Thanksgiving is coming, and I so love cooking for this holiday. I also love hearing about other people’s traditions, what they serve, what they enjoy cooking. In the midst of all this, though, one thing that seems to come up a lot is Turkey Gravy Stress Syndrome! The list of issues seem endless: it turns out lumpy, it tastes like flour, it’s not thick enough, it’s too salty, and so forth. It seems that, because the gravy needs to be made once the turkey comes out of the oven, we feel rushed – and in rushing through the process, we kind of get ourselves (and our gravy) in trouble.
A number of years ago, I read about using a “turkey gravy base” to serve as the start of the gravy. The idea is to create a super-rich, turkey-based stock ahead of time that you can then flavor up with drippings from your own turkey on Thanksgiving Day. It’s so simple, it’s genius! Like nearly everything else I cook, I adapted it over time, and then I sort of took it further – why not freeze the base to make preparations on “the Day” even more streamlined? Today is all about sharing this really simple concept that will put an end to your Turkey Gravy Stress Syndrome – and give you a really delicious gravy to serve with your gorgeous turkey!
Since you’re looking for richness, you want to start out with a bone-dense part of the turkey for optimum flavor – for me this means using turkey necks. Turkey wings are also an option, but I kind of like using something that might otherwise get thrown away – sort of a “waste not, want not” thing. They can be a little hard to find early in the season, but if you give your grocery-store butcher a heads-up that you’re interested, they are usually happy to accommodate within a couple of days. I was actually able to find them this year at Tony’s, a local Chicago-based grocery store, even though the larger stores did not have them readily available.

You may find turkey necks either whole or already cut up for you. If you find them whole, just cut them up into pieces until you have about 2 pounds.


You are also going to also add some flavor with diced onions, celery and carrots. This is your typical mirepoix mixture, with 2 parts onions, 1 part celery and 1 part carrots (here I used 2 cups of onions, 1 cup celery, 1 cup carrots). Mirepoix is often used as the base for soups, stocks and sauces.

Mirepoix is typically cooked on a gentle heat and not caramelized (or “browned”). So when I use the term in the following video, I use it rather loosely, referring to the mixture itself and not the process – because you will see that I caramelize the heck out of it!
The rest of this, while it takes a little bit of time, is not difficult. And let’s face it, if you’re going to spend time on something, wouldn’t you rather do so a few weeks ahead of Thanksgiving Day than on “the Day” itself? Just melt a couple of tablespoons of butter in a large saucepan or stock pot (big enough to hold about 6 cups of liquid, plus all the turkey necks and vegetables). Brown the turkey necks until they are nice and dark, then add your vegetables and brown those, as well. Add your chicken stock (or broth, homemade or purchased), let it simmer/reduce for about 45 minutes, and strain out the solids so you have a nice smooth stock base. That’s it! Now you can freeze your turkey base until Thanksgiving Day and make your gravy while your turkey rests after coming out of the oven. Your turkey will need to rest for about an hour anyway, so you will have plenty of time to finish up your gravy with this flavorful timesaver!
To make your gravy, you’ll blend your turkey pan drippings in a bowl with your thawed turkey base. Then make a quick mixture of melted butter and flour (a “roux”). I use butter that has been blended with the same herbs I use in/on my turkey, so their flavors kick in a little extra zing, but you could just as easily use plain butter. Then just add your drippings/base mixture and let it boil gently (just above a simmer) and reduce to about 4 cups, 10-20 minutes. You’ll want to check if it needs salt and/or pepper, but honestly, I don’t think I have ever added anything to mine – the drippings seem to flavor it up perfectly!
Here’s a video with some more details and hints:
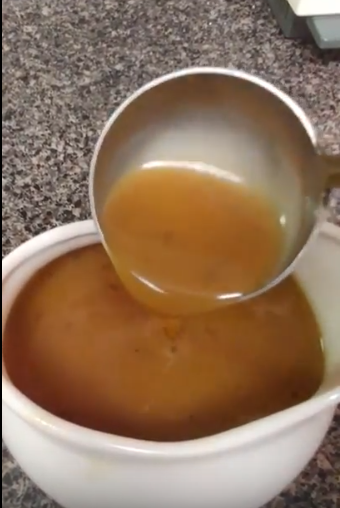
And here’s a short clip of how awesome your finished gravy will look – after only about 30 minutes of effort, you will have rich, lump-less, non-floury, perfectly seasoned gravy, stress-free!
Happy Thanksgiving, everyone!
For Thanksgiving essentials that can help every cook conquer their fears, check out The Chopping Block’s Thanksgiving Headquarters series of classes and Thanksgiving Workshop on November 20 during Thanksgiving Week.
Want to skip making your own holiday pies this year? Nothing will be more special than an awesome Apple or perfect Pumpkin Pie, made with love at The Chopping Block!
Order online by 2pm Tuesday, November 21 for pickup on Wednesday, November 22. If you need them a day earlier, order by 7pm on Monday, November 20 for pickup on Tuesday. These pies travel well so they are the perfect choice if you'll be on the road for Thanksgiving.