

One of the things I love most about cooking is serving other people my food. I love to see people enjoying what I have created and hopefully inspire them to make something of their own. It brings me great joy to cook for other people. I do not do it for the compliments, but I believe it is my love language. Truly, the only way I really know how to express myself is through food.
In traditional French fine dining restaurant culture, you are served an amuse bouche, which is a small bite packed with flavor served before the meal as a gift from the kitchen for your patronage. It literally translates to “mouth amuser” and it is meant to awaken your palate to enjoy the courses ahead. These complimentary appetizers were some of my favorite creations to make in the restaurant world. Appetizers are usually the beginning of a meal, but I enjoy making a meal out of appetizers.

Eating is one of the most primal and basic instincts a person has. To me, it is a full body and sensory experience. Not only are you seeing the beautiful creation with your eyes, but smelling the aromas, tasting the flavors, hearing the crunch as your fork breaks through a crust, but also touch plays an important role. Not only are you touching the food to your lips but eating with your hands instead of utensils is proven to actually taste better and promotes better gut health. And I cannot agree more. In many cultures, eating with your hands is customary. For example, in India there is a belief that eating with your hands not only feeds the body but the mind and spirit as well. In this day and age, this may not seem very sanitary but in the comfort and safety of your own home: I say: do away with the forks and eat with your hands! At The Chopping Block, we have a saying that the two best utensils you have in the kitchen are your hands, so why not use them for eating as well as cooking?
I think this is why I love appetizers and grazing boards so much! First of all, I always appreciate a nice assortment of food instead of just one main appetizer. I like giving people options because you never know what people are going to like. Most importantly though, I like a variety of bite-sized food that you can enjoy picking at with your fingers. That's why I want to give you an assortment of recipes to try out the next time you feel like eating with your hands or entertaining guests. Whether it is a special occasion or just a random weekday, these recipes will surely delight all of your senses.
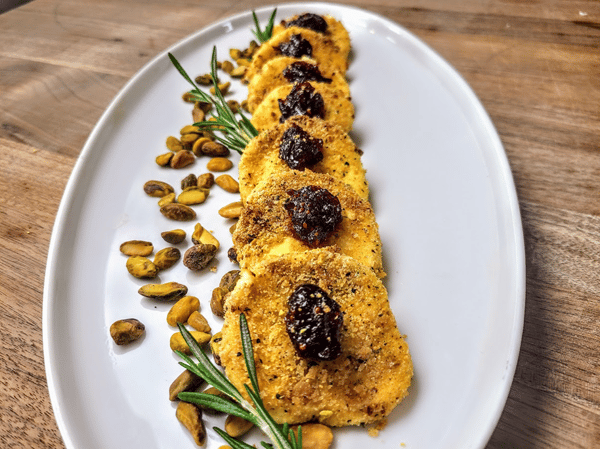
Crispy Baked Goat Cheese
Yield: 10 pieces
Prep Time: 15 minutes, not including freezing time
Bake Time: 10-15 minutes
10 oz. goat cheese log
2 eggs, lightly beaten
1/2 cup Flour
1 cup breadcrumbs of choice (I used Panko)
1 cup nuts of choice( I used pistachios)
2 Tablespoons herbs, fresh or dried (I used fresh rosemary)
Jam or preserves for topping (I used cranberry jam but other favorites are fig, cherry, apricot, and raspberry.)
1. Preheat oven to 450° and line a sheet pan with parchment, foil, or Silpat and heavily coat with pan spray.
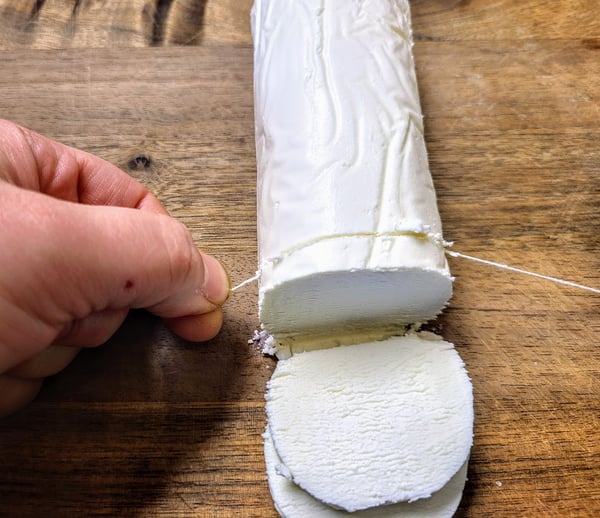
2. Cut the goat cheese log into rounds about 1/4-inch thick. Pro tip: use twine or floss to get a cleaner slice.
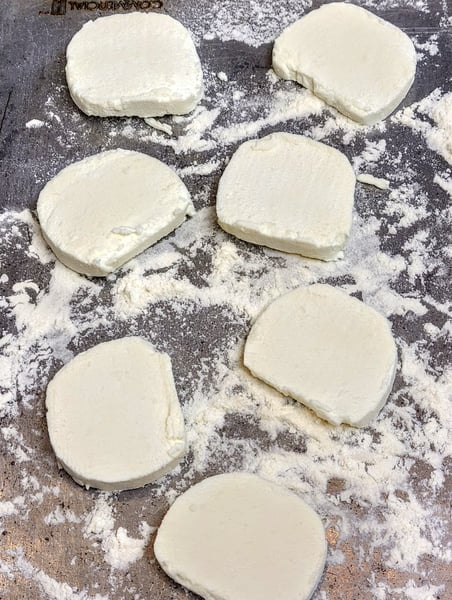
3. Toss the goat cheese in the flour to lightly coat and freeze flat for at least 30 minutes, but this can be done overnight.
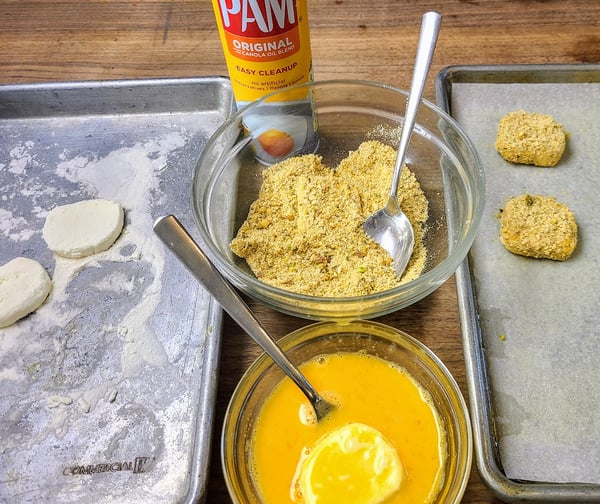
4. Process the nuts and Panko together in a food processor or coffee grinder or smash them together in a Ziploc bag until they are less coarse.
5. Chop herbs if using fresh and add them to the nut and breadcrumb mixture and season with salt and pepper.
6. Once the goat cheese is solid, dip the pieces into the eggs, and then into the breadcrumb mixture.
7. Then dip again into the eggs and once more into the breadcrumbs to achieve a double crust.
8. Set the crusted goat cheese onto the greased sheet tray.
9. Repeat breading with all of the goat cheese slices.
10. Spray the tops of the breaded cheese with more pan spray (this will help with the browning process).
11. Bake in the oven for about 10-15 minutes. The crust should be golden brown and don’t worry if some of the cheese starts melting out.
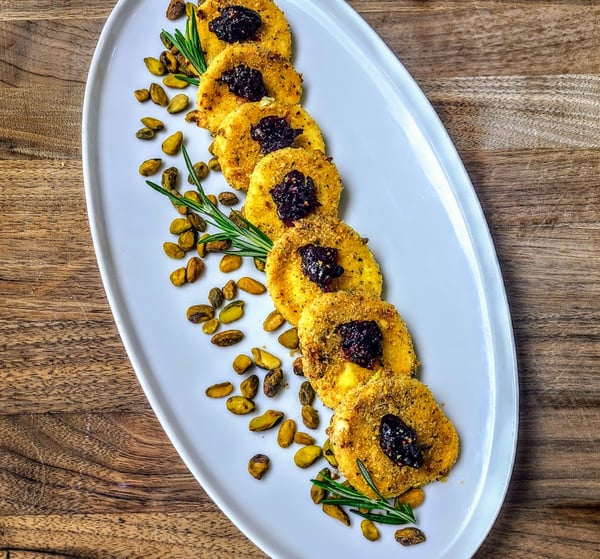
These goat cheese bites are totally customizable to whatever you may have in your own kitchen. They can be rolled into balls instead of serving slices. They can be topped with any kind of jam or preserves. And you may use any nuts for the breading or even omit them. Not only are these crispy goat cheese slices delicious on their own, but they make an excellent complement to a salad as “croutons” or even a pasta dish.
This next dish is a personal favorite: I serve these Gyro Phyllo cups for Super Bowl parties or as a little nosh with a Mediterranean meal on a weeknight.

Gyro Meatballs in Phyllo Cups
Yield: 12 pieces
Prep Time: 30 minutes
Bake Time: 10-15 minutes
For the Meatballs:
1 pound ground meat of choice (lamb, sausage, beef, pork, etc.) (I used Italian sausage)
1/2 onion, grated and squeezed dry
1/4 cup breadcrumbs
2 Tablespoons ricotta cheese
2 teaspoons garlic powder or minced garlic
2 teaspoons dried oregano
1 teaspoon Chili flakes
Salt and pepper
For the Tzatziki Sauce:
1/2 cup yogurt
1/2 lemon, juiced
1/4 cup cucumber, grated and squeezed dry
1 Tablespoon mint, chiffonade
Pinch of cayenne pepper
Salt and pepper
Phyllo dough, thawed
Melted butter
Tomato slices for garnish
1. Preheat oven to 425°.
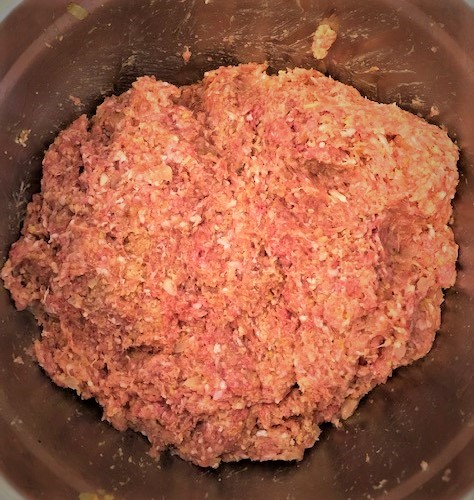
2. Mix the meatball ingredients all together in a bowl. Make sure to cook off a small amount to test for seasonings and adjust before shaping.
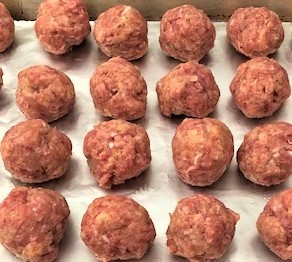
3. Portion the meatballs into golf ball size and roll into a tight ball.
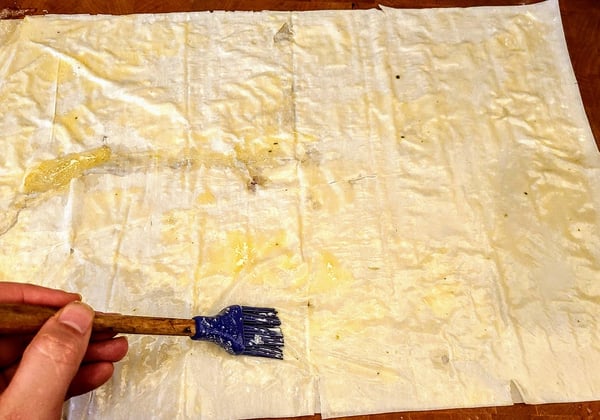
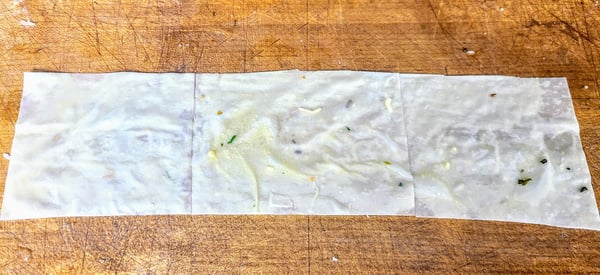
4. Lay a sheet of phyllo dough down and brush with melted butter, then layer another sheet on top.
5. Cut the sheets into uniform squares. One full sheet should yield about 12 squares. (Don’t worry if layers rip or are not perfect edges, you can piece more phyllo on top of holes if necessary.)
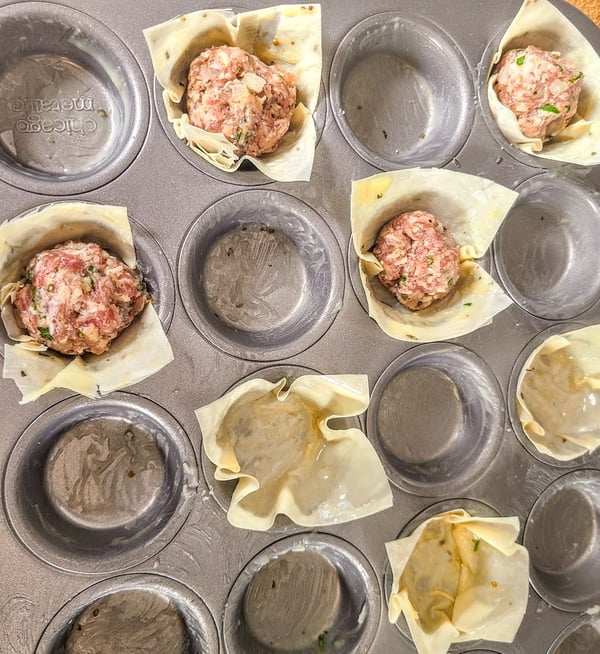
6. Spray a muffin tin with non-stick spray and press the phyllo squares into the tins to form cups.
7. Place the raw formed meatballs into the phyllo cup.
8. Bake the cups for about 12-15 minutes until the phyllo is golden brown and crispy, the meatballs should read 155° on a meat thermometer.
9. While baking, prepare the tzatziki sauce by mixing all of the sauce ingredients together in a bowl and adjust seasonings.
10. Slice tomatoes if using to garnish the tops of the gyro cups.
11. Once done baking, top each cup with a spoonful of tzatziki sauce and a tomato slice.
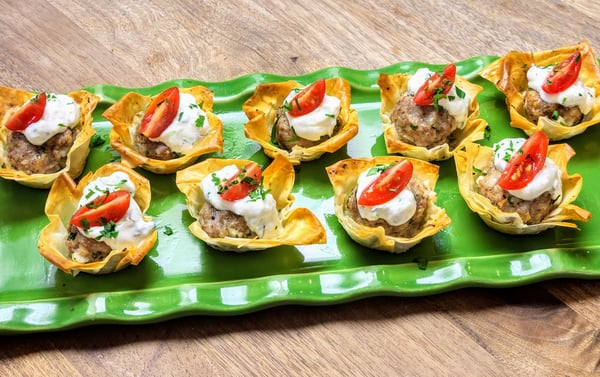
Traditionally Gyros are made with lamb and beef or other ground meats. These little meatballs can be made with whatever ground meat you prefer, even chicken or turkey. By adding in the spices, it instantly transforms into that distinct Gyro flavor we all know and love. Quite honestly, anything topped with tzatziki sauce is delicious. I always make sure I buy a big tub of yogurt so I always can keep this sauce in my fridge at all times. It makes for a great dip or even a condiment on a sandwich. If you don't have phyllo dough you can always use puff pastry or even white bread pounded thin and pressed into the muffin tin to hold the meatballs. They also sell pre-made phyllo cups in the freezer section of the grocery store! These meatballs could also stand alone and do not need a vessel to contain them if you wanted to keep this gluten free. You may also omit the bread crumbs and they would still be fantastic.
The next recipe is perfect for Christmas gatherings but can also be made into other shapes for whatever occasion you may be celebrating.
Christmas Tree Pull-Apart Bread
Scroll down for a printable version of this recipe
Yield: 32 pieces
Prep Time: 1 hour (for dough and assembly)
Proof Time: 1 hour
Bake Time: 25-35 minutes
For the dough:
1 Tablespoon active dry yeast, roughly 2 packets
1 cup lukewarm water (110º to 120º)
1/2 teaspoon sugar
1 Tablespoon olive oil
2 3/4 cups hard-wheat (“00”) flour or all-purpose flour
1 teaspoon TCB fine sea salt
For the fillings: (fillings are up to your own preferences and are optional)
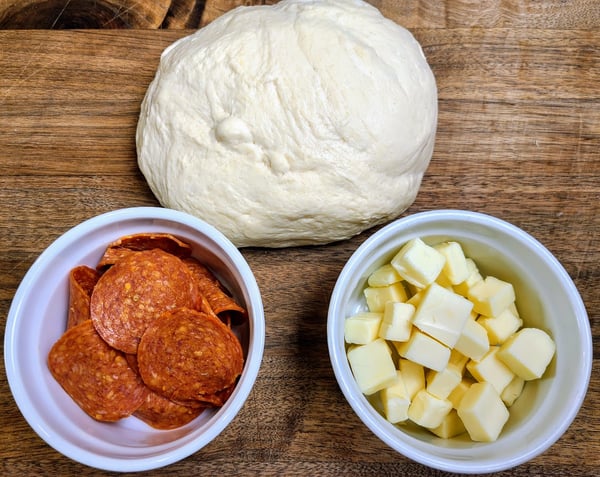
32 small cubes of meltable cheese such as mozzarella, fontina, cheddar, gruyere (I used fontina)
32 pieces of pepperoni
For the toppings: (again, these are optional)
Melted butter or olive oil for brushing over the top
Grated Parmesan cheese
Fresh parsley
Cherry tomatoes
For the dough:
Check out this video on how to make pizza dough by our Owner/Chef Shelley Young.
1. Sprinkle the yeast on top of the water in a large mixing bowl and add the sugar. Stir gently until dissolved.
2. Allow to proof until slightly foamy and aromatic to ensure yeast is alive, about 5 minutes.
3. Add oil, 1/2 of the flour and salt, and mix until incorporated.
4. Work in the remaining flour. Turn out mixture, which may be slightly sticky, onto a floured surface.
5. Knead several turns by hand until smooth and elastic, about 8-10 minutes. Adjust consistency, if necessary, with a small amount of flour. Dough should be barely moist and no longer sticky.
6. Shape dough into a ball, place it in a bowl and cover with plastic wrap.
7. Let the dough rise at room temperature until doubled, 60 to 75 minutes, or in the refrigerator overnight. (This can also be made in a stand mixer.)
For the assembly:
1. Preheat oven to 400°.
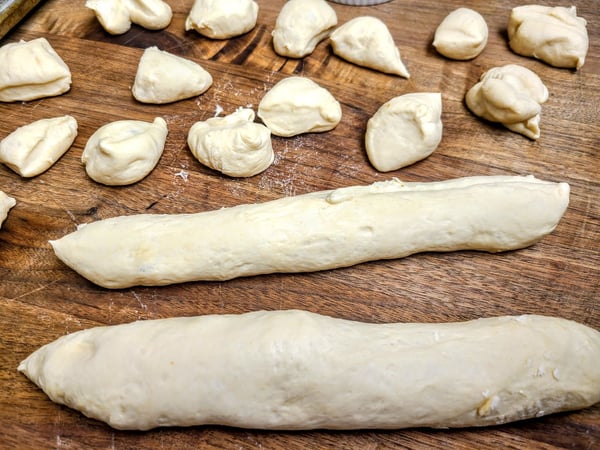
2. Take the dough out of the bowl and portion into about 1oz pieces (to make the tree you will need 32 pieces total).
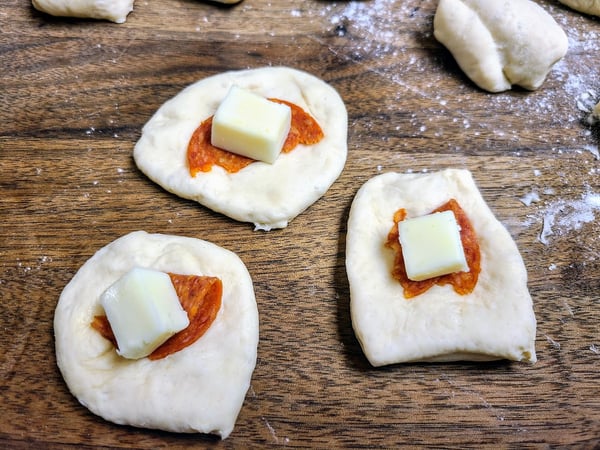
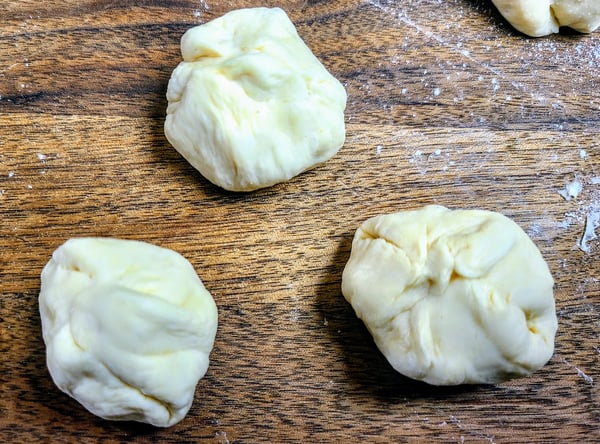
3. Place a piece of cheese and pepperoni in the center of each piece of dough, seal the dough around the filling, and roll into a ball.
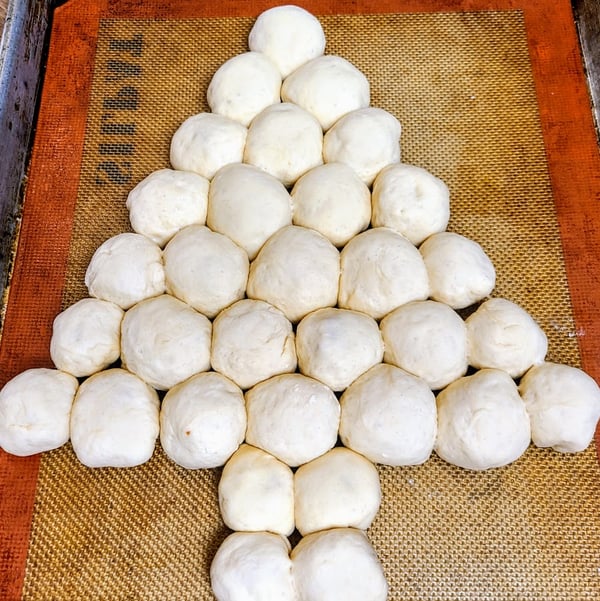
4. Once rolled, begin placing the dough balls onto a sheet tray lined with parchment or a Silpat into the shape of the tree. Start with the top and work your way down to the bottom.
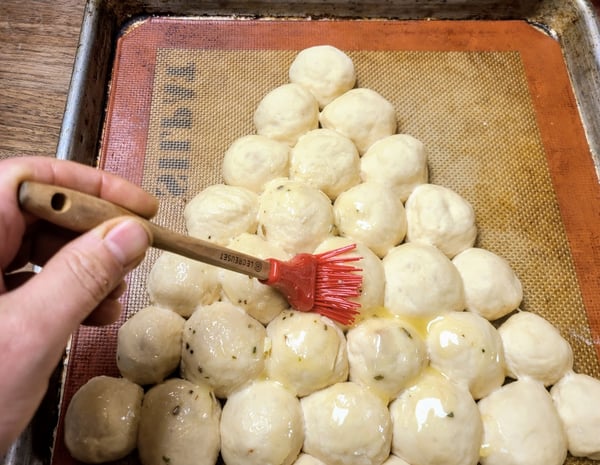
5. When the tree is finished, brush a light amount of melted butter or olive oil over the top of the dough.
6. Bake in the oven until all of the dough sections are golden brown, about 25-30 minutes.
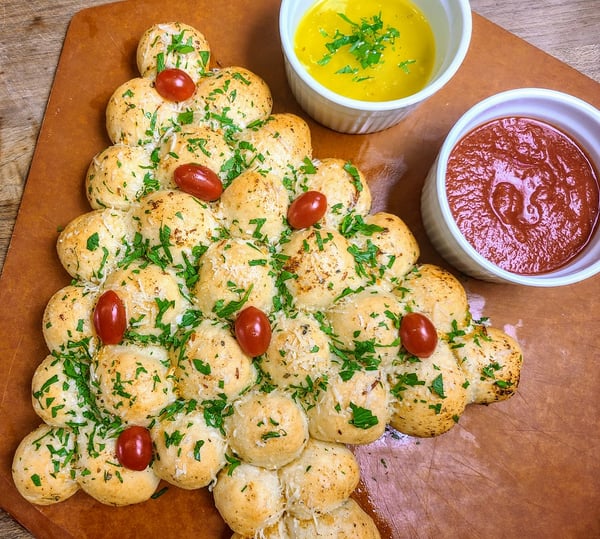
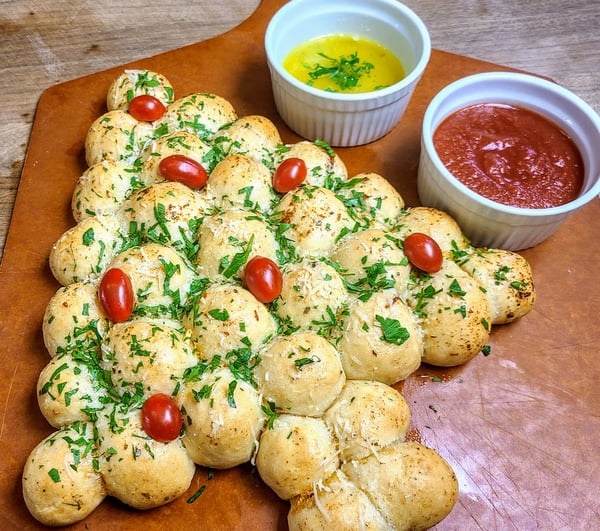
7. When the pull apart bread comes out of the oven, brush more butter or oil on top and sprinkle on some grated Parmesan, chopped parsley and garnish with tomatoes.
8. Serve with extra melted butter and your favorite tomato sauce for dipping.
The main part of this recipe really is the dough; it is a basic pizza dough that can be used for just about anything. The fillings can be whatever you prefer. You can also bump up the flavor by adding some dried spices or herbs to your butter when brushing the tops. I have made this pull apart bread into a wreath or even a pumpkin for Halloween. I have piled all of the dough in a Bundt pan or even a pie dish. If you are short on time you can always grab pre-made dough or biscuit dough from the supermarket and still achieve a great pull apart bread.
No appetizer table would be complete with out some festive libations! We have a slew of wine and spirits available for purchase and available for curbside pickup at Lincoln Square. If you are interested in learning more about cooking in general, we have a wide variety of virtual cooking classes. There is actually a meatball and marinara class coming up in January as well as a pizza and calzone class coming up in February so make sure to check our virtual class calendar often!
And if you want more fun ideas to make this week, join us for:
- Virtual New Year's Eve Retro Appetizer Party TONIGHT at 6pm CST
- Virtual Noon Year's Eve Party Food Thursday, December 12 at 11am CST
Festive appetizers are our challenge to our private Facebook group members this week. Join, make some and share your creations with other home cooks!


Christmas Tree Pull-Apart Bread
Ingredients
- 1 Tablespoon active dry yeast, roughly 2 packets
- 1 cup lukewarm water (110º to 120º)
- 1/2 teaspoon sugar
- 1 Tablespoon olive oil
- 2 3/4 cups hard-wheat (“00”) flour or all-purpose flour
- 1 teaspoon TCB fine sea salt
- 32 small cubes of meltable cheese such as mozzarella, fontina, cheddar, gruyere (I used fontina)
- 32 pieces of pepperoni
- Melted butter or olive oil for brushing over the top
- Grated Parmesan cheese
- Fresh parsley
- Cherry tomatoes
Instructions
- Sprinkle the yeast on top of the water in a large mixing bowl and add the sugar. Stir gently until dissolved.
- Allow to proof until slightly foamy and aromatic to ensure yeast is alive, about 5 minutes.
- Add oil, 1/2 of the flour and salt, and mix until incorporated.
- Work in the remaining flour. Turn out mixture, which may be slightly sticky, onto a floured surface.
- Knead several turns by hand until smooth and elastic, about 8-10 minutes. Adjust consistency, if necessary, with a small amount of flour. Dough should be barely moist and no longer sticky.
- Shape dough into a ball, place it in a bowl and cover with plastic wrap.
- Let the dough rise at room temperature until doubled, 60 to 75 minutes, or in the refrigerator overnight. (This can also be made in a stand mixer.)
- Preheat oven to 400°.
- Take the dough out of the bowl and portion into about 1oz pieces (to make the tree you will need 32 pieces total).
- Place a piece of cheese and pepperoni in the center of each piece of dough, seal the dough around the filling, and roll into a ball.
- Once rolled, begin placing the dough balls onto a sheet tray lined with parchment or a Silpat into the shape of the tree. Start with the top and work your way down to the bottom.
- When the tree is finished, brush a light amount of melted butter or olive oil over the top of the dough.
- Bake in the oven until all of the dough sections are golden brown, about 25-30 minutes.
- When the pull apart bread comes out of the oven, brush more butter or oil on top and sprinkle on some grated Parmesan, chopped parsley and garnish with tomatoes.
- Serve with extra melted butter and your favorite tomato sauce for dipping.