
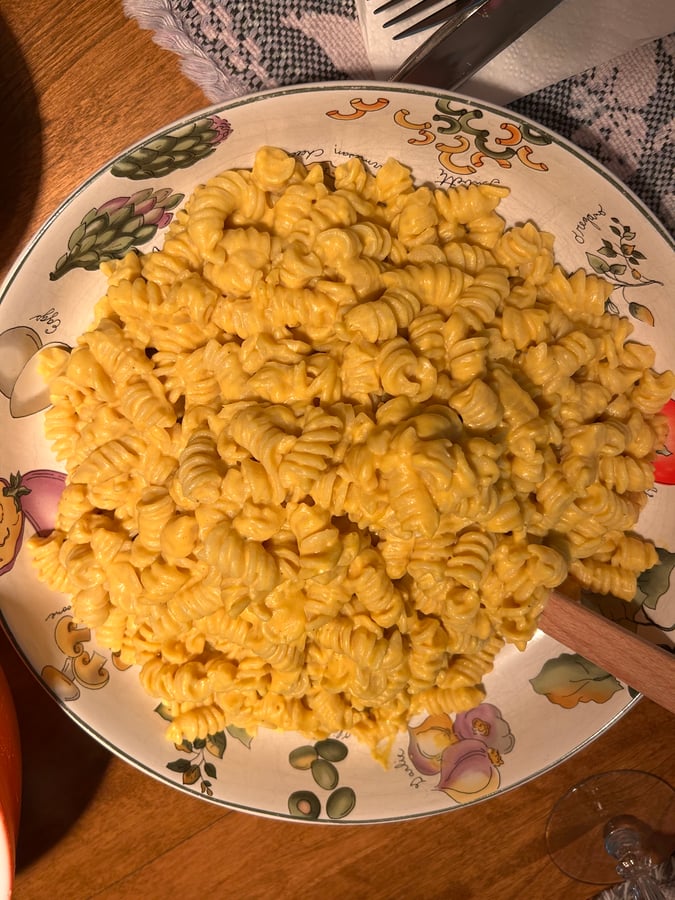
A few days ago, I cooked dinner for my grandparents, and we went all in on fall. Butternut squash mac and cheese, a fall harvest salad, and apple crisp for dessert. They absolutely loved it, which is always the best part of cooking for people you love.
Unfortunately, I did not take any pictures of the apple crisp. You will just have to take my word for that one! But the pasta and salad deserve some attention of their own, especially if you are looking for something seasonal to bring to Thanksgiving or add to your dinner rotation.
One is creamy and comforting, the other crunchy and tangy, and together they make a delicious dinner. Below, I’ll share what makes the sauce work, my favorite baked variation, and why curly kale deserves another chance if you think you do not like it.
A Few Tips Before You Start
- Roast the squash and sweet potato at 400°F on separate trays, checking each for doneness.
- Soak the cashews and blend thoroughly for a smooth sauce.
- Save some pasta water before draining, and massage the kale before adding the salad toppings.
Creamy Part Without the Cream
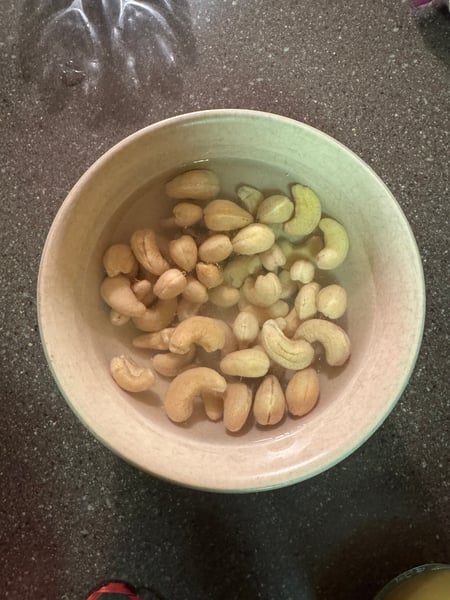
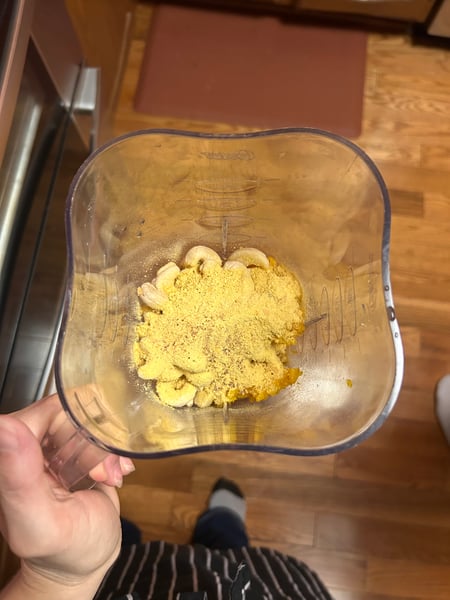
The base of this mac and cheese is roasted butternut squash, onion, and cashews. The squash brings sweetness and that beautiful orange color, while the cashews give the sauce its creamy texture. Soaking softens the cashews, but you still need a powerful blender and enough blending time to get everything completely smooth.
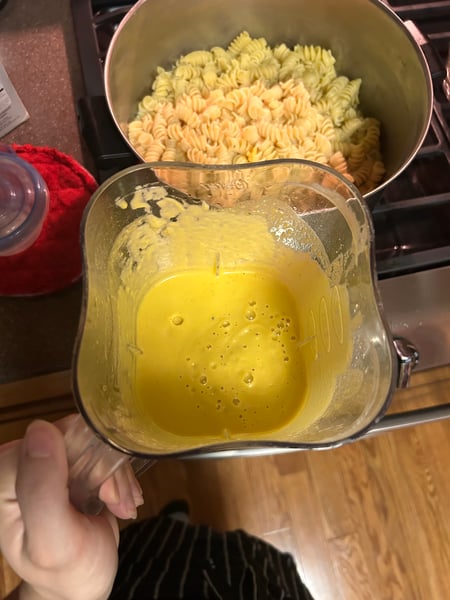
Nobody wants a grainy mac and cheese! A Vitamix works great. I wouldn’t recommend a small blender, or a blender where the blades come down from the top. The sauce won’t get as creamy.
And, of course, nutritional yeast makes another appearance, which I love. Here, it adds savory flavor to balance the sweetness of the squash. Lemon juice adds brightness, smoked paprika adds a little smokiness, and a pinch of nutmeg gives it that cozy fall flavor.
Start with the smaller amount of water when blending, then adjust. Once you toss the sauce with the pasta, a little reserved pasta water helps loosen it so it coats everything. You want creamy and saucy, rather than a thick paste sitting on top of your noodles.
How do you Prep Butternut Squash and Sweet Potato?
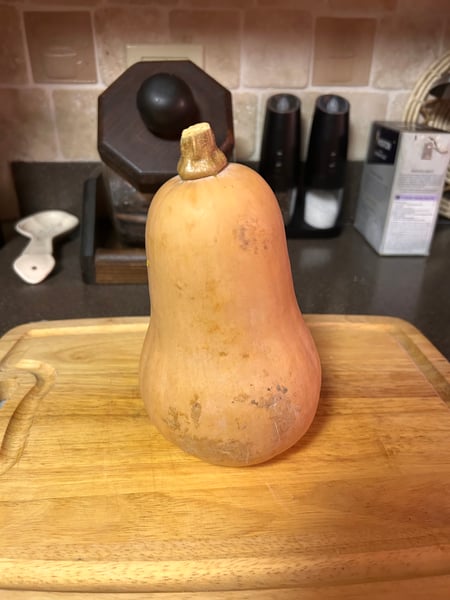
For this recipe, I prefer roasting the squash whole. Or, in half, technically.
Cut the squash lengthwise down the center. I like to remove the tough stem at the top to facilitate this process. Scoop out the seeds with a large spoon, then toss the squash with oil, salt, pepper, and seasonings of choice. Paprika, nutmeg, and sage are great pairings with squash!
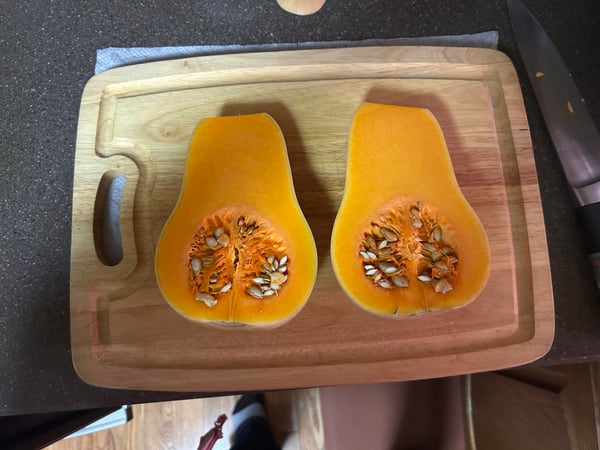
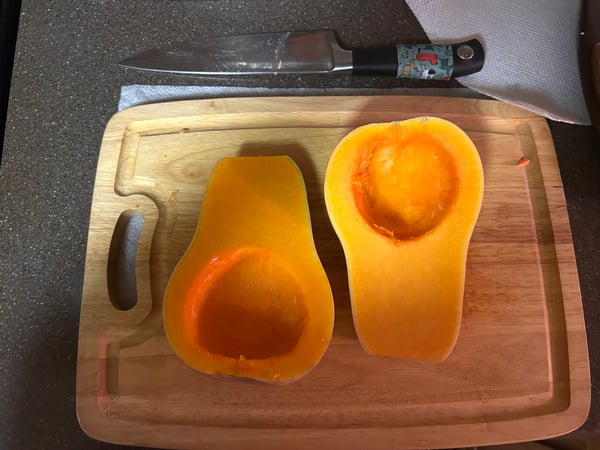
Place the squash cut side down on a baking sheet, and roast at 400F until fork tender, about 30-35 minutes. Personally, when I am cooking squash like this, the whole-roast method, I prefer to flip the squash so it is cut-side up during the last 5-10 minutes of cooking. You’ll notice that a lot of moisture gets trapped in the squash when you roast it cut side down, and I prefer to cook off that moisture so it isn’t as soggy, and gets a bit crisper. I do this with almost all other squashes as well - spaghetti squash in particular.
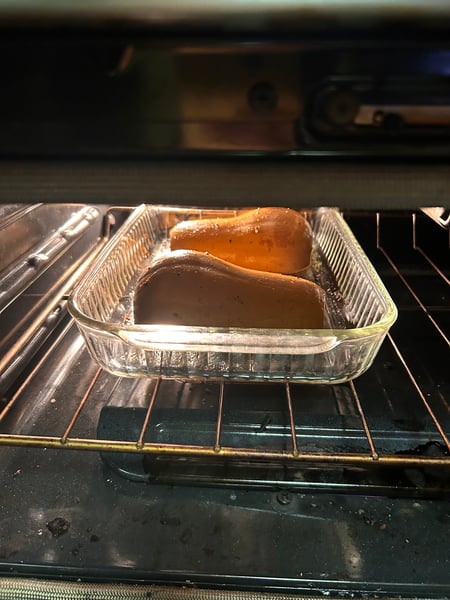
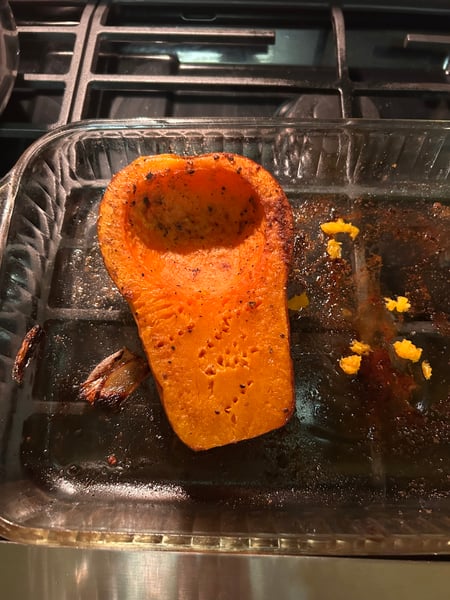
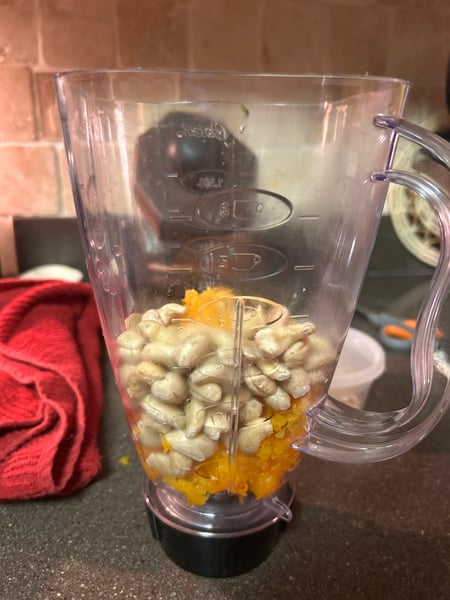
Once your squash is cooked, you can scoop out the flesh with a spoon, and add it to your blender along with all the other sauce ingredients. Blend on high until completely smooth and creamy!
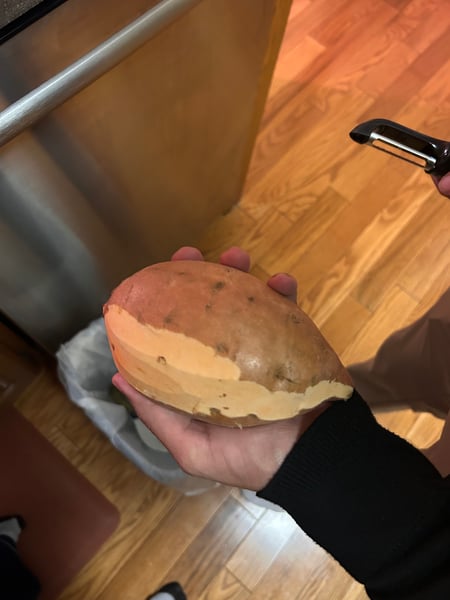
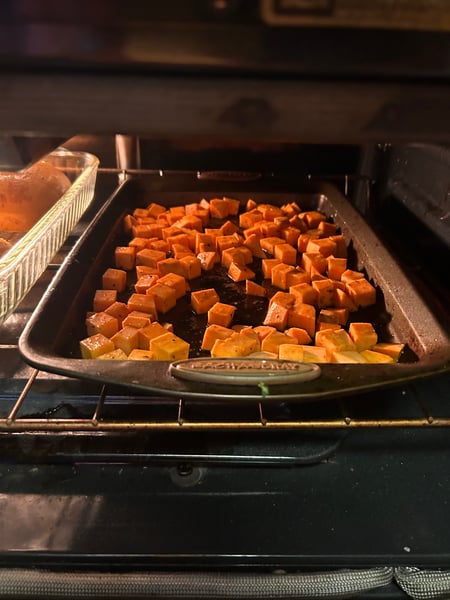
For the sweet potato, peel and dice it up into small, bite sized pieces. I prefer a medium dice for this recipe, which is about 1/2 inch on all sides. Toss the sweet potato with oil, salt, pepper, and seasonings on a sheet tray, and roast in the oven for about 20-25 minutes at 400F. It should be fork tender and slightly browned!
Does the Pasta Shape Really Matter?
Normally, I would use elbow macaroni or cavatappi. My grandparents could not find either, so they bought rotini instead. And honestly? It turned out just as delicious.
The sauce got trapped in all those little spirals, so every bite had plenty of butternut squash goodness. It is a good reminder that you do not always need the exact pasta shape listed in a recipe. For this dish, look for a short shape with curves, ridges, or little spaces that hold sauce.
Don’t forget to salt your pasta water when cooking! Seasoning at every step helps to maximize flavor in the final dish.
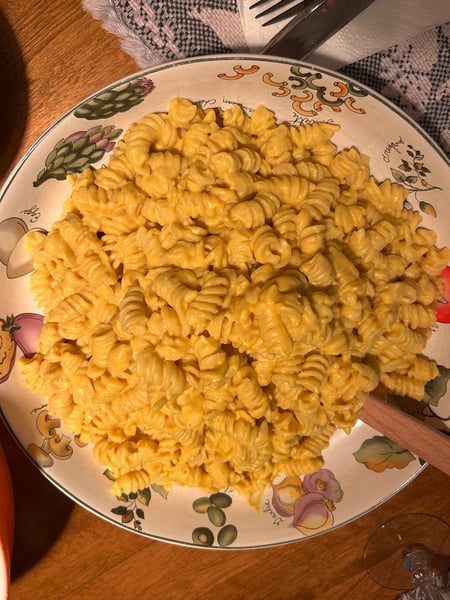
Butternut Squash Mac & Cheese
Yield: ~5-6 servings
Prep time: 15 minutes
Cook time: 45 minutes
Total time: 1 hour
For the squash:
1/2 butternut squash
1 small onion, peeled and cut in half
1 teaspoon kosher salt
1/2 teaspoon ground black pepper
1/2 teaspoon smoked paprika
2 Tablespoons olive oil
For the sauce:
1 cup cashews, soaked overnight or in hot water for 20 minutes
1 1/2 - 2 cups water (adjust for consistency)
1/2 cup nutritional yeast
1 teaspoon garlic powder
1 lemon, juiced
Kosher salt, to taste
Ground black pepper, to taste
Pinch of ground nutmeg
For the pasta:
1 lb pasta of your choice (I used rotini)
1/4 - 1/2 cup reserved pasta water
-
Preheat your oven to 400F and cook your pasta according to package instructions. Set aside.
- For the butternut squash, cut it in half lengthwise. Use a spoon to scrape out the seeds. For this recipe, we’ll only need ½ of a medium squash.
- Place the prepped squash and onion on a baking sheet. Toss with oil, salt, pepper, and paprika.
- Bake the squash and onion, cut side down, at 400F for about 30-35 minutes, or until completely fork tender. In the last 5-10 minutes of cooking, I like flipping the squash and onion cut side up to evaporate excess trapped steam.
- Add all the sauce ingredients to the base of a high-power blender, such as a Vitamix. A weak blender won’t work well for this recipe - the cashews have to be blended until completely smooth!
- Scoop out the flesh of the butternut squash and place in the blender along with the onion and the rest of the sauce ingredients. Blend on high until completely smooth and creamy. Start with about 1 ½ cup of water, and adjust to your desired consistency.
- Toss the sauce with the cooked pasta and pasta water.
-
Serve and enjoy.
Bring It to the Thanksgiving Table
This mac and cheese also makes a great Thanksgiving side dish. It is a side I make all the time, and sometimes I turn it into a baked version with seasoned breadcrumbs on top. It is always a hit!
For that version, I slightly undercook the pasta, add a little extra squash and liquid to the sauce, and transfer the sauced pasta to a baking dish. Then I top it with seasoned breadcrumbs and bake until heated through and golden on top. The creamy pasta underneath that crisp topping is so good.
Undercooking matters because the pasta continues cooking in the oven. Keep the sauce a little looser, too, since the noodles absorb liquid as they bake. Tossing the breadcrumbs with a little olive oil helps them brown, and gives you a topping that is crisp rather than dry and dusty.
A Fall Salad Worth Getting Excited About
Alongside the pasta, I made a curly kale salad with roasted sweet potato, thinly sliced apple, shallot, dried cranberries, and toasted pepitas. The maple-Dijon vinaigrette ties everything together without making it overly sweet. With a creamy main dish, that tangy dressing and crisp apple are especially welcome.
Texture makes a salad interesting. Here, you have tender roasted sweet potato, crunchy pepitas, chewy cranberries, and crisp, fresh apple. Toasting the pepitas adds another layer of flavor, so it is a small step worth taking. To toast the pepitas, I placed them on a small sheet tray and baked them in the oven at 350F for about 5-10 minutes, or until they are lightly browned and aromatic.
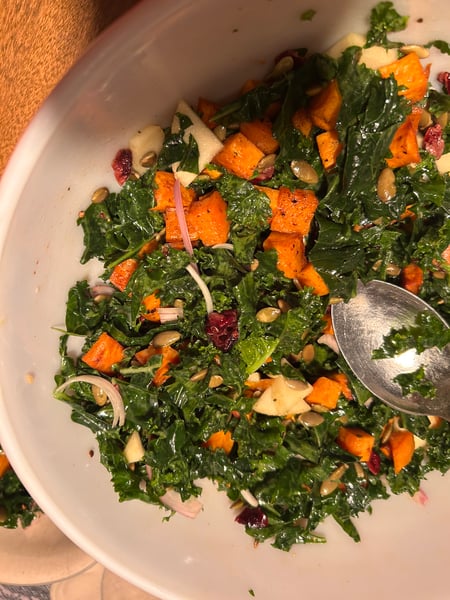
Fall Harvest Salad
Yield: ~4-6 servings
For the sweet potato:
1 large sweet potato, peeled and cut into medium dice
1 Tablespoon olive oil
1/2 teaspoon smoked paprika
Kosher salt, to taste
Ground black pepper, to taste
For the vinaigrette:
2 Tablespoons dijon mustard
1 Tablespoons maple syrup
1/4 cup apple cider vinegar
1 clove garlic, minced or grated
Kosher salt, to taste
Ground black pepper, to taste
1/3 - 1/2 cup extra virgin olive oil
For the salad:
1 small bunch curly kale, washed, stems removed and roughly chopped
1 small shallot, thinly sliced
1 small apple, thinly sliced
1/3 cup dried cranberries
1/2 cup pepitas, toasted
-
On a baking sheet, toss the sweet potato with oil, paprika, salt, and pepper. Roast for 20-25 minutes, until lightly browned and fork tender.
-
To make the vinaigrette, whisk the dijon mustard, maple syrup, apple cider vinegar, minced garlic, salt, and pepper in a small bowl. Slowly drizzle in the olive oil while whisking to create a temporary emulsion. Set aside.
-
Place the kale in a bowl. Add about half of the vinaigrette, and massage the kale well with your hands for about 30 seconds - 1 minute. Really work the vinaigrette into the kale - massaging helps to transform the leaves from tough and bitter to something tender, bright green, and easily digestable.
-
Add in the rest of the salad ingredients, along with the roasted sweet potato. Add more vinaigrette as desired. Toss well.
-
Serve, and enjoy.
-
This salad will keep in the fridge for a few days. Unlike tender greens such as spinach, arugula, or lettuce that go soggy after being dressed, curly kale has a tougher, more fibrous exterior that holds dressings quite well. It can actually get more flavorful if the dressing sits for a day or two, allowing the leaves to fully absorb or “marinate” the flavor of the dressing. It also aids further in tenderizing/removing bitter flavor from the leaves.
Think You Do Not Like Curly Kale?
Curly kale gets overlooked, but it is one of my favorite salad greens. I think some people decide they dislike it after eating a bowl of tough, barely dressed leaves. And to be fair, that is not exactly an exciting salad.
The step they may be missing? Massaging it!
Start by removing the tough stems, washing and drying the leaves, and chopping them into manageable pieces. Add some dressing and use clean hands to gently squeeze and rub the leaves together. Don’t be shy with this!
After about a minute, check the texture; keep going if the leaves still feel stiff. They should soften, darken slightly, and become easier to chew. You can always taste to check the doneness, too.
Massaging kale physically softens the tough leaves and works the seasoning throughout. If a tough mouthful has put you off kale, this is the step to try before giving up on it.
Curly Kale Makes Meal Prep Easy
Another reason I love curly kale is that it is a wonderful green to meal-prep in advance. Unlike delicate greens that quickly wilt once dressed, massaged and dressed curly kale holds up well in the refrigerator. Store it in a covered container and use it over the next few days as a side vegetable, a salad base, or tucked into a sandwich or wrap. Add apple and toasted pepitas closer to serving to keep their crunch.
You do not even need to make a separate dressing. A little olive oil, lemon juice or vinegar, salt, and pepper will do! Massage everything into the leaves, taste, and adjust the seasoning.
Keep the Fall Cooking Going
I hope you enjoy these recipes, and the tips above. If you cannot get enough butternut squash, join our Lunch & Learn Demonstration: Butternut Squash Risotto on Friday, November 27. The class covers roasting squash, working with leafy greens, and balancing flavors, so it connects beautifully to this dinner.
Our Hands-On Fall Farmhouse Dinner on Friday, December 11 offers more seasonal inspiration with apples and roasted root vegetables. Browse our class calendar to practice the techniques that help you make the most of these ingredients. In the meantime, the recipes below will get you started. Hopefully they are as big a hit at your table as they were at my grandparents!
