I need to make a confession… for many years I felt extremely intimidated to bake bread. The kneading, the waiting, the pans it involved, it just felt too complicated. Even after I studied at a French culinary school, where we had a specialty French bread program, I avoided bread making at all costs. There was no way I was going to embarrass myself, especially as a chef and turn out a hockey puck masquerading as a roll! Well, all that changed with The Chopping Block, first when I took an Artisanal Breads Boot Camp, and later when I started working as a chef instructor and began to use the crème de la crème of cookware – Le Creuset enameled cast iron.
If you don’t already know about this magical cooking vessel, I would love to introduce you. As I mentioned, these are enameled cast iron pots and pans, and come in many shapes, sizes and colors. What makes them so special is their versatility. They have all of the pros of cast iron – which means they heat to a very high temperature without damage, they retain heat for much longer than regular pots and pans, and are almost indestructible, and none of the cons, the most important of which is that you shouldn’t cook acidic foods (think tomato sauce) in cast iron because the acid reacts with the iron. Since the iron is enameled, you have a non-reactive surface, and therefore you can cook almost anything. They also go from stove - to oven - to table so you can cook and serve in the same pot, keeping the food warm all through second helpings, and have only one pot to clean! I will admit they weigh a bit more than your typical pot, and are an investment to purchase, but so worth it because just one Le Creuset pot can replace a multitude of other pots and pans, and it will last for decades.
Most often, Le Creuset pots are used to make soups, stews and braises – however I have been known to use the braiser style pot to bake a cobbler or cinnamon rolls, make a quick and easy paella, or even sear a juicy rib eye. But it wasn’t until I decided to conquer my fear of bread making and did a Google search that I found out that Le Creuset Dutch ovens are a fantastic option if you want to have bakery quality bread at home.
In my search I also discovered a bread-making recipe from the Le Creuset website itself. I have to admit I was skeptical at first, but I thought I would give it a try. I was so shocked when it actually turned out; I thought it must be a fluke. So I made the recipe again and again, and each time, the bread came out golden brown and delicious. The only changes I made to the original recipe were to add a specific measurement of salt (1/2 teaspoon per cup of flour) and a 1/2 teaspoon of honey or sugar to the yeast and water mixture in order to jumpstart the yeast.
Dutch Oven Bread
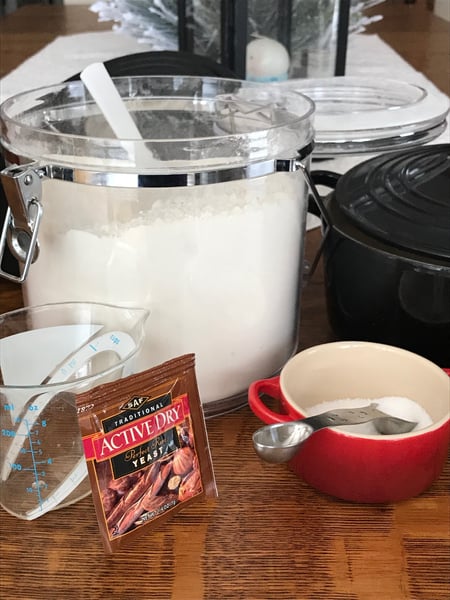
4 cups all-purpose flour, plus extra for kneading and shaping of dough
2 teaspoons fine sea salt (kosher works well too)
1 teaspoon dry active yeast
1.5 cups of water (105 -115 degrees F)
1/2 teaspoon honey or sugar (optional)
Grapeseed oil, olive oil, coarse salt (i.e. fleur de sel) for sprinkling on top before baking
5.5 quart Le Creuset oval or round Dutch oven
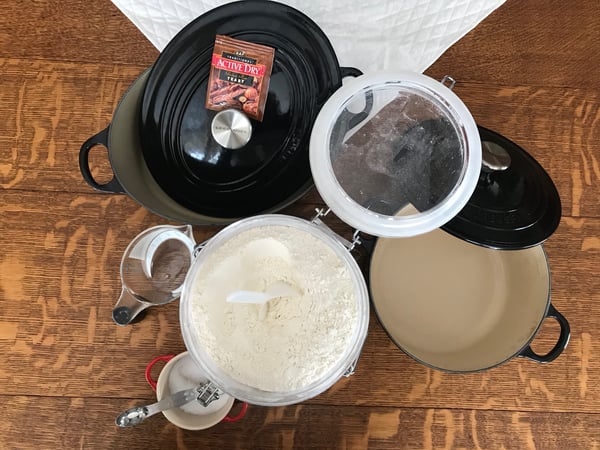
Additional equipment:
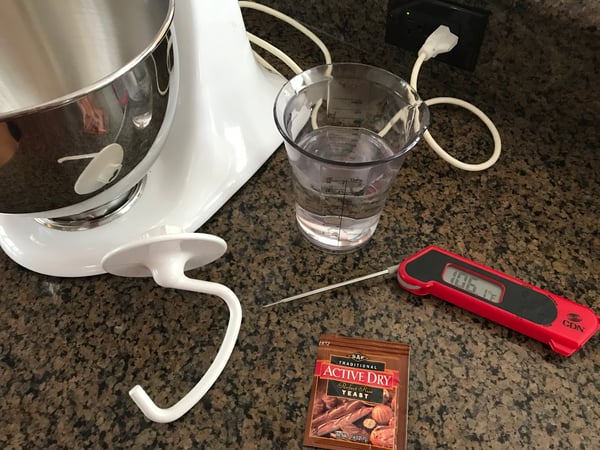
- Instant Read Thermometer
- Stand mixer with a dough hook attachment*
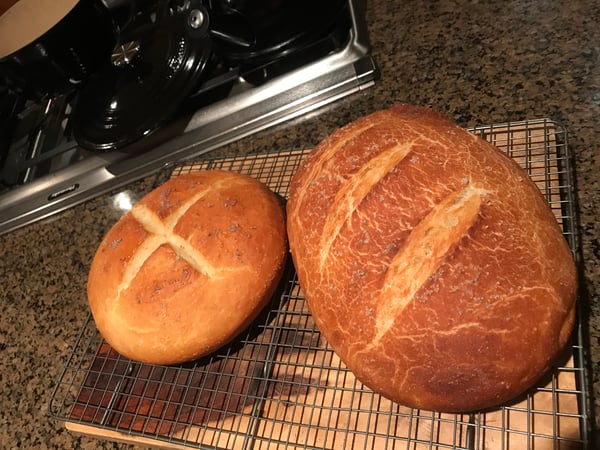
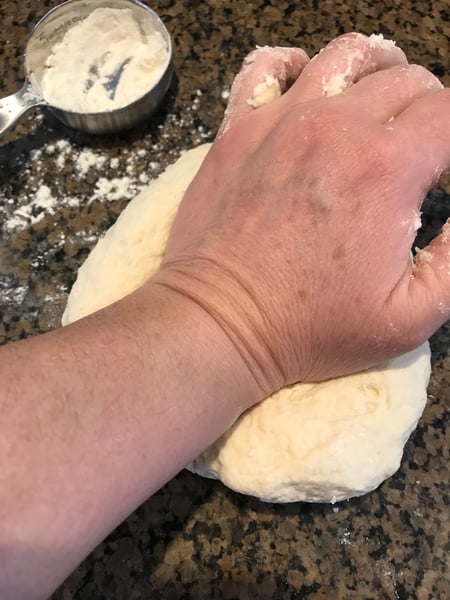
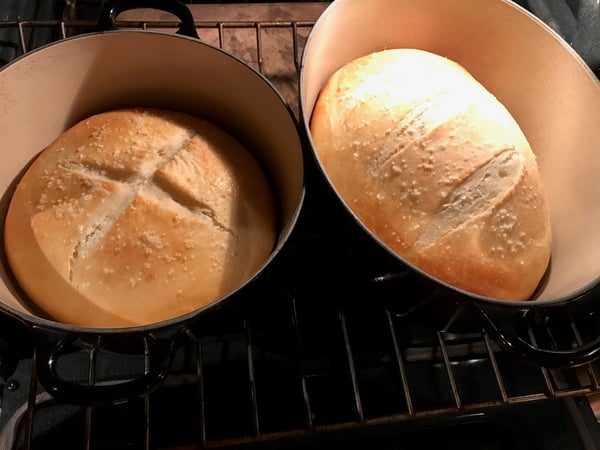
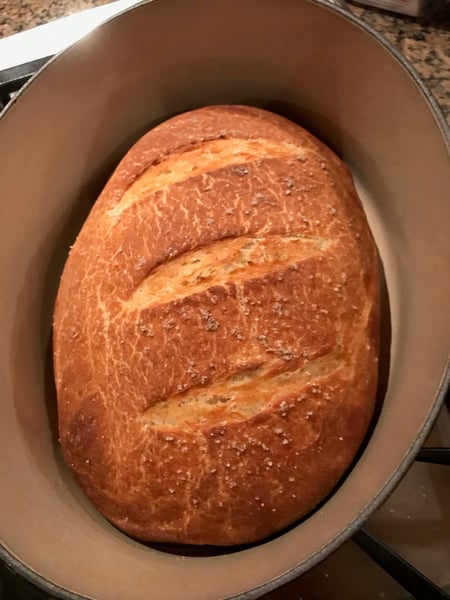
*I did make 2 loaves for this post because I wanted to see if it was possible to make this bread without the mixer, kneading only by hand. The pictures of the round loaf depict hand kneading. I was pleasantly surprised at how well it turned out since I was unable to get the smooth elasticity that the machine achieves when kneading the dough. It didn’t rise as much, but the texture and taste were almost identical to those of the machine prepared dough. So feel free to do it that way if you don't have a stand mixer!
Directions:
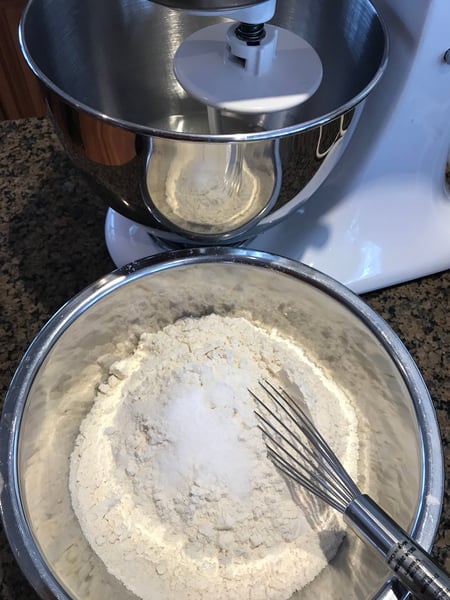
1. Place yeast, water and sugar (if using) in the bowl of a stand mixer.
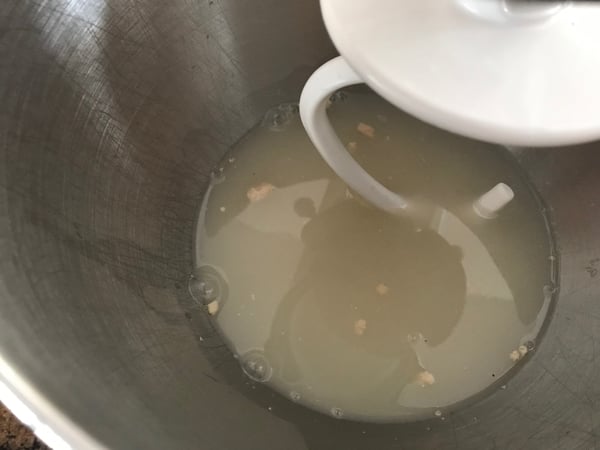
2. Once the yeast awakens in 2-4 minutes (you will see little starbursts rising to the top), add the flour and salt all at once.
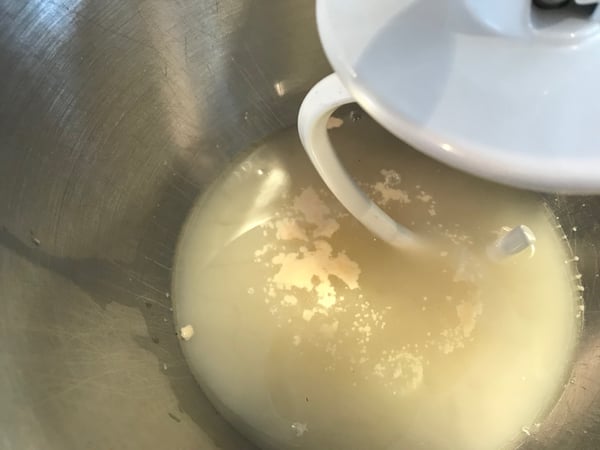
I recommend mixing the salt into the flour before adding to the mixer because salt slows the yeast down, so by distributing it throughout the flour, you don’t shock the yeast.
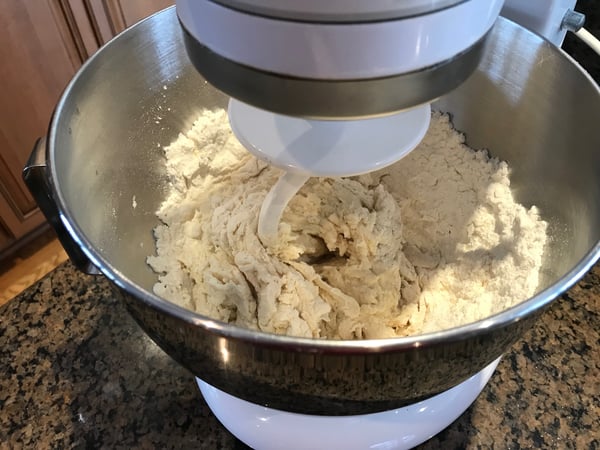
3. The dough will seem very loose at first, but it will come together.
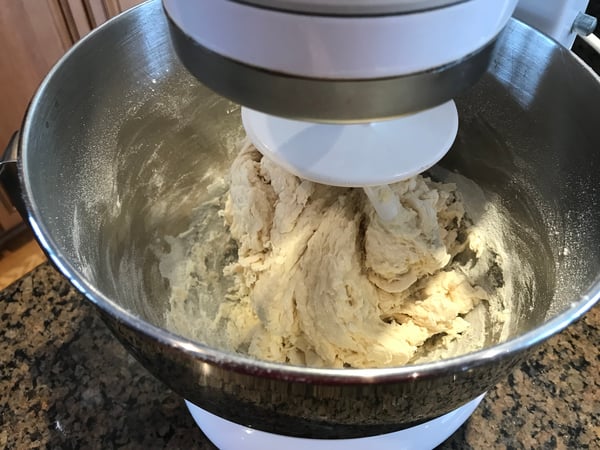
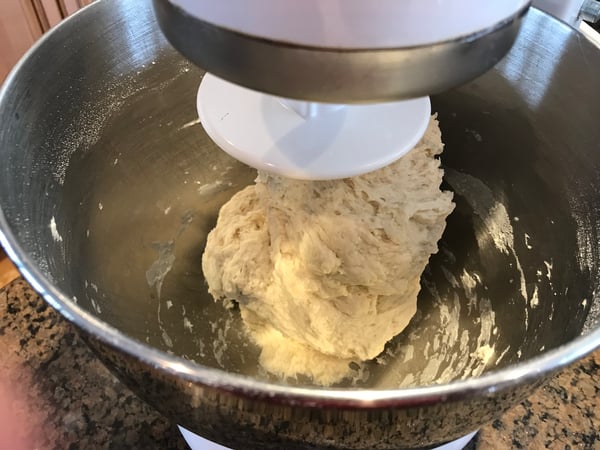
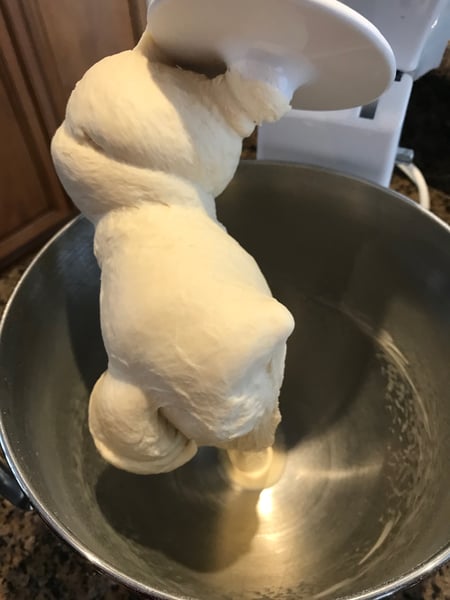
Once incorporated, turn the mixer to medium and allow it to “knead” the dough for 10-12 minutes or until the dough is smooth to the touch and stretches very thin easily without tearing.
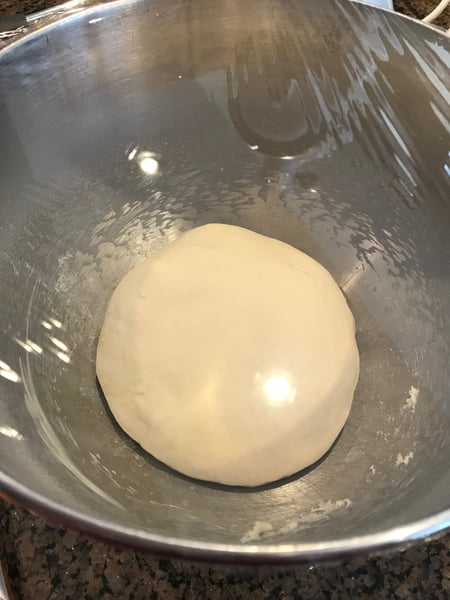
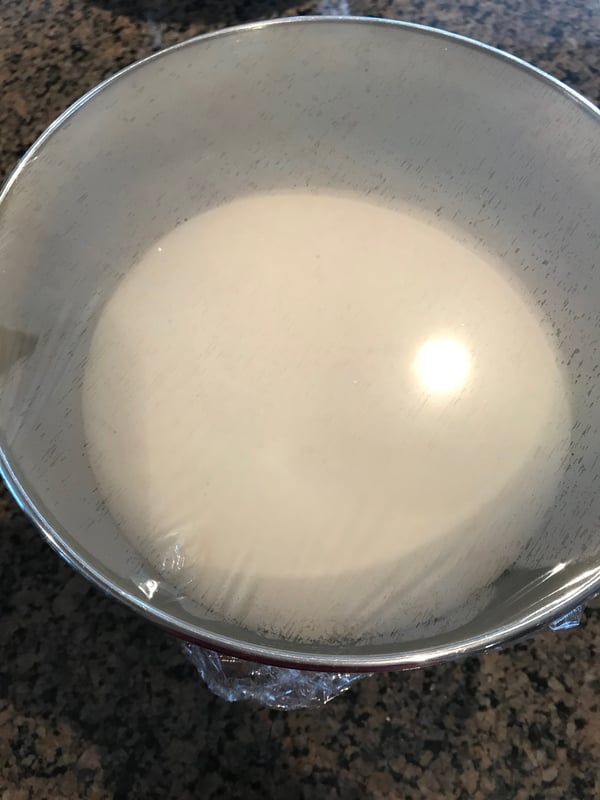
4. Take dough off of dough hook and out of bowl – form a loose ball, place back in the bowl and cover with plastic wrap.
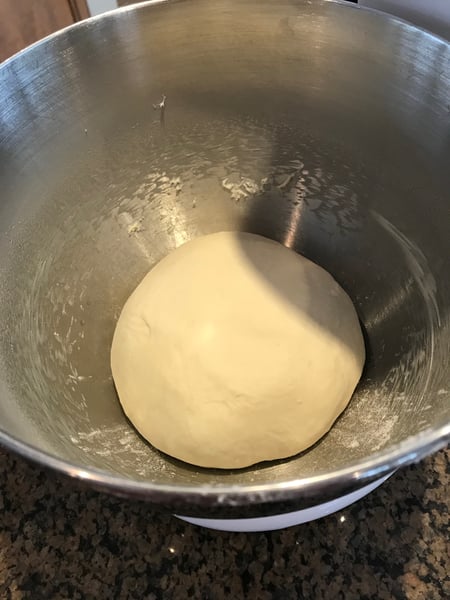
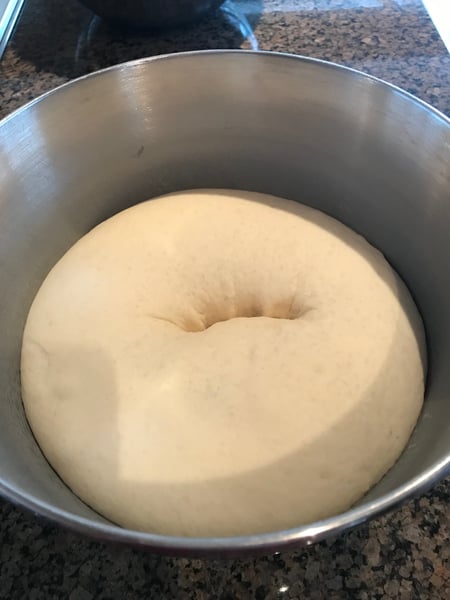
Place in a draft free area for 3-4 hours to allow the dough to double in size.
5. Preheat oven to 450 degrees, move rack to middle.
6. Place 1 Tablespoon of grapeseed oil on bottom and sides of Dutch oven. Punch down dough.
Remove dough and place on very lightly floured surface. Shape into either a ball or football loaf. I've shown both shapes of loaves here.
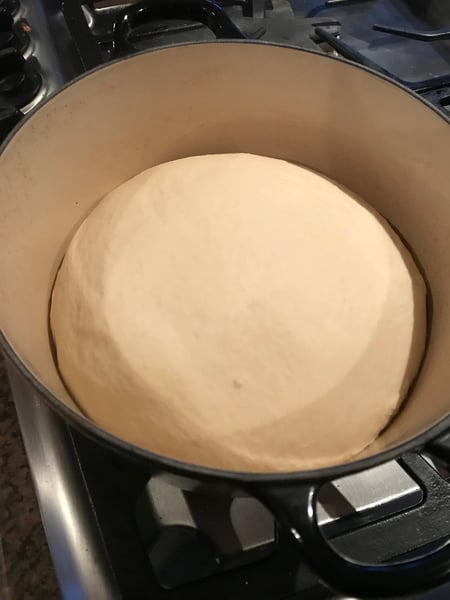
 Place into Dutch oven seam side down and cover with lid, let rest for 30-60 minutes.
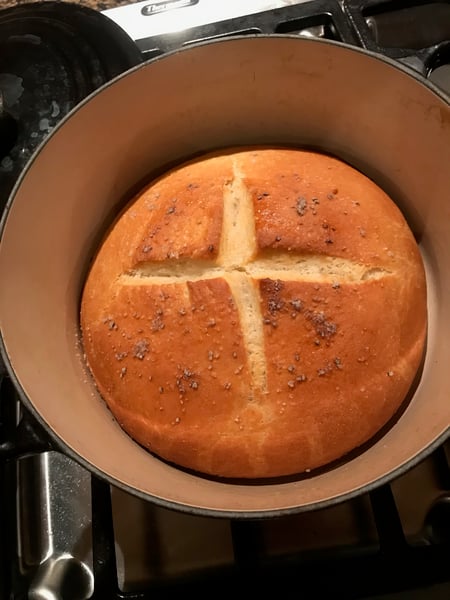
7. Remove lid, slice and “X” or slits into the loaf (this step is crucial to allow steam to escape, and it makes it pretty!)
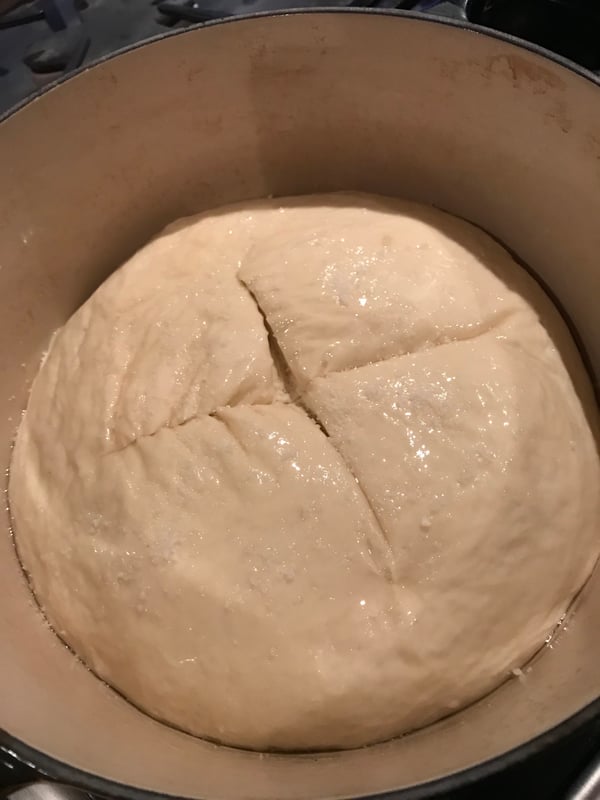
8. Optional – brush 1 Tablespoon of oil on top of bread and sprinkle fleur de sel on top (you can also add sesame seeds, poppy seeds, etc. – they will turn dark as break cooks)
9. Place lid back on the pot and place in center of oven. Bake for 30 minutes.
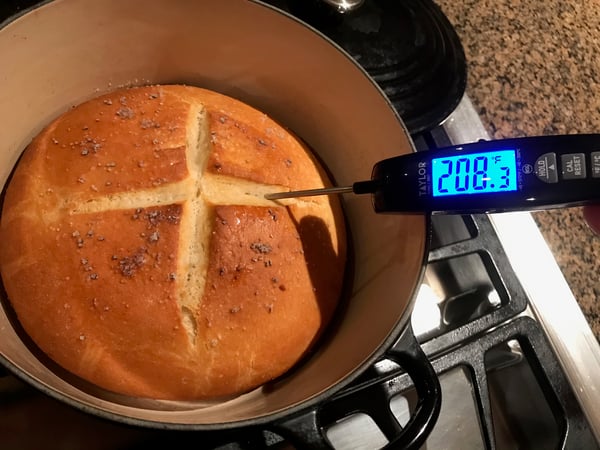
10. Remove lid, turn oven down to 375 degrees and continue to bake for 25-30 minutes until golden brown and internal temperature of bread is 200-205 degrees.
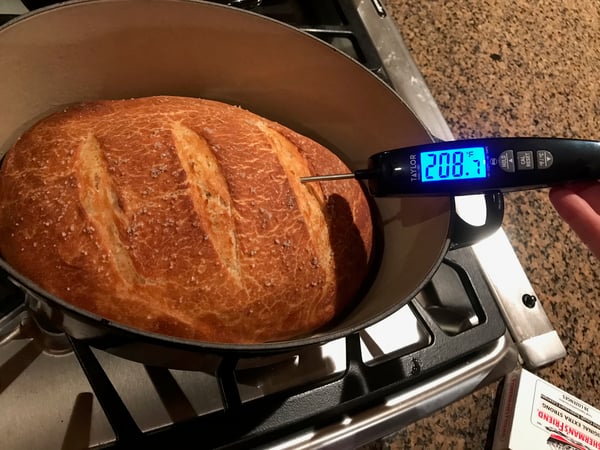
11. Remove pot from oven.
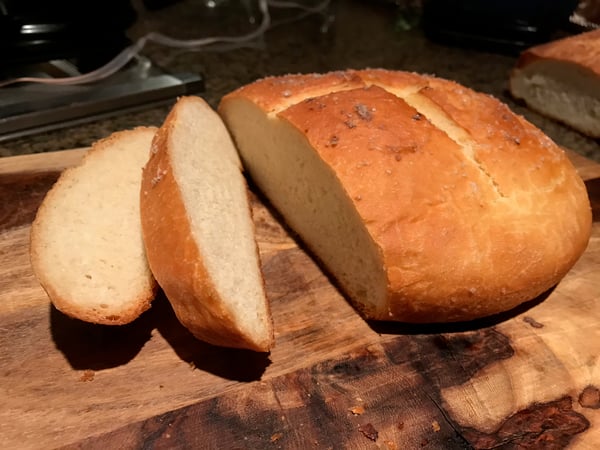
Allow to rest in pot for 10 minutes, then remove loaf to a cooling rack for an additional 20 minutes. (I know it's tempting to want to eat the bread right out of the oven, but it has not finished cooking so the 30 minute wait time is essential.)
12. Slice and serve with butter, jam, a pot of homemade soup, or even all by itself.

Please note that Fresh bread will dry out much more quickly than other types of bread, so if there is anything left a few days after its made, I recommend cutting into croutons, or waiting for it to completely dry out and then make homemade breadcrumbs in the food processor. These can be stored in the freezer for a few months.
If you want to try this bread at home but don't yet have a Le Creuset Dutch oven, you're in luck as all cookware is 20% off this month. Save on Le Creuset, All Clad and Lodge Cast Iron.
If you would like to expand your bread making skills, in addition to the Artisanal Breads Boot Camp, we offer a 3-hour How to Bake Bread class.
And if you are living gluten-free, we even have a Gluten-Free Breads Boot Camp for you!