

Cuisine doesn't get any more classical French than Potatoes Anna. This was one of the recipes included in Auguste Escoffier's cookbook published in 1902 and named "Pommes de Terre Anna." If you aren't familiar with Escoffier, he left behind a legacy in the French culinary industry still used by professional chefs everywhere. He invented some 5,000 recipes, published the Le Guide Culinaire textbook and developed approaches to kitchen management. If you aren't familiar with Potatoes Anna, let's change that right now.
Potatoes Anna is a crispy potato dish of beautifully arranged thinly sliced potatoes seasoned with only butter and salt. Of course, there have been countless variations created since Escoffier's original. Some, like the recipe we teach in Culinary Boot Camp, add thinly sliced onion while others like this version add shredded cheese (which technically makes the dish a gratin).
The reason why this dish is still taught in culinary schools today is because of all of the techniques it embodies. I remember making this dish in professional culinary school at Le Cordon Bleu in Chicago many years ago and being freaked out that the bottom layers of potatoes would burn before the top layers were done. In fact, I busted out my old textbook today to refresh my memory of how I first learned to make this dish some 20+ years ago.
 To give you an idea of how long ago that was, this textbook is now published in the ninth edition!
The recipe calls for clarified butter which is an important technique in itself. We remove the milk solids and water from the butter so that you are left with butter that has a much higher smoke point, meaning it won't burn as easily. The smoke point of regular butter is 350 degrees F. The smoke point of clarified butter is 450 degrees F, allowing you to use it to get a good, flavorful sear.
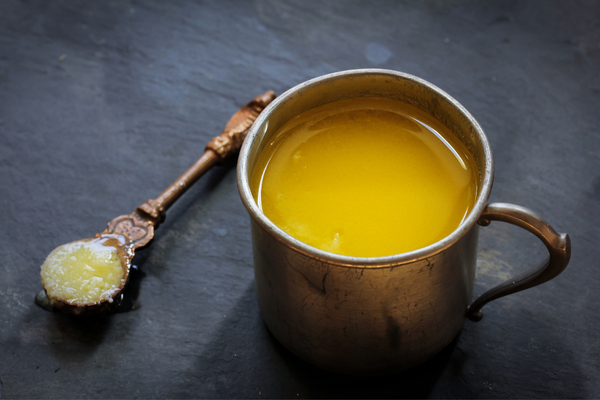
Here's how we instruct Culinary Boot Camp students on making clarified butter for Potatoes Anna:
- To clarify butter, place tablespoon-size pieces of butter in a saucepan over medium-low heat. Using a large spoon, skim off all of the milk solids that rise to the top as the butter melts. Once all of the solids have been removed strain the butter through a fine sieve lined with cheesecloth. You now have clarified butter.
Our Owner/Chef Shelley Young also has a helpful video for this technique:
The next important technique in the Potatoes Anna is the knife skills (if yours could use some work, we have openings in our hands-on class tomorrow!) needed to slice potatoes into very slice slices. Of course, we can simply this step by simply using a trusty mandoline for uniform slices.
Presentation is a necessary technique in this dish. You arrange the slices in the bottom of the pan, shingle them and reverse the direction of each circle. That ensures you have even layers of potatoes.
You then brown the potatoes, but the trick is to ensure the potatoes are not sticking to the pan. In the classic recipe, we cover the pan with foil and bake in an oven until the potatoes are tender. We remove the foil and continue cooking for a final ten minutes praying that first layer of potatoes was crispy and golden but not burnt.
Then comes the most harrowing part of this recipe - the unmolding. Using a plate slightly larger than the pan, invert the potato cake and cut into wedges.
Some recipes (like our Culinary Boot Camp example) call to unmold the potatoes, return them to the original pan and continue to cook until they are tender. You then slide the potatoes out of the pan onto a platter or cutting board to cut into wedges.
The Ingredients
Both of these recipes (my old school textbook and our Culinary Boot Camp version) are great for mastering all of the techniques of Potatoes Anna. But when I saw a recipe on The Kitchn that seemed to be easier, I gave it a go. While the method may be more foolproof for home cooks, the ingredients stay with the purist version. All you need are:
- Potatoes (I use russet because they are starchier, and I find that helps hold the potato cake together better than Yukon Gold potatoes.)
- Unsalted butter (No need to clarify your butter for this method, but I prefer using unsalted butter so I'm in control of the salt. Some chefs disagree with me on this controversial topic, however.)
- Salt (I like using a course salt so you can see where you've sprinkled it. Don't be shy, potatoes need a lot of seasoning to taste good.)
The Pan
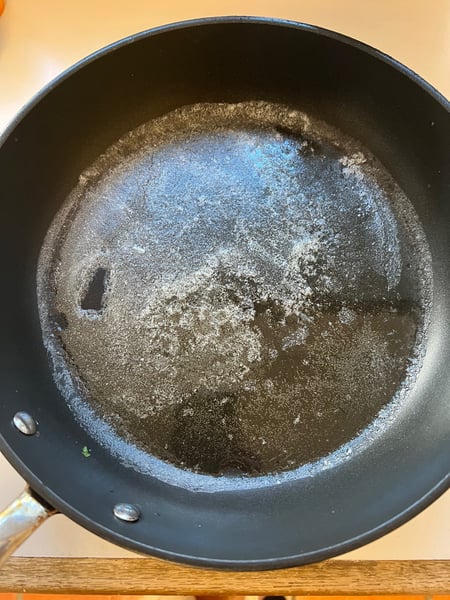
You will need a good wide (10-inches or so) non-stick pan for this recipe. Although the original dish was made in copper, those pans are expensive, and I don't know about you, but I don't own one. Even my favorite enameled cast iron cookware Le Creuset can lead to some sticking with this dish, so your best bet is really non-stick.
The Layering
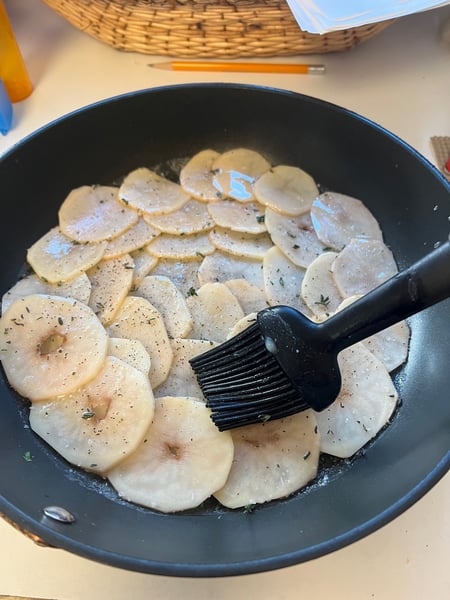
Use a silicone brush to coat the bottom of your pan with melted butter. Because we are only cooking this version in the oven and not the stovetop, clarified butter isn't necessary for this step.
 Arrange the first layer of potatoes in the pan, starting in the center and fanning them out in circles. Each potato should overlap the previous one halfway. Brush the potatoes with more butter, season with salt and continue building more layers. But keep in mind you'll need to switch up your starting point in order to create even layers. So, start in the center for the first layer, then start on the outside for the second layer and continue to alternate. Otherwise, you'll have a mound of potatoes instead of even layers.
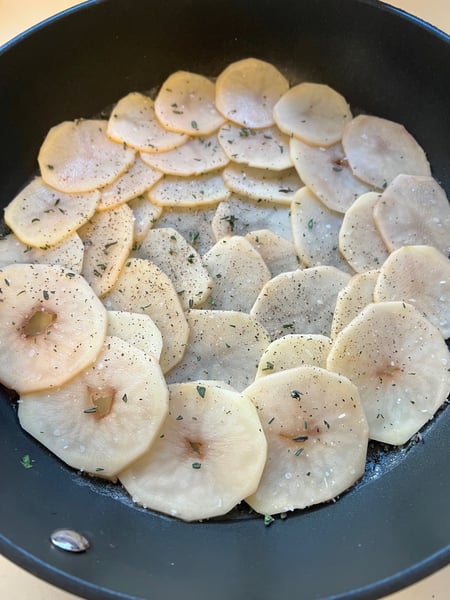
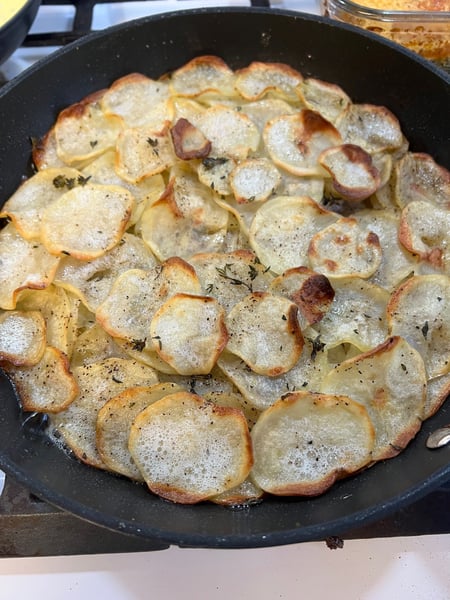
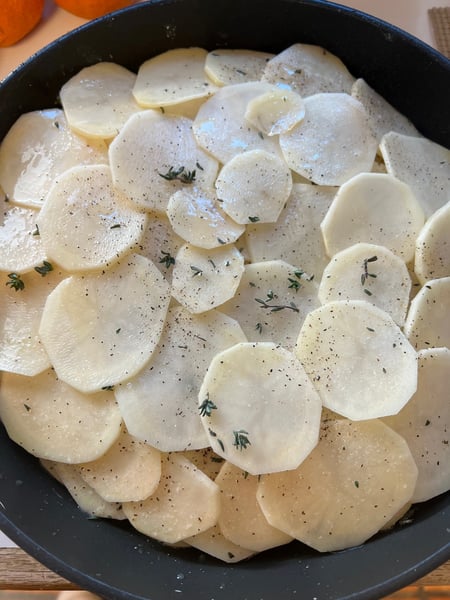 You will notice some fresh thyme in my Potatoes Anna and that's because I had prepped a bunch of it for another dish for this meal and needed to use it up. Feel free to omit it from yours or add another fresh herb of your liking, like rosemary or oregano.
The Cooking
In this version of Potatoes Anna, the entire dish is cooked in the oven. That's to avoid the uneven cooking that can happen by starting on the stovetop and transferring to the oven. But there's one important step you need to do to weigh down the potato cake while baking.
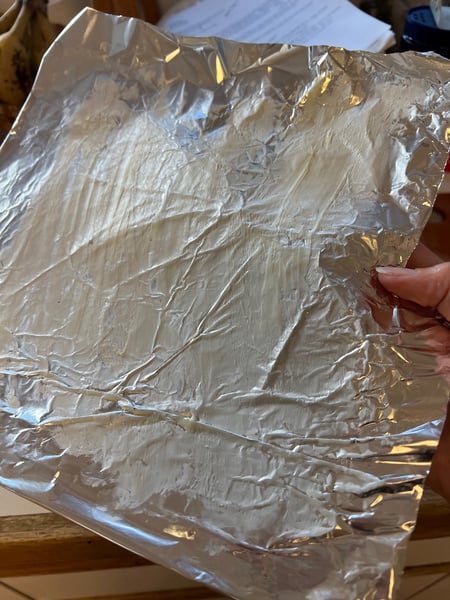
First, brush some melted butter on a piece of foil and put that on top of the potatoes, butter side down.
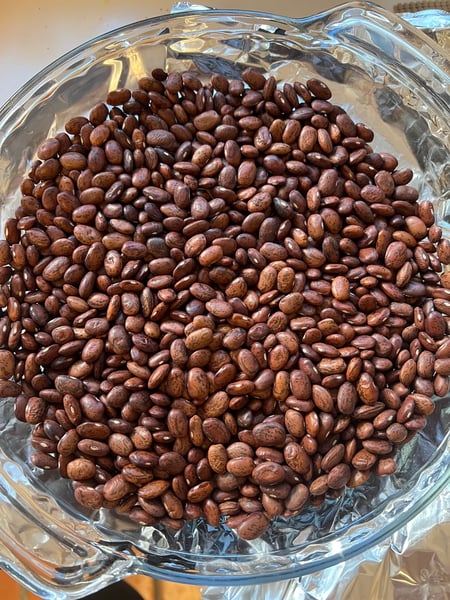
 Top the foil with a glass pie plate filled with pie weights (I use dried beans, which are my go-to pie weights).
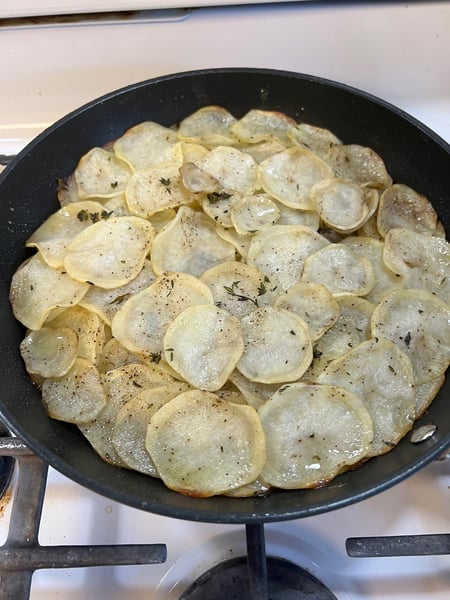
 This compresses the potato cake so that it has lots of contact with the pan for browning and so that it stays together when sliced. Bake with the weights for the first 25 minutes of baking, then take off the foil and weights for the last 20 minutes. Then, use the broiler to get the top (which will eventually become the bottom) brown and crispy.
The Unmolding
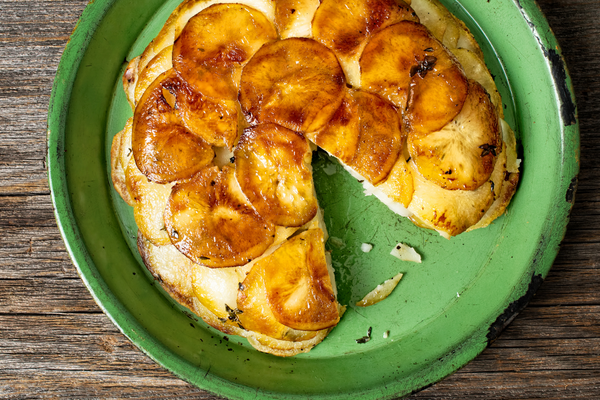
Unlike a gratin, there's no need to wait to let this dish rest before serving, and it's best served hot. Give the pan a gentle shake. It should slide around easily. If not, use a spatula to unstick any parts of the potato cake that have stuck. I had none!
Place a larger platter than your pan (or a cutting board) and flip the skillet upside down. The top should be nice and crispy. Then, cut into wedges and serve.
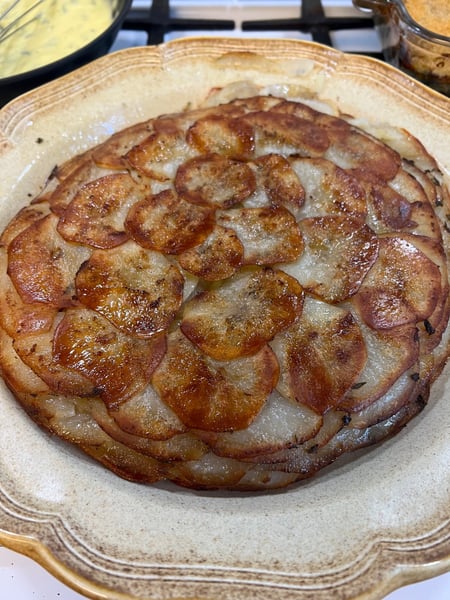
This impressive side dish with easier shortcuts means I'll be putting this dish in my regular rotation for special dinners, and next up is Easter.
Potatoes Anna
Scroll down for a printable version of this recipe
Serves: 8
Prep time: 20 minutes
Cook time: 45 minutes
2 pounds large russet potatoes (about 4 large potatoes)
3 Tablespoons unsalted butter, melted
1 1/4 teaspoons kosher salt, divided
1. Preheat the oven to 425ºF.
2. Peel the potatoes. Cut crosswise into 1/8-inch thick rounds with a mandoline or with a sharp knife.
3. Brush the bottom and sides of an oven-safe 10-inch nonstick sauté pan with butter. Brush a thin layer of butter onto a sheet of aluminum foil big enough to cover the pan.
4. Starting in the center and overlapping the slices, arrange the potato slices in a spiral pattern, making sure the bottom is completely and evenly covered. Use smaller slices in the center and larger slices on the edges. Brush with melted butter and sprinkle salt.
5. For the second layer, work your way from the outside in to the center (again using the larger slices on the edges), arrange the potato slices to build the second layer. Brush with butter and sprinkle with salt.
6. Repeat arranging the third layer, working from the inside out, then buttering and seasoning. Build the fourth and layer of potatoes from the outside in. Brush with butter, season with salt and continue building layers with the remaining potatoes.
7. Place the foil butter-side down onto the potatoes, then weigh down the foil by topping it with a 9-inch pie plate. Fill the plate with pie weights. Bake for 25 minutes.
8. Remove the weights and foil. Bake uncovered until knife-tender and the bottom is golden brown, about 20 minutes more.
9. Turn the oven to broil on high. Broil until the top is golden brown, about 5 minutes.
10. Gently shake the pan to see if the potato cake slides around easily. If it doesn’t, run a thin knife around the edges and slide a spatula underneath the potato cake to loosen. Invert a cutting board or platter over the pan, flip over and remove the pan. Cut the potato cake into wedges and serve hot.
This potato cake side dish would be perfect for Easter dinner. If you are interested in learning desserts to serve with it, don't miss our Virtual Spring Baking Workshop on Saturday, April 8 at 11am CST.
- Strawberry Shortcakes with Vanilla Whipped Cream
- Lemon Cake with Lemon Curd and Blueberry Sauce

And if you want to learn how to make the classic version of this dish, join us for Culinary Boot Camp. This 5-day program features many of the same dishes taught in professional culinary school such as Potatoes Anna. We take that professional curriculum and make it approachable for home cooks. We offer this course at least once a month, so check out our 2023 schedule and commit to learning how to cook!


Potatoes Anna
Ingredients
- 2 pounds large russet potatoes (about 4 large potatoes)
- 3 Tablespoons unsalted butter, melted
- 1 1/4 teaspoons kosher salt, divided
Instructions
- Preheat the oven to 425ºF.
- Peel the potatoes. Cut crosswise into 1/8-inch thick rounds with a mandoline or with a sharp knife.
- Brush the bottom and sides of an oven-safe 10-inch nonstick sauté pan with 1 tablespoon of the butter. Brush a thin layer of butter onto a sheet of aluminum foil big enough to cover the pan.
- Starting in the center and overlapping the slices by about half, arrange one pile of the slices in a spiral pattern, making sure the bottom is completely and evenly covered. Use smaller slices in the center and larger slices on the edges. Brush with 1/2 tablespoon of the melted butter and sprinkle with 1/4 teaspoon of the kosher salt.
- For the second layer, work your way from the outside in to the center (again using the larger slices on the edges), arrange the second pile of potato slices to build the second layer. Brush with 1/2 tablespoon of the butter and sprinkle with 1/4 teaspoon of the kosher salt.
- Repeat arranging the third layer, working from the inside out, then buttering and seasoning. Build the fourth and final layer of potatoes from the outside in. Brush all the remaining butter onto the top layer and season with the remaining 1/4 teaspoon kosher salt.
- Place the foil butter-side down onto the potatoes, then weigh down the foil by topping it with a 9-inch cake pan or pie plate. Fill the cake pan or pie plate with pie weights. Bake for 25 minutes.
- Remove the weights and foil. Bake uncovered until knife-tender and the bottom is golden brown, about 20 minutes more.
- Turn the oven to broil on high. Broil until the top is golden brown, about 5 minutes.
- Gently shake the pan to see if the potato cake slides around easily. If it doesn’t, run a thin knife around the edges and slide a spatula underneath the potato cake to loosen. Invert a cutting board or platter over the pan. Grasping both the board and the pan, flip over and remove the pan. Cut the potato cake into wedges and serve hot.