Welcome back to another exciting installment the story of how to make your own duck confit. In my previous post, we walked through the simple steps required to get your duck leg confit to the point of curing. I mentioned this in the last post, but it bears repeating that the curing step is where the duck will absorb almost all of its flavor. And you don’t have to stick to the traditional flavorings, you can add whatever spin you like. You could use the aromatics found in Thai curry, or you could use jerk seasonings, or crawfish boil spices, really any flavor profile you think might enhance your duck. Once you have your flavorings and cure mix lightly coating your duck legs, and have stashed them in the fridge for about 24 hours, we are ready to begin the cooking process.
 But before we get to the actual cook, we need to get them cleaned up. Lets take a look at what mine looked like after the cure.
 You might notice a slightly pinker-than-normal hue to the meat which is the effect of the pink salt. When it cooks, this effect will become even more pronounced. One of the effects of the sodium nitrite in the pink curing salt is that it makes sure the meat stays pink no matter how long its cooked. Most cooks are used to meat turning gray as it progresses through the stages of doneness, so this can be a bit surprising if you aren’t ready for it. However, this is an effect that most people are quite familiar with even if they don’t realize it. If you’ve ever had bacon and wondered how it stays pink as it cooks, this is the reason. Similarly, if you’ve ever bought “uncured” bacon that was pink and stayed pink as it cooked, there was nothing “uncured” about it. This is one of my marketing pet peeves when it comes to cured meats. While it's true that the product is probably free from pink curing salt specifically, if you read the ingredient list you’ll find it's simply been replaced with 15 acres of celery’s worth of celery salt. Celery has naturally occurring nitrite in it so chemically the process is identical. The “uncured” moniker is almost always a marketing term that stretches the facts so much it borders on intentionally misleading. Anyway, once you take your cured duck legs out of the fridge, give them a rinse to get all the excess cure and flavorings off, then pat them dry.
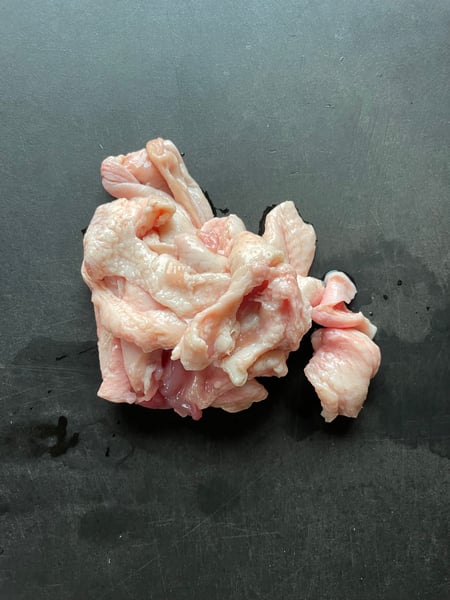
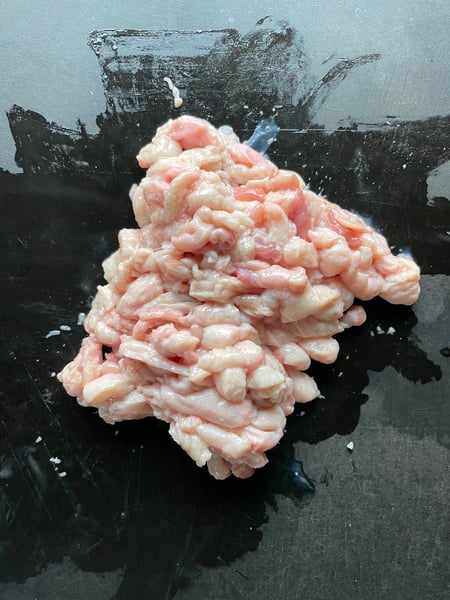
 If you started from a whole duck and have excess fat and skin, now is the time to chop that up and start rendering is in a pan over low heat. If you didn’t start with a whole duck, you can usually find rendered duck fat at the grocery store or online. We will need some cooking fat for this process and duck fat is, of course, traditional, but technically you can use any fat you’ve got. Even canola oil.
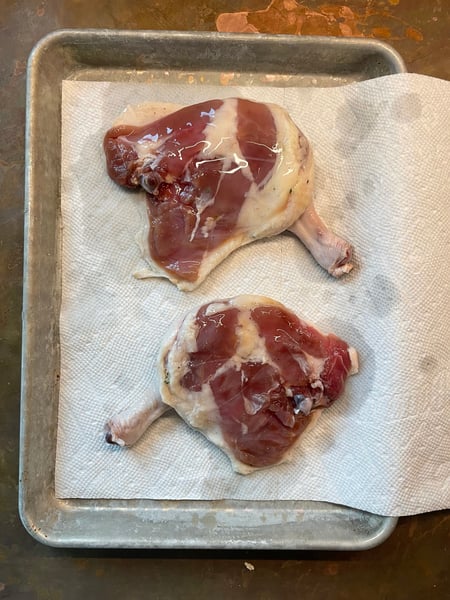
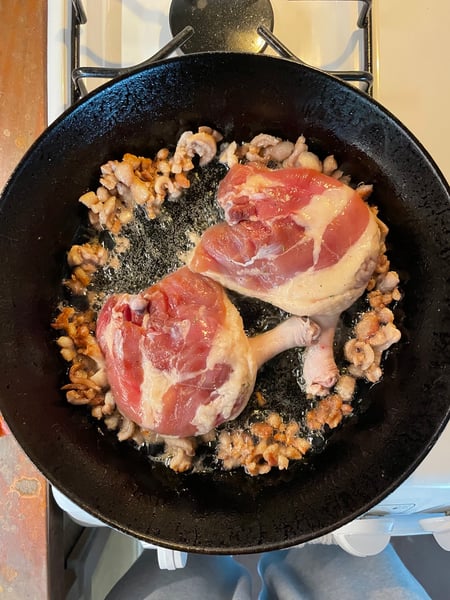
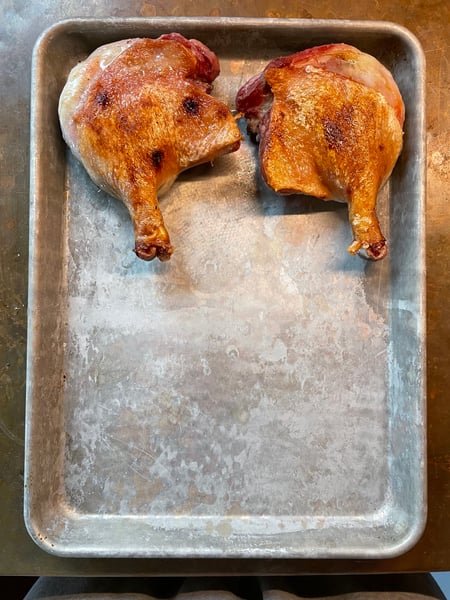
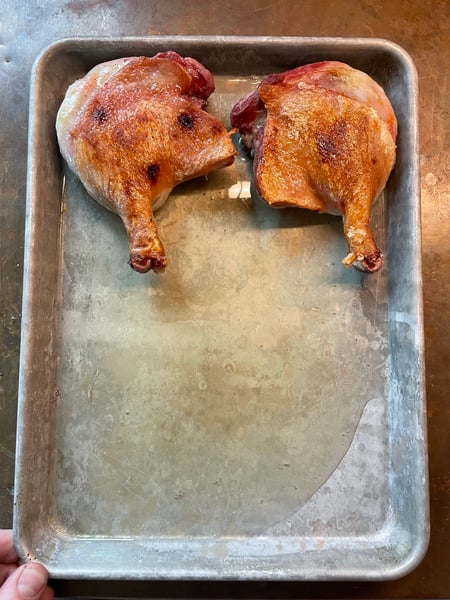
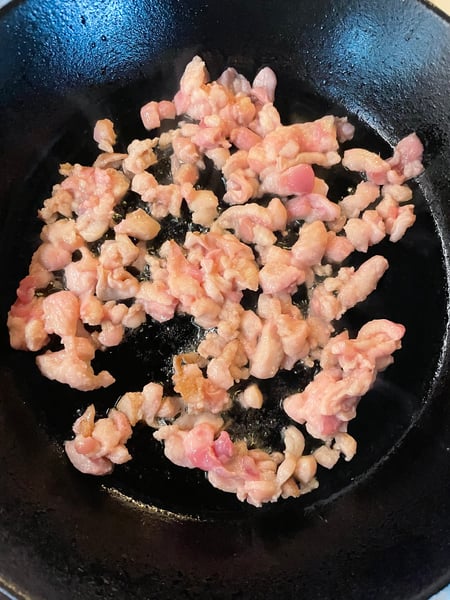 Once you’ve rendered out a good bit of fat, then drop the legs into the pan skin side down to give them a nice sear and render out as much fat as you can from the legs themselves. Once they’re well rendered, take them out of the pan and let them cool skin side up on a sheet tray.
 Traditionally duck confit is cooked submerged in duck fat in a pot over low heat on the stovetop or in a low oven. I have seen so many beginner oriented recipes for duck confit that imply that you should be able to render enough fat from the duck, or even just the legs themselves, to be able to submerge the legs without having to source extra duck fat. Let me just say once and for all that this is not, never had been, and likely never will be the case. Even if you render every bit of fat and skin on the duck the legs were attached to you’re likely to end up with no more than one cup of liquid duck fat. This is simply not enough to submerge the legs in a pan.
To get around this problem without having to buy extra duck fat (which can be expensive) or substituting with a different fat (which can affect the flavor) we will be employing the use of an immersion circulator or sous vide machine as they have become popularly known. If you don’t have an immersion circulator, you can cook the legs using the traditional method (just barely bubbling submerged in liquid fat on the stovetop or in the oven for about 4-6 hours. Think really low temperature deep frying), but if you do, this is a great time to pull it out because there are a great many benefits to cooking your duck confit this way.
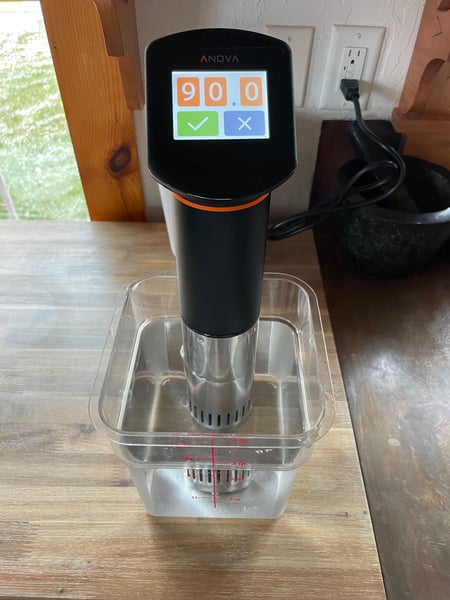
First, you have complete control over the cooking temperature. Low temps can be difficult to achieve and maintain on a burner or in an oven, but an immersion circulator can do it no problem without any more effort on your part than setting it and pressing go. Since duck confit relies on a low and slow cook this method goes a long way towards making the process almost foolproof. Second, bagging the legs under vacuum (sort of) allows you to completely surround your duck legs with rendered duck fat even if you only have a few tablespoons. And lastly it's less messy. You no longer have to worry about spilling liquid duck fat all over your kitchen, nor do you have to wonder what to do with all of it once you’ve finished using it to cook your duck legs. So while your legs are searing, set up your circulator and preheat it to 194 ºF/90 ºC.
 Once you’ve finished rendering out as much fat as you can get from your chopped up fat and skin, pour the rendered fat into the same tray your duck legs are on so that it will cool quickly.
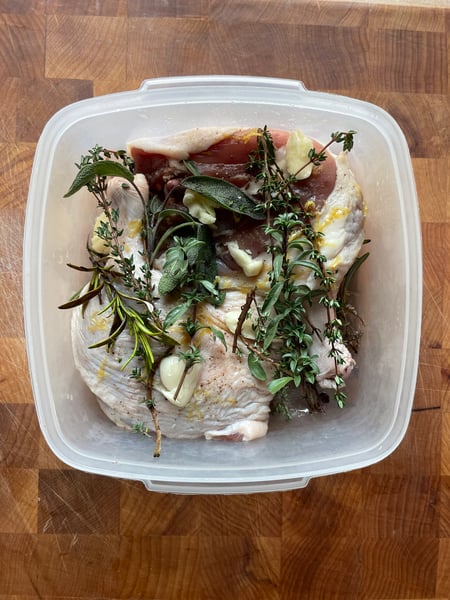
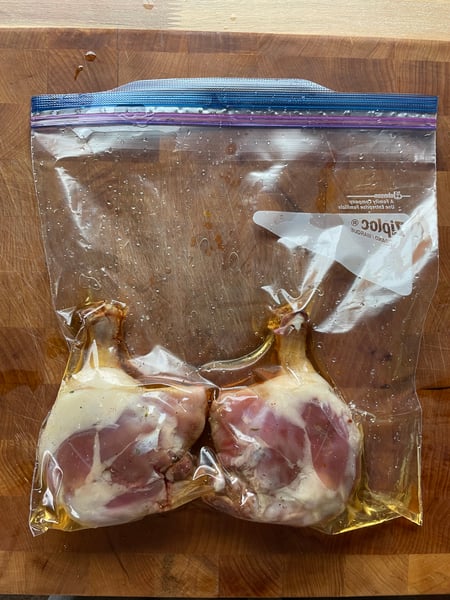
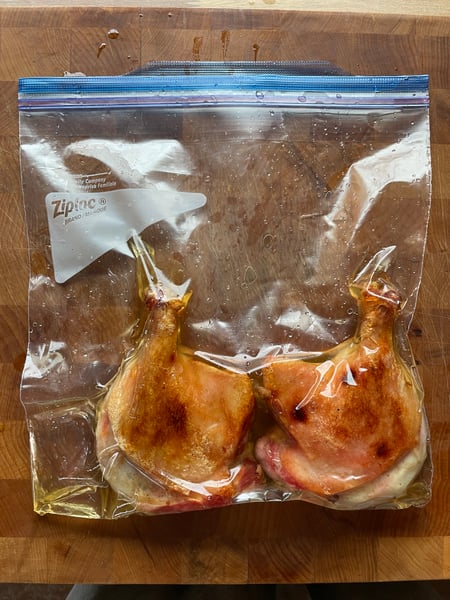
 Once it's about room temp (which should only take a few minutes) load your duck legs and rendered fat into a gallon-sized Zip-loc freezer bag.
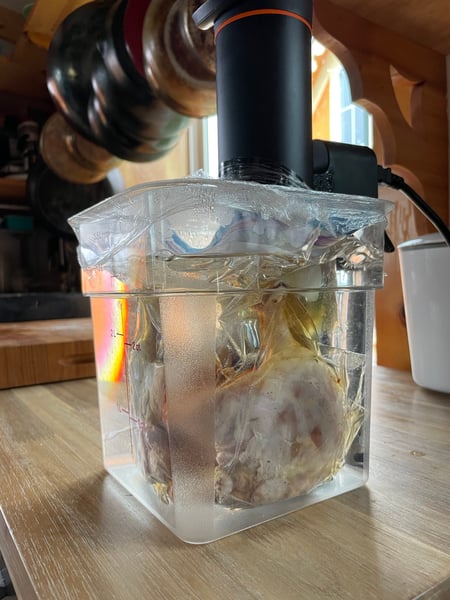
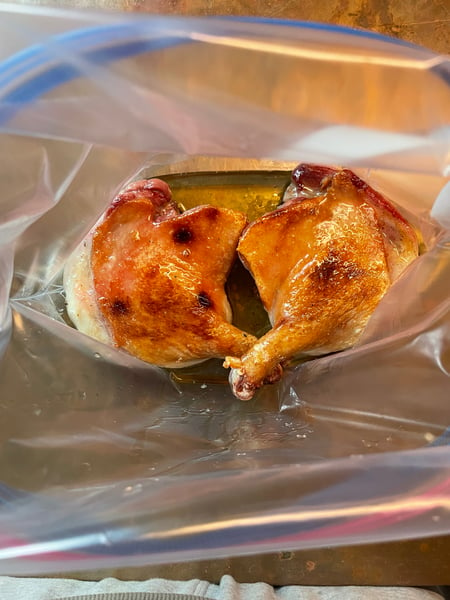 Using the displacement method, work all the air out of your bag and seal it up. Once your water bath is fully preheated, go ahead and drop your bagged legs in.
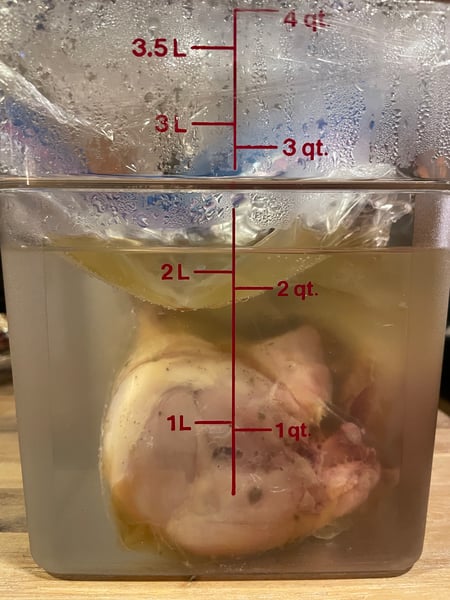
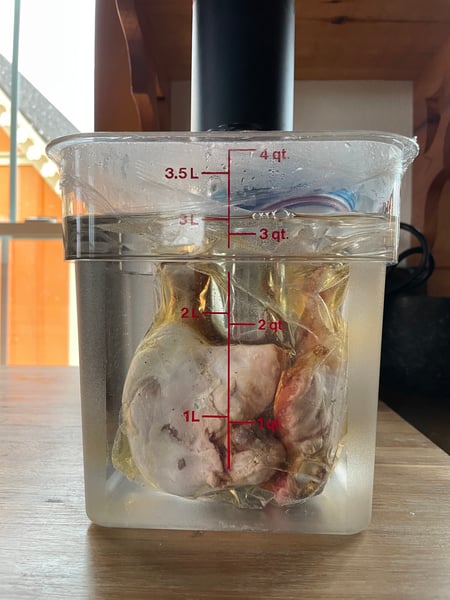 With circulator temps this high, it's important to cover the water bath in some way. A custom fitting lid that fully seals the container is best, but I don’t have such a fancy item, so I just use plastic wrap to wrap up the top as best I can. But even with that, you can see how far the water has evaporated after my cook time of about seven hours.
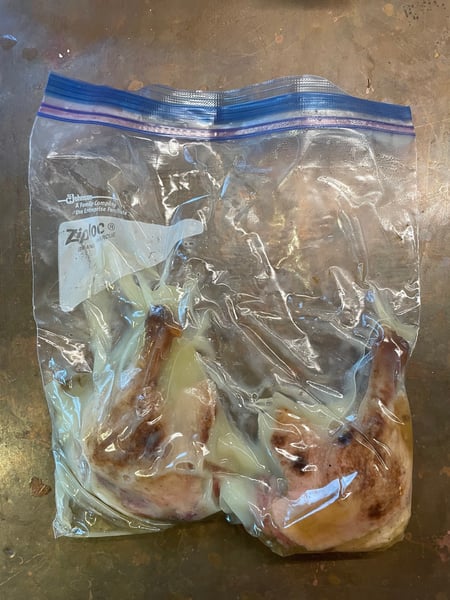
 Once your duck legs are finished cooking, take them out of the bath and let them chill in the fridge overnight or at least for a couple hours. You could use them right away, but I find the texture benefits a good bit from an overnight chill.
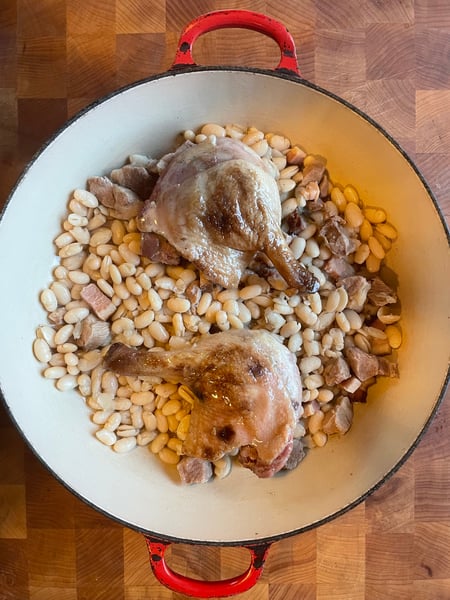
 Now that your confit is ready to go all you need to do is figure out how you want to use it. Of course you could simply sear it up in a hot pan and eat it as is for a delicious and hearty protein for dinner. But there’s also a lot more it's good for. You could put it on top of a frisée and lardon salad, or shred it up and mix it with more rendered duck fat to make duck rillettes. You could make one of my all-time favorite French winter dishes, cassoulet.
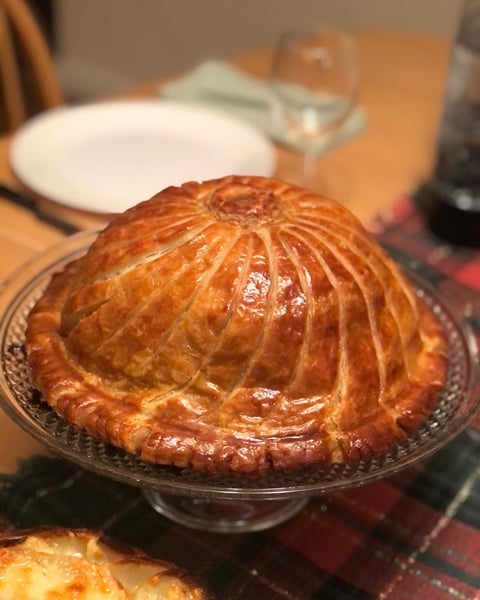
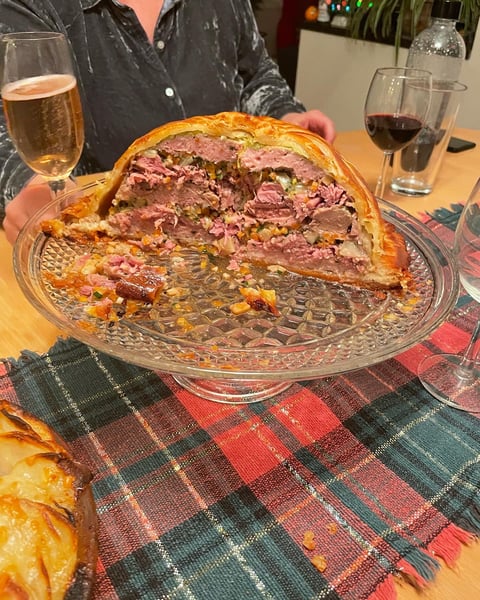
 Or if you’re feeling really fancy and ambitious you could use it as a component of a traditional pithivier (a French meat pie with duck confit, pork sausage, foie gras and more).
 Really, there are almost endless possibilities for your duck confit. Shred the meat and fill an omelette with it. Or fill anything with it really. It can be used as a sandwich meat, or to enhance a batch of meatballs. The limit is only your imagination.
If all this talk of French cooking has whet your appetite for some classic French comfort food, then I recommend checking out our Virtual Coq au Vin class on Sunday, December 11 at 4pm CST. Hope to see you there!