

As I look out my window, it is hard to believe that spring is around the corner. There is about two feet of snow in my yard, and snow shoes are the ideal footwear for the trek from my home to office these days. While drinking my coffee this morning, my view was obstructed by the stalactite-size icicles hanging from the roof. But through that frosty view, I saw one of the first signs of spring: bluebirds. There were bluebirds eating at my bird feeders and flitting around their houses, scoping out the digs and confirming if this was a safe place to make their nests.
 Not two hours later, a flock of rose-breasted grosbeaks came rolling through our yard. I don’t know if I trust the groundhog to tell me we are going to have an early spring, but the birds are a sure sign that spring is just around the corner. When I think spring, I think about one of my favorite dates, April 3rd. If you didn’t know, April 3 is a big day; it is National Chocolate Mousse Day! I can’t think of anything better to celebrate the start of spring than to make some chocolate mousse. I can’t actually think of anything better than chocolate mousse anytime of the year.
Chocolate mousse has a reputation of being extremely difficult to make. It seems recipes that have a perception of being hard to make are often perceived as fancy. Maybe these recipes seem fancy because we tend to save making them for special occasions? It is true that chocolate mousse has several delicate steps involved and that can add to the degree of difficulty. However, all of those steps are elemental cooking techniques. Consider that if simply eating chocolate mousse isn't incentive enough for you to make it!
These elemental techniques are worth mastering on their own: whipping cream, whipping egg whites, melting chocolate and folding. If you already know how to do any of those techniques, you should know you are really close to knowing how to make chocolate mousse! The approach I am going to take in teaching you how to make chocolate mousse is to teach you how to whip cream, egg whites, melt chocolate and to fold. As always, I like to simplify the steps as much as possible.
Chocolate Mousse
Scroll down for a printable version of this recipe
Yield: 4-6 servings
Active Time: 30 minutes
Start to Finish: 2 hours, 30 minutes
1/2 pound semi-or bittersweet chocolate
1/4 cup unsalted butter
5 room temperature eggs, separated and at room temperature
2 tablespoons, Grand Marnier (or other flavored liqueur, optional)
6 tablespoons, granulated sugar
3/4 cup heavy cream (if you want to garnish with whipped cream double this)
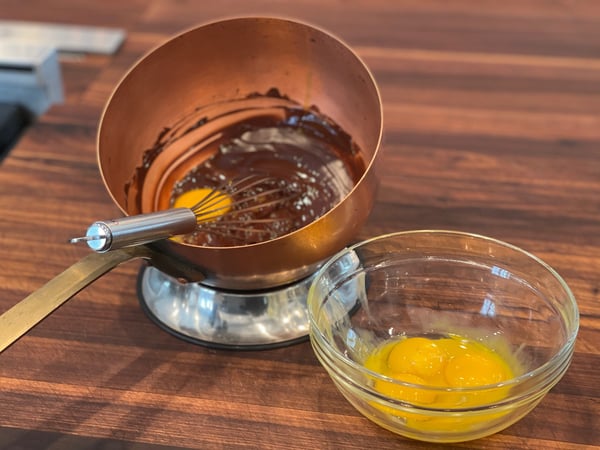
Step 1: Melt the Chocolate
Place a heatproof, round bottomed bowl on top of a sauce pan filled with approximately 2 to 3 inches of water, this is referred to as a water bath or bain Marie.
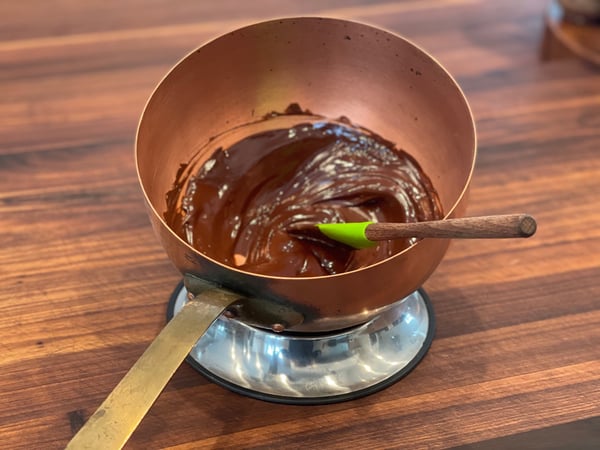
 Bring the water to a simmer. Place chocolate and butter in the round bottomed bowl, turn the heat off and stir constantly until the chocolate and butter are melted. Remove the bowl of chocolate from the water bath and set aside.
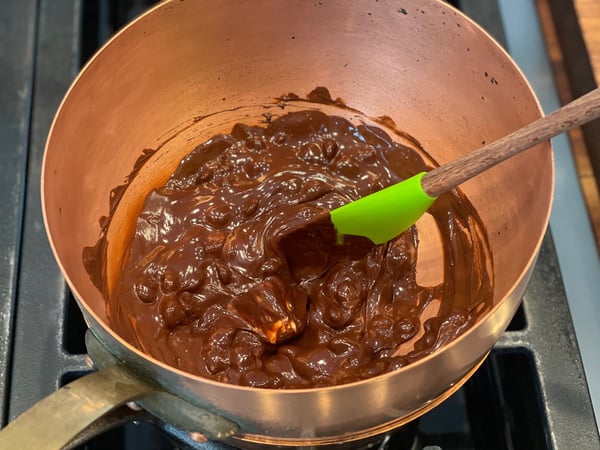 You need very little heat to melt chocolate. Think about it this way: when you eat a piece of chocolate it can melt right in your hand! When chocolate is overheated or if the chocolate is exposed to a drastic change in temperature, it can take your chocolate out of temper. When chocolate is made it is tempered, which is what gives it its smooth and creamy texture. Chocolate in temper is smooth and creamy, but when out of temper it becomes grainy and or bloomed (meaning white in color). When your chocolate turns white or becomes grainy, that is what has happened. Follow the instructions above and you should have no problem.
 Step 2: Separate Eggs
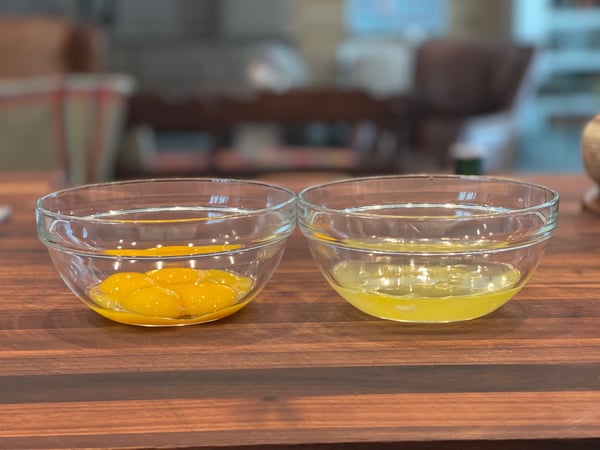
Separate the whites from the yolks. Make sure to use room temperature eggs for your mousse. The egg whites will whip much more easily, and the egg yolks won’t seize your chocolate when you add them to the chocolate if they are room temperature.
 Step 3: Add Egg Yolks to Chocolate
Add the five egg yolks one at a time to the melted chocolate. Mix until just combined, there's no need to mix too much.
 Step 4: Whipping Cream
Unlike egg whites, cream likes to be whipped cold, so use a very large, round bottomed cold bowl and make sure the cream is chilled too. Whip the heavy cream in a large bowl until thick and about doubled in volume. Look for the cream to lose its sheen when it is done, it will go from shiny to dull. Egg whites gain a sheen when they have reached a stiff peak and whipped cream loses its sheen when it is done.
Notes:
- Whipped egg whites are more fragile than whipped cream which is why we whip the cream first.
- Over mixed cream will turn to butter. You will see it start to deflate and get grainy if it is overbeaten. I think one of the reasons people over beat cream is because they expect it to get fluffy like Redi-Whip or Cool Whip. Heavy cream gets more thick than fluffy when whipped. If you are whipping a small quantity of cream like we are in this recipe, you won’t notice the volume increasing as much as the thickness.
- If you want to garnish your mousse with whipped cream, whip your cream separately from the cream for the mousse if you want to sweeten it. Add 1/4 cup of powdered sugar to the cream right at the beginning and whip in the same method as outlined above. Powdered sugar has some cornstarch in it and that will help to stabilize your whipped cream.
- Overwhipped cream cannot be remedied back into whipped cream but keep whipping and you can turn it into butter.
Step 5: Whip Egg Whites
Room temperature egg whites will give you better volume which is another reason we like to bring eggs to room temperature.
When I am whipping egg whites or heavy cream, I like to use a very large bowl. The bigger the bowl, the quicker they will whip. The larger bowl allows more air into the whipping process, and it also reduces the mess!
Have six tablespoons of sugar ready, but don’t add it yet. Whip your egg whites till thick and foamy; you will start to see tracks in the egg whites from the beaters. Gradually add the six tablespoons of sugar to the whites, whisk thoroughly after each addition. Keep whipping until soft peaks form. Soft peaks are formed when you lift the beaters out of the egg whites and the peaks bend over slightly.
Notes:
- You may see some recipes using copper bowls or adding cream of tartar to the egg whites before they whip them. The copper bowl does what the cream of tartar does, it stabilizes the egg whites. I personally don’t find this necessary in a cold mousse, but I do like use these techniques when baking the whipped egg whites like I would in a soufflé or meringue. The extra stabilization isn’t necessary in a cold mousse but helps to keep your soufflé from deflating in the oven.
- Fat interferes with egg whites whipping to stiff peaks. You will see a lot of recipes really emphasizing not to get egg any yolks into the whites or they won’t whip. It is true that fat will interfere with egg whites whipping to stiff peaks but if you are whipping to soft peaks the fat will not interfere with that but rather slows down the process of whipping dramatically. It could be argued that whipping whole eggs, yolks and whites together keeps you from overwhipping the whites (of course this would only be in the case where a recipe calls for both whites and yolks). I have a recipe for flourless chocolate cake that uses this theory but it takes about 20 minutes on high speed of a stand mixer to whip the eggs to soft peaks. It comes out perfect every time so if you have trepidation about whipping the whites properly you can try this. Take the five eggs in this recipe and whip them together, 20 minutes, high speed in your stand mixer. You would simply skip the step of mixing the yolks into the chocolate.
- When egg whites are overwhipped they will start to deflate. If you see them start to deflate and liquid start escaping the eggs whites, you have overwhipped them. This cannot be remedied.
Step 6: Folding
This step isn’t as fragile as you might expect, but you do want to exercise some restraint in combining the chocolate, whipped egg whites and whipped cream. We combine 1/3 of the whipped cream and egg whites into the chocolate mixture at a time. You do not need to thoroughly mix after each addition, 70% combined is good enough. Save the thorough mixing for the last addition.
We use a technique called folding when we combine ingredients that are fragile. Whipped egg whites and cream are fragile and can easily deflate. The idea of folding is that we are trying to preserve the volume in the cream and egg whites by folding rather than stirring. Folding is the process of skimming the surface of the inside of the mixing bowl with a rubber spatula and lifting some of the contents up and over. It can be hard to explain, so check out the video.

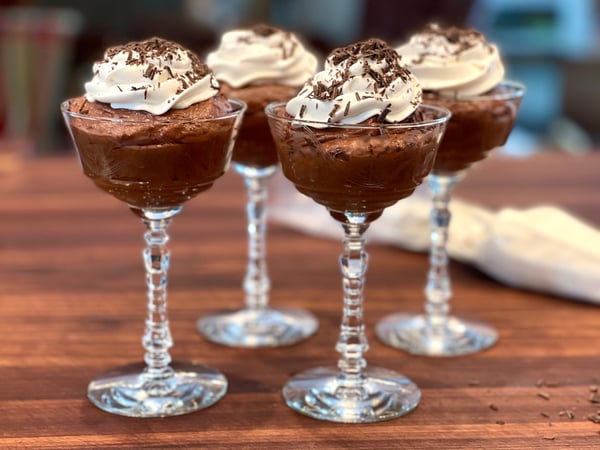
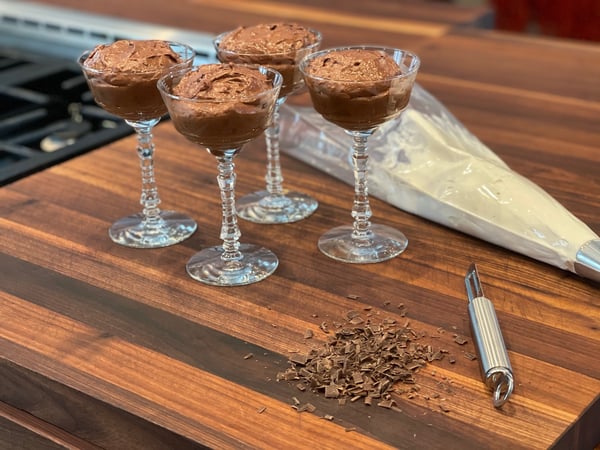
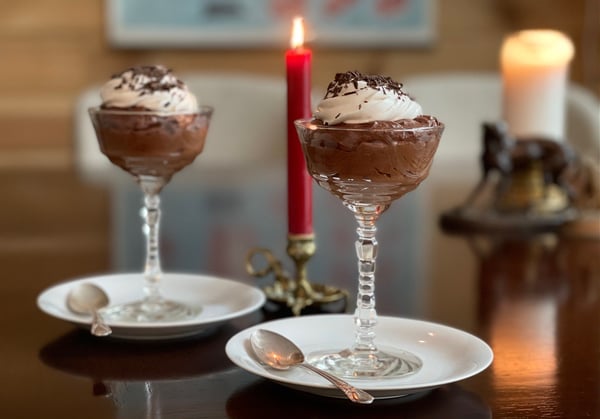
Step 7: Portion and Chill
After your mousse is made, it needs to be chilled for a couple of hours. Before we chill it, I like to put it into its serving dish. Most people put the mousse into a wine glass, which is pretty but it can be hard to get it into the glass without getting the mousse all over the sides of the glass. I like to use a coupe or martini glass for serving; its wide mouth make filling them easy. Garnish with a little whipped cream and a shave of chocolate, if you like.
 If you are looking to build more foundational cooking techniques, we have plenty of classes to chose from our virtual Building Blocks series to our in-person Culinary Boot Camps at Lincoln Square.
If you want to enjoy this dessert prepared for you by one of our professional chefs, join us for a Surf and Turf demonstration at Lincoln Square on Saturday, March 27 at 6:30pm. This menu is mouthwatering and it's full of cooking techniques:
- Lobster Thermidor
- Sautéed Beef Tenderloin Steaks with Garlic-Herb Butter
- Oven-Roasted Brussels Sprouts with Almonds
- Dark Chocolate Mousse


Chocolate Mousse
Ingredients
- 1/2 pound semi-or bittersweet chocolate
- 1/4 cup unsalted butter
- 5 room temperature eggs, separated and at room temperature
- 2 tablespoons, Grand Marnier (or other flavored liqueur, optional)
- 6 tablespoons, granulated sugar
- 3/4 cup heavy cream (if you want to garnish with whipped cream double this)
Instructions
- Bring two inches of water to a boil in a saucepan.
- Place the chocolate and butter in a large bowl or bain marie that will fit top of the saucepan without touching the water. Turn off the heat, and place the bowl on top of the saucepan. Allow the mixture to melt, stirring occasionally until smooth.
- Remove the bowl from the saucepan, and whisk in the egg yolks, one at a time. Add the liqueur. Set aside until cool to the touch.
- Place the heaving cream in a separate, large mixing bowl. Whip by hand or with an electric mixer until soft peaks form, being careful not to overwhip.
- Using an electric mixer or a whisk, beat the egg whites in a very clean bowl until foamy. Gradually add the sugar while continuing to beat. Continue whipping until the whites form shiny, soft peaks.
- Gently fold the egg whites into the chocolate mixture until almost incorporated. Fold in the whipped cream until no streaks appear.
- Place the mousse into individual serving dishes or one large serving bowl. Chill thoroughly, about 2 hours, and serve cold. Garnish with fresh fruit and/or chocolate shavings, if desired.