Take Your Happiness Into Your Own Hands: Make Your Own Bagels

I’m not going to say it's impossible to find a good bagel in Chicago. That would be irresponsible. But they are few and far between (Sorry, Chicago; I respect you too much to lie), which means that more often than not you have to go far out of your way if you want to start your day with the most delicious dough ring around (you heard me, doughnuts). Well I, for one, am finished being tyrannized over by the sparse distribution of good bagel spots. I’m taking matters into my own hands, and making my own bagels, and you can too.
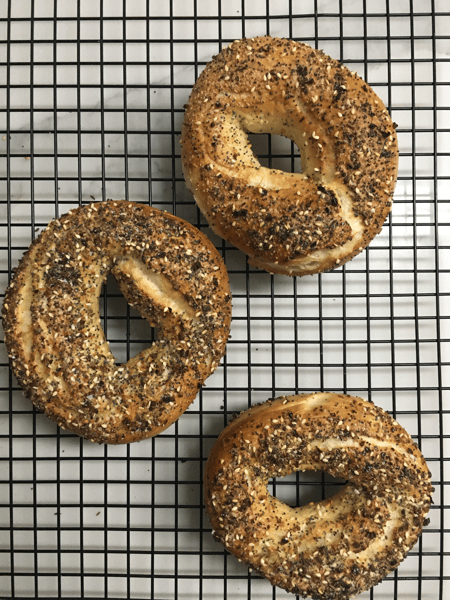
But before we get into the method we have to consider what exactly makes a bagel a good bagel. A good bagel should be chewy, but not tough with a crust that is a deep golden brown and not too crispy. The crust adds another dimension of chew and texture to the bagel, but it shouldn’t dominate the bite. Bagels should not ever be cake-like or bready in texture. If your bagel makes a great bread for a breakfast sandwich without squishing all the filling out the side when you take a bite then almost certainly you are not eating a bagel. You are eating a ring-shaped bread product masquerading as a bagel. A bagel like that is the type of product that is responsible for whole generations of non New Yorkers living out their lives with the attitude “Bagels? They’re fine I guess, but I don’t really get the big deal.” Well bagels are a big deal, man, and I’m here to set you straight and send you down the righteous path of proper bagel appreciation by showing you how to make them yourself.
A lot of people are intimidated by doughs, especially yeasted doughs, but they are honestly typically very simple to bring together. Even more so if you have a stand mixer. We will begin our bagel dough by mixing a wet dough that will ferment ahead of time to start developing flavor before we add the rest of the ingredients to make the final dough.
To make the starter dough combine:
1/2 teaspoon instant yeast
1 cup plus two tablespoons room temperature water
1 1/2 cups bread flour
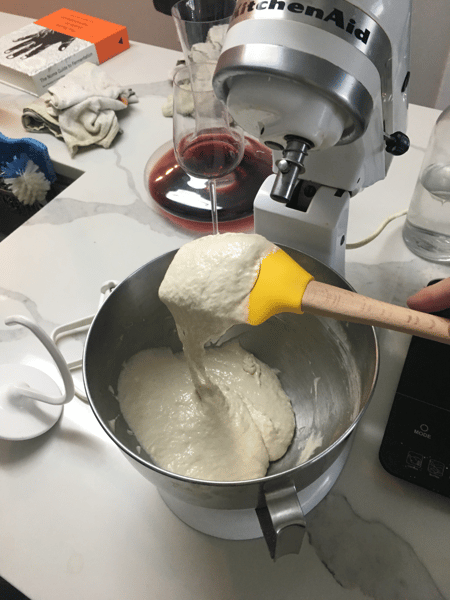
Then simply whisk for two minutes, until everything is well incorporated. The starter should look like this:
In a separate bowl combine the rest of the ingredients for the final dough:
1 cup bread flour
1/2 teaspoon instant yeast
1 tablespoon honey
1/2 tablespoon salt
then sprinkle this mixture over the top of the starter dough and cover the bowl in plastic wrap. At this point we will let the yeast start to ferment our dough. To best facilitate this we want to provide our yeast with the best environment we can. We want a humid and warm (ideally around 80-85 degrees) place for the dough to develop flavor. If this does not describe your kitchen in the dead of winter then do what I do: bring a saucepan of water to a full rolling boil, then stick it in the bottom of your oven with the bowl of dough sitting on a middle rack (with the oven off, of course).
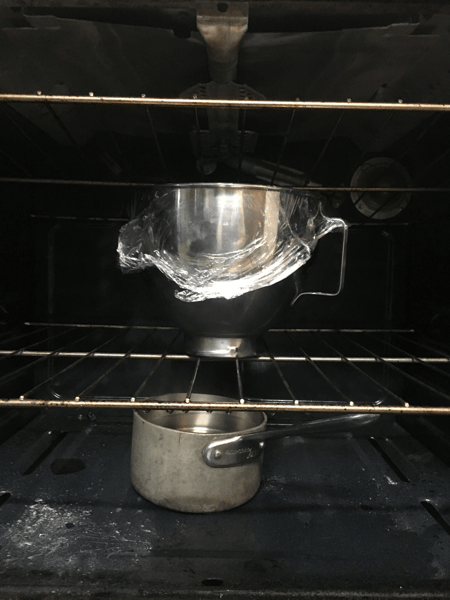
Let this dough ferment for about an hour (or for a really flavorful dough, overnight in the fridge). Now we can do our final mix on the dough. We simply mix the flour mixture into our starter dough and knead for about 10 minutes (I use a stand mixer for this whole process). Once it has finished kneading, place it in a lightly oiled bowl, and lightly oil the top of the dough. Wrap the bowl in plastic and return the dough to our oven-with-boiling-water set-up. The dough will now undergo what is called ‘bulk-fermentation’. Bulk fermentation is the first big rise any yeasted dough undergoes, and ours will last for 1-2 hours (or again overnight in the fridge for really flavorful dough), or until the size of the dough has doubled.
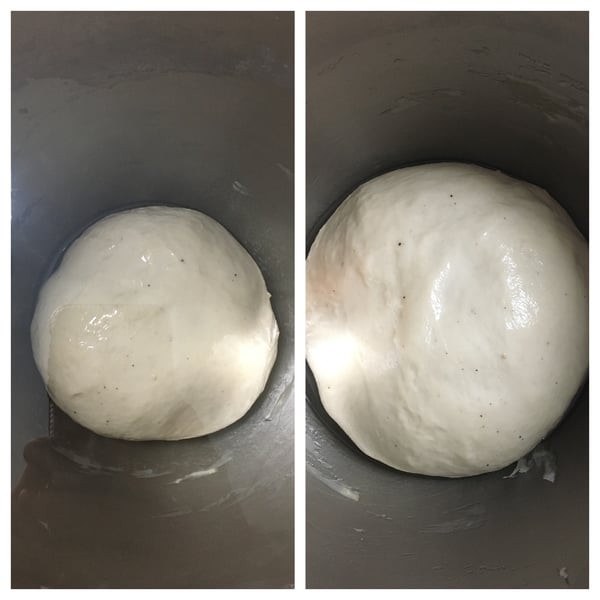
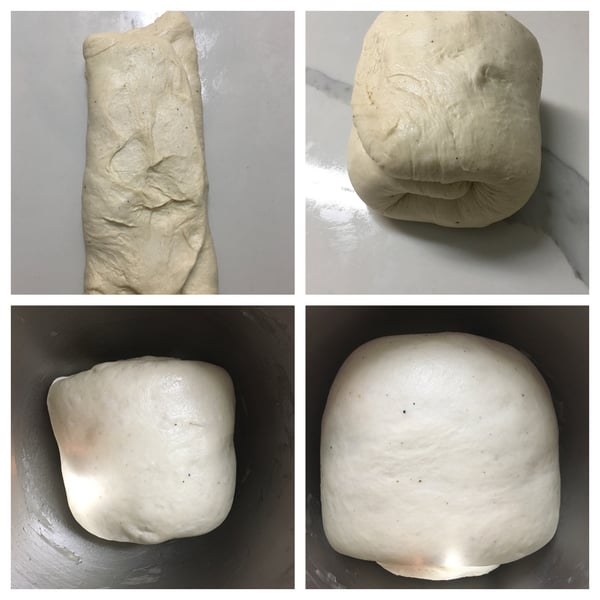
Once the dough has doubled punch it down (exactly what it sounds like) to de-gas it. Then take it out of the bowl and give it a fold into thirds, then into thirds again, then put it back in the bowl seam side down, and return it to the oven to rise again for about an hour. After this rise, we are ready to shape our bagels. To do this, divide the dough into five equal pieces.
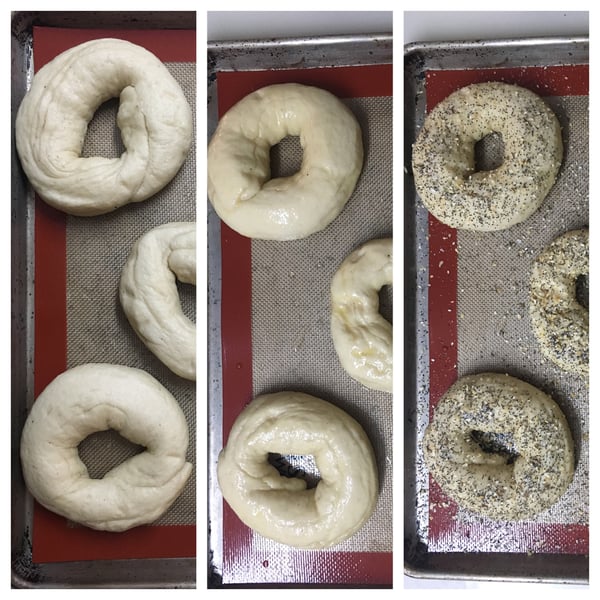
Once your dough is divided roll each piece into a long thin rope about 12 inches in length. Then loop it around on itself so you have about two inches of overlap, and use your fingertips to roll along to joint to connect them. Repeat this process with remaining portions of dough, and set shaped bagels on a sheet tray, covered with plastic, do complete their final rise. This final rise should only take about 15 minutes.

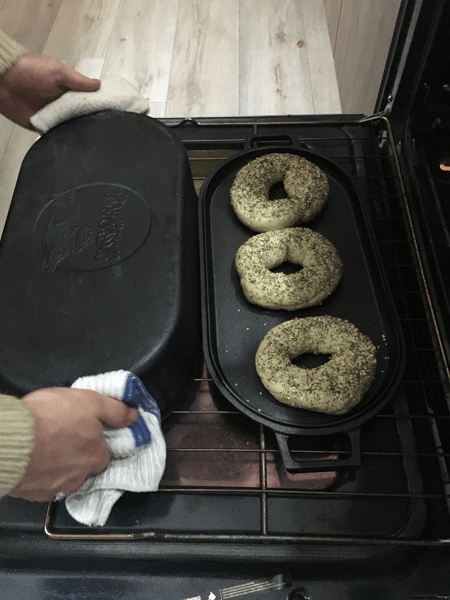
Once the final rise is complete its time to poach the bagels. To do this, fill a deep and wide pot with about inches of water and add a tablespoon of baking soda, and a quarter cup of barley malt syrup (if you don’t have this on hand you can use honey, maple syrup, or just plain old sugar). Bring to a boil, then add the risen bagels. Poach for 30 seconds-1 minute per side, flipping the bagels gently (more time per side will yield a thicker, chewier crust) and returning them to the sheet tray after they are done. At this point pre-heat your oven to 500 degrees (in my photos you will see I use an inverted cast iron roasting pot as a kind of mini oven inside my oven to better regulate temperature and humidity to get a really nice crust. If you have one of these, I recommend using it, and pre-heating it along with your oven. If not, then simply bake your bagels on a sheet tray lined with parchment or a Silpat). Beat one whole egg with a tablespoon of water, and brush this egg wash over the tops of the bagels and add whatever topping you may wish (you’ll notice here that I am using the only bagel topping worth mentioning: everything seasoning).
Once your oven is pre-heated get those bagels in there and immediately drop the temperature to 450. Bake until the crust is a deep golden brown (about 20 minutes), and let cool completely before eating.
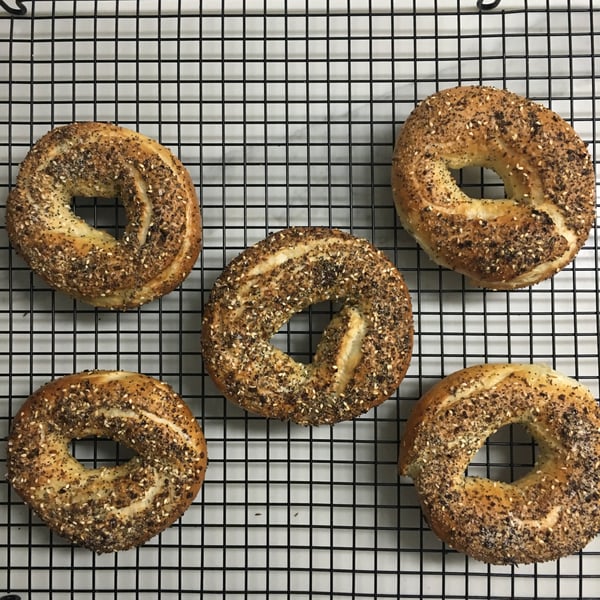
That wasn’t so hard right? Now you can access a delicious fresh bagel anytime you may need to (which is a lot for me). Please use your new powers responsibly. And for more in depth learning about all things yeast-dough check out one of our bread classes (one of which I recently had the pleasure of teaching for the first time, and inspired this blog post). See you there!

