

It has become something of a tradition for me to make birthday cakes for our two favorite little girls. We’ve known them since they were born & Auntie Karen loves to bake – it’s a match made in heaven! Audrey turned three in late November and her little bestie, Beau, turned two in early December. With Thanksgiving and Christmas so close this year – and all the craziness that came with it – it was decided to have a little party featuring BOTH as the guests of honor. Well, this Auntie decided to get her creativity game on and have a lot of fun with this one!
When it comes to cake creativity, no one is as imaginative and fun to watch as Amy Droubay (@neuroticmom on Instagram), and I love turning to her for inspiration! Back around Labor Day I had seen a cake she made with an ice cream cone theme – beautifully decorated with seven cones for seven “daes” of “sundaes”! What kid doesn’t love ice cream? And somehow ice cream in December seemed even better! So an idea was born for a fun cake for Audrey & Beau! Here is the cake that inspired me:
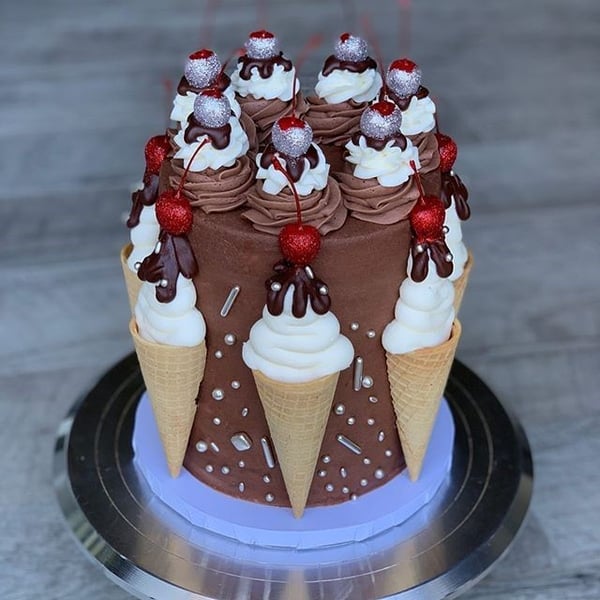
There was nothing about this cake that I didn’t love! The sugar-dipped cherries, the buttercream-filled cones, the sundae swirls of buttercream at the top – they all set my heart aflutter. Never mind the details: how many and what flavors the layers should be, what to use as filling between the layers, how on earth to get those cones to work… I could figure it out!
First, those cones.I really felt that if I could get the cones right, the rest would fall into place. I actually sent a message to Amy about how she cut the cones. My take on her reply was to be very careful and buy extras! So off I went and bought a box of 12 cones. Since I only needed to end up with seven, I figured that would work out just fine. But then, what to cut them with? I wasn’t sure any of my kitchen knives would be up to the task, so I asked my tool-guy husband if he had any fine-toothed saws I could use to cut sugar cones. He pulled several for me to check out, and I finally settled on a coping saw (before this I never knew the name of this saw) and a small craft saw. Here was my cutting board-turned-workshop-bench:
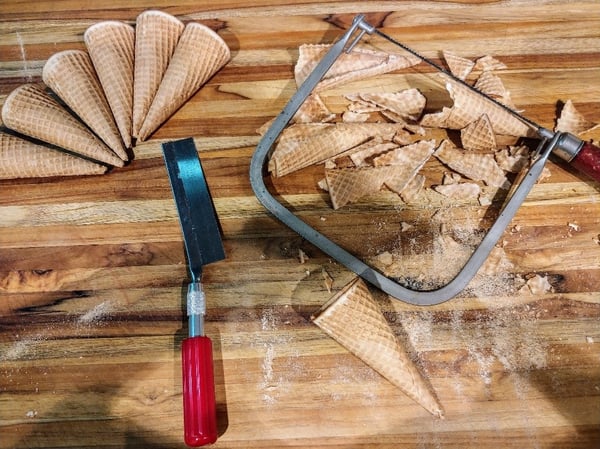
At first I thought I only needed to cut the cones in half. But when I placed a halved cone against a flat surface, they just didn’t sit right. When I took a closer look at the model cake, I realized they weren’t cut in half, but at an angle. What a relief that it only took one cone to figure that out! Here was the final result:
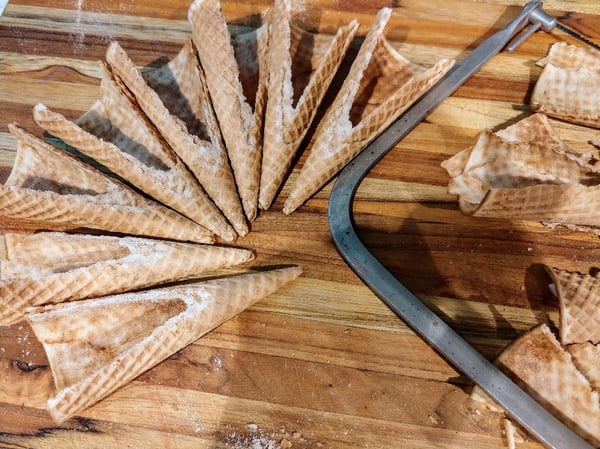
In the end, only four cones were lost in my quest for cone-perfection. I had eight cones to work with – one extra, “just in case”!
Now on to deciding the cake layers and filling. I wanted to do both a day ahead of time so they would have time to cool. Since we were talking ice cream, I thought it would be fun to bring together as many flavors of an ice cream sundae as possible. I went with alternating vanilla and chocolate layers for the cake flavors. I have go-to recipes for both and I baked two layers of each, not knowing if this cake would end up being three or four layers tall.
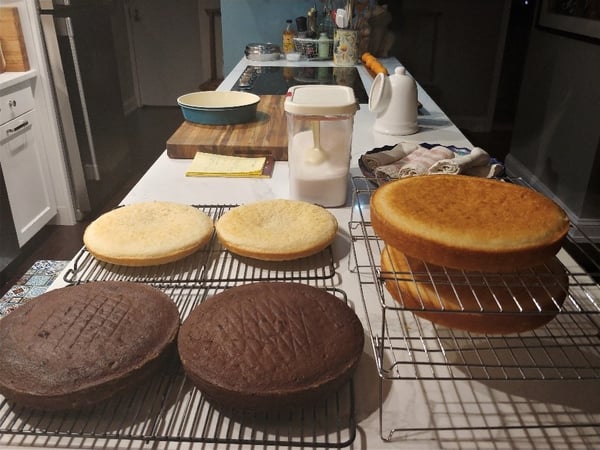
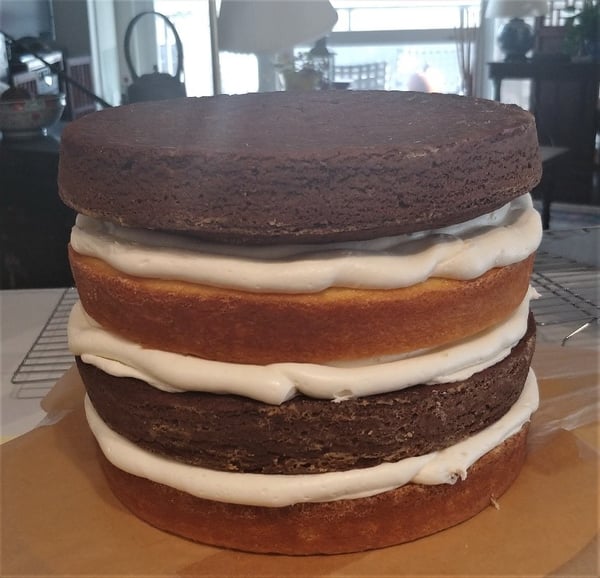
You may notice that there are indeed six cake layers here! Well, that’s because my first round of vanilla cakes were just awful. They didn’t rise properly and were gummy. I don’t know why. It was clearly an error on my part because, as you can see, the vanilla layers off to the right (round two) turned out perfectly. All I can say is that I’m glad I decided to bake the cake layers a day ahead of time instead of waiting until the last minute!
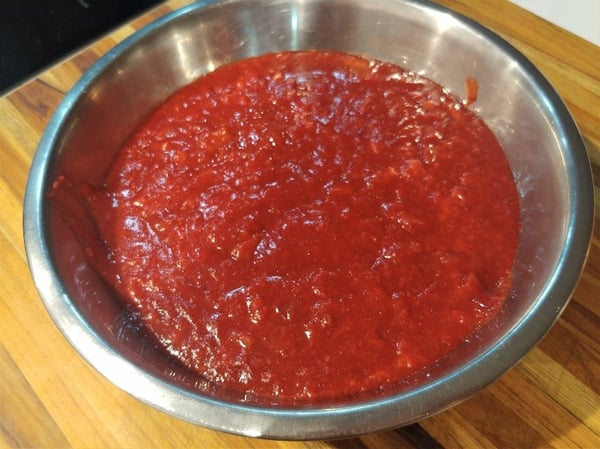
So what about the filling? When I think of ice cream sundaes I think of all kinds of toppings: chocolate syrup, strawberry topping, candied walnuts in syrup. Knowing that there would be chocolate “syrup” on the ice cream cones and not knowing if there would be any nut allergies in the group, I figured strawberry would do the job. Well, all those reasons plus I also have a kind of “go to” for strawberry filling! Honestly, it’s basically just sugar and strawberries cooked together to make a nice spreadable compote – and then tasting the way I want it to!
Once the cakes were cooled, I stacked them up and placed one of the cones along the side, just to measure. Turns out, it was a good thing I went for it and made four layers. Adding the height of the buttercream filling on top of the height of the cone, three layers was not going to be high enough.
With the cakes and filling done, I wanted to focus on the last details: those sugar-dipped cherries, the chocolate drizzle for topping the cones and swirls, and some details on the cones themselves.
The only maraschino cherries I was able to find did not have stems on them. Now I know they exist, but we couldn’t find them. No worries. Although they’re a nice detail, I just didn’t think anyone was going to wonder where the stems were. I had red sprinkles but when I just put them on the cherries right out of the jar, they kind of melted. So I set the cherries on a baking rack and let them air dry until they were just a bit tacky. Then I rolled them in the red sprinkles until they were coated, putting them back on the rack to dry. They were perfectly sparkly!
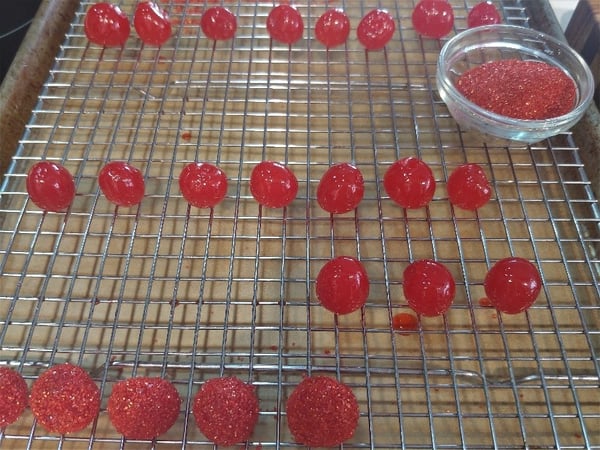
While the model cake had cherries with two different sugar coatings, I went with just the one. This was for no other reason than that I didn’t have another color in my sprinkle arsenal that would have worked as nicely. And in the end, it all came out just fine.
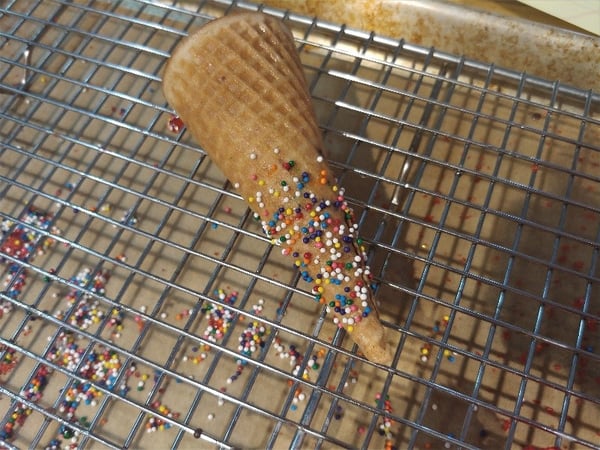
I also wanted to add one little detail that differed from the model cake. I decided to jazz up the cones a little bit. At first, my idea was just to add a bit of a sheen to them. I made a heavy sugar syrup and brushed it over the cones as they sat on a baking rack. But once the syrup coating began to dry and became a little bit tacky, I thought it might be fun to make them look as though they had been dipped in sprinkles along the bottom. So I added some multi-colored sprinkles, just around the bottom of my “extra” cone – and it looked great! I went ahead and did the rest, as well.
Finally, I made the chocolate drizzle for the cones and swirls. I just melted some chocolate and cream to make a little chocolate syrup. I made it on the thicker side so that it wouldn’t drip too far down and put it in a small squeeze bottle to make it super-easy to apply.
Now, fast forward to the next day to build the cake. I made up some vanilla and chocolate buttercreams. I always make more than I think I’ll need. It freezes well and I just happen to believe that you can never have too much buttercream hanging around. Really. I mean it. Extra is always good.
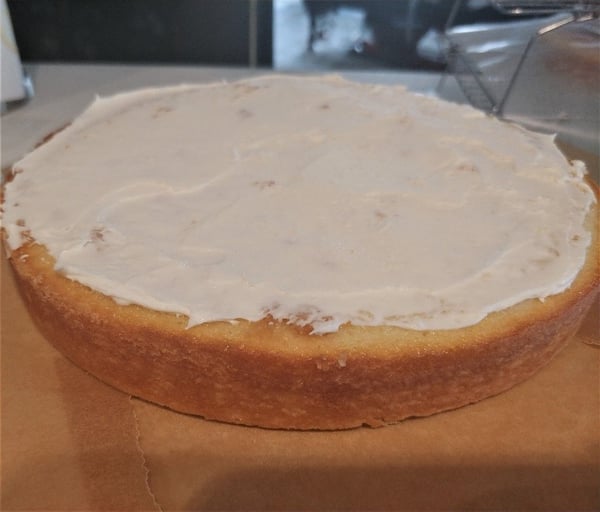
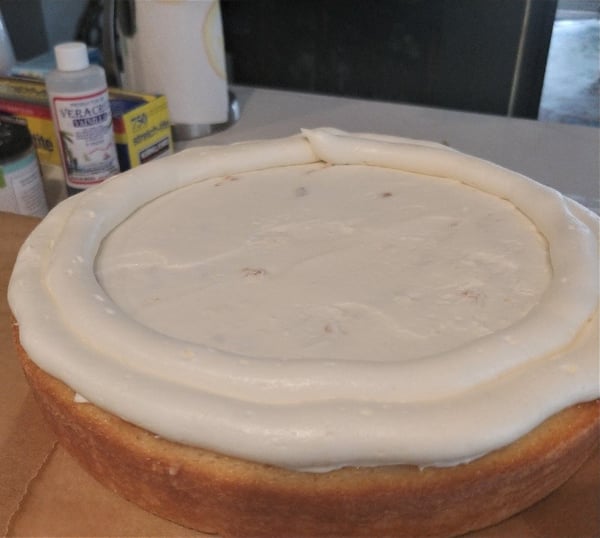
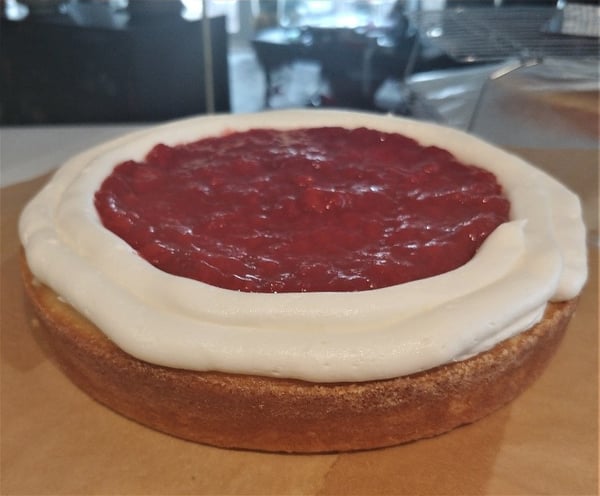
I decided to start with a vanilla layer. Since I wanted the focus of the filling to be the strawberry compote and not buttercream, I spread a thin layer of vanilla buttercream on the cake, just enough to keep the strawberry compote from seeping into the cake itself. Then I piped a little dam or wall around the perimeter of the cake to keep the strawberry compote from oozing out the sides. Finally, I spread a layer of strawberry compote inside the wall of buttercream.
I then repeated this process for each of the next three layers, alternating chocolate and vanilla cake layers. When I ended with the chocolate layer, I placed that one upside down. I like doing that so that it gives me a nice flat surface for frosting the top.
I set the entire cake in the refrigerator for a good 30 minutes to help keep it from sliding around when I start to frost the outside. Once it came out of the fridge, I applied a “crumb coat” of chocolate buttercream. This is just a thin layer of buttercream to give me a nice flat surface to work with.
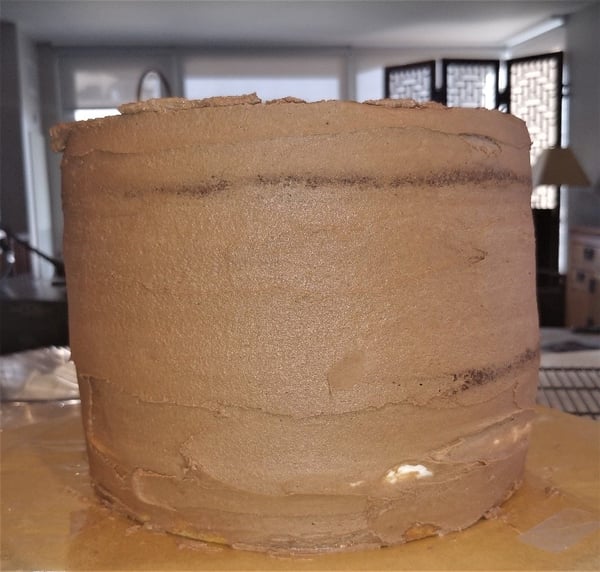
As you can see, this isn’t pretty and doesn’t need to be. I popped it back in the fridge for another 30 minutes or so and when it came out, the entire surface of the cake was ready to decorate with a final layer of buttercream (as thick as I wanted to make it) and all the additional details of this cake: cones, buttercream “ice cream”, sundae swirls, chocolate drips, sugar-dipped cherries and fun little sprinkles.
I have to admit, once I got started it was hard to stop to take pictures along the way. Suffice it to say, my husband had to laugh when he came in and found me literally giggling as I was filling the ice cream cones with buttercream! It was just so much darn fun to assemble. And while I was so focused on the cake itself, I almost forgot to add Audrey and Beau’s names to the top. While I was grateful that there was actually room at the end to do so, it would have been a whole lot easier to do that part first!
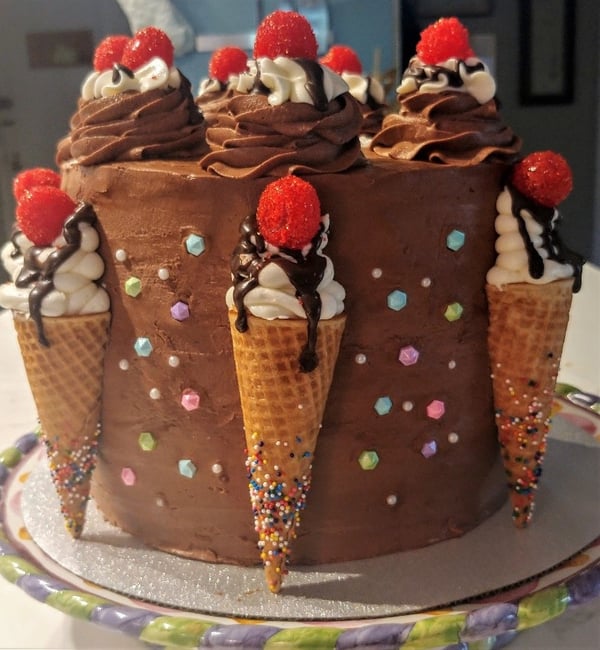
So here is a photo of the birthday cake when it was done…
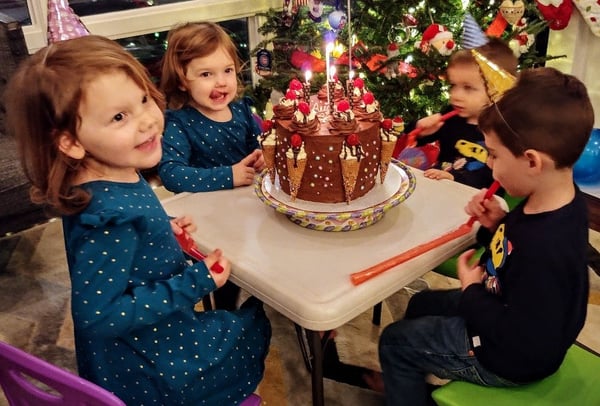
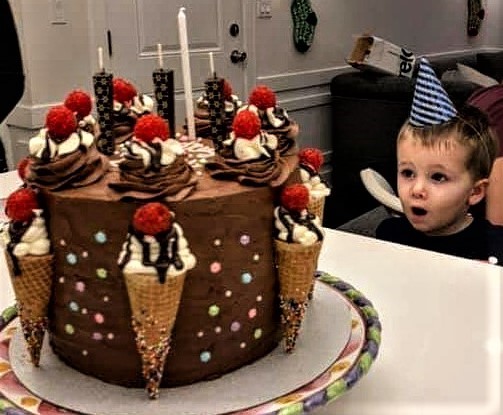
And really, these little faces made it all just perfect.
The Chopping Block is hosting a brand new Cake Decorating Workshop at the Mart in January. The January 12 session is already sold out, and there are only 2 spots left in the January 19 session. This workshop will be so much fun and will feature:
- Working with acetate paper
- Cake assembly
- Crumb coating
- Piping techniques
- Working with cake decorations
- How to make buttercream
- Working with gel food coloring
Grab those last two spots and learn how to decorate a stunning cake.
