For those of you who don’t know, we announce a cooking challenge each week in The Chopping Block's private Facebook group. If you aren't already a member, it’s a great way to connect with others who love to cook! This week features citrus as the topic, so I thought it would be the perfect time to show you how to candy citrus slices. You can use nearly any citrus, but I’ll be focusing on oranges. And since it's now the end of the week, I like to think of it as a “sweet ending” to the challenge!
I love candied orange slices! You can gift them, use them as decoration on cakes, toppers for cupcakes, garnish for cocktails or sodas, or just eat them as a snack if you haven’t filled your quota of fruit servings for the day. Okay, maybe that last one carries a little “wink” with it, but they are genuinely delicious for a little pick-me-up snack!
You will want to use naval oranges so you don’t have to be concerned about seeds. If I don’t have a specific project in mind and am just making a batch to have on hand, I’ll generally use two oranges. The sugar and water measures here would be good for up to four oranges. Each orange usually yields 8-12 slices. In addition to oranges, the only other ingredients you will need are water and sugar.
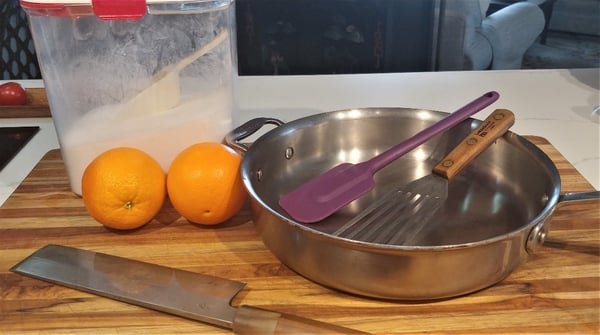 Equipment-wise, you’ll want your sharpest knife that also slices the most thinly of any of your knives. A pan about 12 inches across will give you ample surface area so your slices can spread out. I prefer a straight-sided sauté pan, about 2 inches deep. A slope-sided skillet will allow the sugar syrup and orange slices to slide around too much, increasing the risk of spills (messy) or burns (ouch). You can always opt to use a Dutch oven, but I find the depth makes it just a little bit more difficult to easily access the orange slices as they simmer. Finally, you will need one or two sheet pans lined with parchment and a rack for draining and drying the slices (not pictured).
First, slice the oranges. You’ll want to slice them thinly, about 1/8-inch thick, trying to slice as straight down through the orange as possible. Here’s a little video to guide you:
With your oranges sliced, you can make the sugar syrup. Pour 4 cups of water and 4.5 cups of granulated sugar into the pan and bring it to a boil over medium-high heat, stirring constantly. It will seem like a lot of sugar, but trust me, it will dissolve. A typical sugar syrup is equal parts sugar and water. In this case, the syrup is a bit “heavier”, that is, a bit more sugar than water. This will provide a better coating to the orange slices.
As soon as the sugar is completely dissolved and the syrup just comes to a boil, lower the heat to about medium-low and slide your orange slices in one at a time. Adding the slices individually is important so they don’t stick together. It’s fine if they touch or overlap once they are in the syrup. As you slide them into the syrup, just let the end touch the syrup and then let them glide away from you. Do not let your fingers touch the syrup – sugar burns are not fun. But since the syrup will not be spattering and you won’t be dropping the slices in from any height, you’ll be fine.
You want the syrup to continue to slowly simmer; too hard of a boil will tear at the flesh of the orange. You can occasionally turn the slices or slide them under/over one another as they cook. I like using a fish spatula to turn them (and to remove them later). It is thin enough to slide between the slices and makes it easy to manipulate them. If you don’t have a fish spatula, any spatula will do; just don’t use tongs, as they are apt to tear the flesh of the orange. Here’s a video to help you get those orange slices safely into the syrup:
Let the slices simmer for about 30 minutes, perhaps a bit longer. This time around was closer to 40 minutes. The rind should become translucent and the flesh will be very tender. Turn your heat off so the syrup is no longer simmering while you are removing the slices to a rack set into a parchment-lined sheet pan. Here’s a video to show you how to know when they’re ready to come out:
Once the slices have been removed, turn the heat to medium so that the syrup comes to a gentle boil. Let it go for about 10 minutes, letting it reduce and thicken. After 10 minutes, take the pan off the heat and stir the syrup, gently scraping the bottom of the pan with a silicone spatula in case any sugar started to stick a bit. Once the syrup has cooled, strain it through a fine-mesh strainer into a bowl and let it cool completely. You now have about 3 cups of orange syrup!
You can store this beautiful syrup in an airtight container in the fridge for up to a month. It’s great drizzled over ice cream, as an additive to sodas or cocktails, in dressings, on poultry, brushed on cake layers or fruit tarts. Use it anytime you want a little hint of orange flavor. Keep in mind that the more oranges you use, the more orange flavored the syrup will be.
Once you’ve reduced the syrup and set it aside to cool, the orange slices should be cool enough to handle. They will be very sticky if you handle them, but here is a tasty touch you can do to jazz them up just a little:
And here are your candied orange slices! Those in the bottom row have had their edges sugared, do you can see how they kind of sparkle.
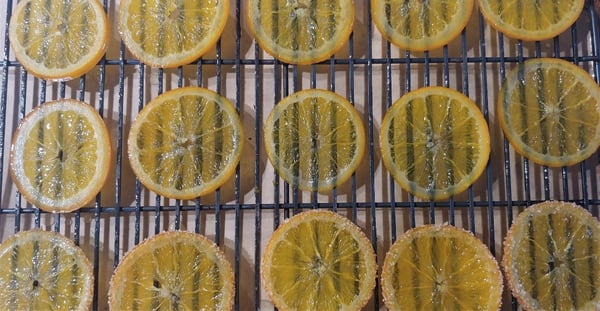 You will want to let them sit out at room temperature overnight (uncovered) until they are fully dried before storing them in an airtight container in the fridge. If they stick together more than you’d like, let them sit out a little longer. And if you want to prevent them from sticking together in the fridge, you can always place a piece of waxed paper between the slices. Note that as they dry out, they will deepen in color.
As I mentioned at the beginning, you can use your candied orange slices for just about anything from cake or cocktail garnish to snacking. I like to melt chocolate (semisweet baking chocolate works well) and dip the slices in, sometimes decorating them with whatever sprinkles I have on hand, like these little pearl drops. Just dip the dried orange slice into the melted chocolate and set it onto a piece of parchment to dry.
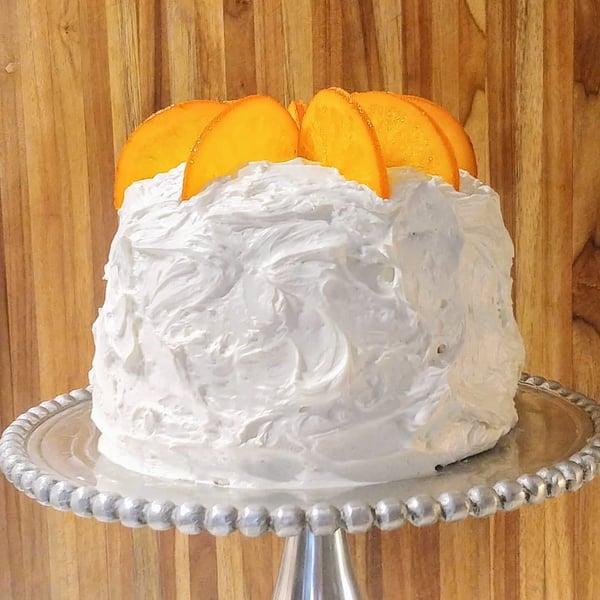
 Over the weekend, I also used them as garnish on a cake, where the inside was orange flavored, so they made a nice pairing with the cake (I also brushed the cake layers with syrup before putting the frosting in between).
 However you choose to enjoy them, I hope they bring a sweet ending to your week!
Want to learn how to make more seasonal sweet treats? Join us for a virtual Easter Treats Workshop on Saturday, April 3 at 2pm CST. You'll learn how to make:
- Hot Cross Buns
- Lemon Bars with Powdered Sugar

We also have a virtual Cupcake Workshop on Saturday, April 24 at 2pm CST featuring:
- Lavender “Hot Milk” Cupcakes with White Chocolate-Lemon Ganache
- Devil's Food Cupcake with Roasted Banana Buttercream and Dulce de Leche

If you want to show off your citrus creations in our private Facebook group, you have all weekend to do so!