
Our Summer Canning and Preserving class, which features a new menu, is coming up in a few weeks! Because it’s a new menu, I went ahead and tested a couple of the recipes to ensure they worked well, tasted good, and produced the correct yields.
The recipe I decided to take on first was the Spicy Red and Green Pepper Jelly. I chose this one because I am a sucker for savory jellies especially when they are served over delicious, ripe cheeses.
If you like to entertain, this jelly should definitely be on your to-do list. I ended up doubling the recipe so I could give away a few jars as gifts… who doesn’t like to be the recipient of homemade jelly?
The first task I needed to accomplish was to procure the canning supplies and ingredients. You can find most of the canning supplies at a hardware store or a grocery store. I was pleasantly surprised to find all of the equipment and ingredients at my local Jewel.
Here’s what you’ll need:
- The correct size Ball jars your recipe calls for. If you already have jars, get yourself some new lids. This will ensure a proper seal.
- A wide-mouth funnel.
- A pair of jar lifters. These are essential for transferring your jars to and from the hot water.
- A large stock pot with a small rack that fits on the bottom. If you don’t have a rack, be creative! You can use old canning lids joined together by twist ties to line the bottom of your pot. Or, make your own rack out of foil.
- Pectin. The red and green pepper jelly calls for Sure-Jell less- or no-sugar-needed pectin because there’s not as much sugar in the savory jelly as there is in your typical sweet jelly. Using this pectin will ensure your jelly sets up.
When you purchase the Ball jars, there’s a lot of really good how-to-can information that’s included, but here are some of my own tips:
How to Safely Can Your Vegetables and Fruit
- Wash the jars and tops with hot soapy water.
- Sterilize the jars on a sheet pan in a 350 oven for 10 minutes… this also ensures that the jars are hot before you fill them so they don’t crack.
- Wipe the rims with a damp cloth before putting on the lids. Secure the lids tightly by hand.
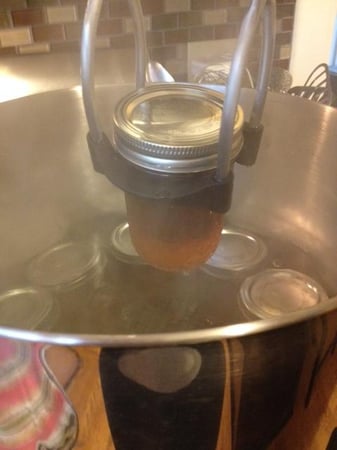
- Set a rack in a deep pot that’s half filled with water and put the pot over a high flame. When the water is almost boiling, you can place the jars in the pot. Add more hot water if needed to cover the jars by 2-inches. Bring the water to a full boil. Keep it boiling for the amount of time indicated in your recipe, usually 10 to 20 minutes.
- When the time is up, remove the jars. Set them on a dry towel and let them cool, undisturbed, for 12 hours.
- After the jars have cooled, gently remove the screw bands and test the seals by lifting the jar by its lid.
- Store the sealed jars in a cool dry place. Any jars that fail to seal should be stored in the refrigerator and used within a few days.
I know it seems like there are a lot of moving parts to the canning process, but it’s so worth it! Once you start, you won’t be able to stop. It’s incredibly satisfying to see rows and rows of canned goods lined up on your shelf, knowing that you’ll be enjoying them throughout the winter months.
If you want to learn more about the canning process, and pick up some more delicious recipes, then sign up for The Chopping Block's Summer Canning and Preserving cooking class on September 13th at the Lincoln Square location. Just wait until you try the Tomato Salsa!
Red and Green Hot Pepper Jelly
Yield: Five 1/2-pint (1 cup) jars
Active time: 35 minutes
Start to finish: 50 minutes
3/4 pound red bell peppers, seeded and cut into 1-inch pieces
3/4 pound jalapeños, seeded and cut into 1-inch pieces
3 tablespoons Sure-Jell less- or no-sugar-needed pectin (see note, below)
3 1/4 cups granulated sugar
1 cup white wine vinegar
1 tablespoon butter
3/4 teaspoon kosher salt
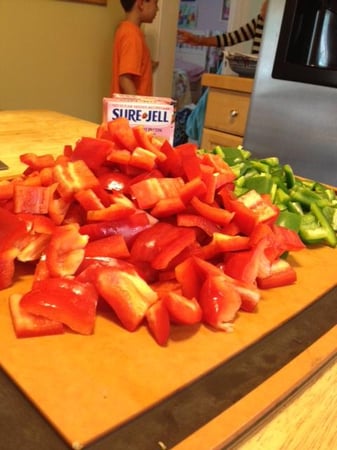
- To prepare the jars wash them with hot, soapy water to ensure they are sanitized. Tip: A great way to sanitize your jars is in a 350° oven for about 10 minutes.
- Place the lid pieces in a saucepan, and cover with water. Bring the lids to a boil, and remove from the heat. Keep the lids in the hot water until ready to use. This will make the lids more malleable, so you get an extra tight seal.
- Place the peppers in a food processor, and process until finely chopped. Measure out 2 1/2 cups of the peppers.
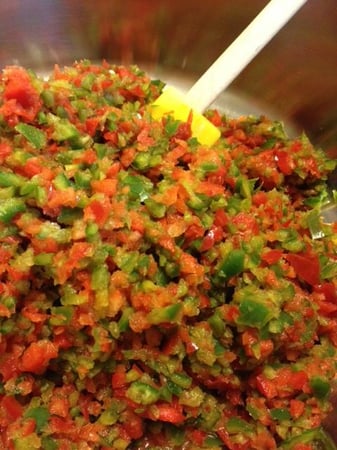
- In a small bowl whisk together the pectin and 1/4 cup sugar.
- In a large saucepan stir together the pepper mixture, vinegar, butter, salt and remaining 3 cups of sugar.
- Bring to a rolling boil over high heat. Allow to boil for 5 minutes, stirring occasionally.
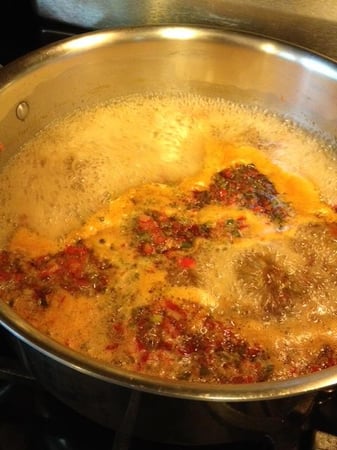
- Gradually add in the pectin-sugar mixture while whisking constantly. Return to a full boil and boil for 1 to 2 minutes, stirring continually.
- Remove from the heat, and skim off any foam with a spoon.
- Ladle the mixture into the prepared jars, leaving about 1/4 inch of head room at the top.
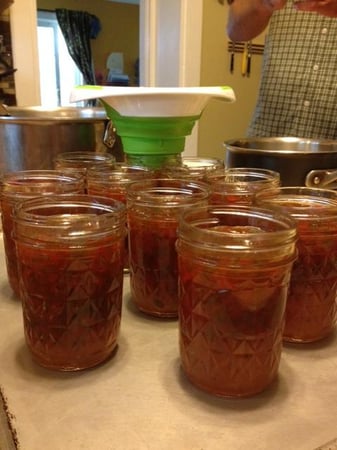
- Wipe the jar rims and threads, and tightly screw on the 2-piece lids.
- Carefully set the jars in the pot of hot water, cover and bring to a boil, and process for 15 minutes.
NOTE: Recipes that call for Sure-Jell less- or no-sugar-needed pectin have less sugar added to them, and this particular pectin will ensure your pepper jelly properly sets up.
The September class is the last of our canning classes of the season. So, don't miss it! It's also a great time of year to make Apple Butter, so use your new-found canning skills for that recipe too.

