

I have had an idea for a book called “Pickled Ginger” for years. No, it’s not a cookbook and nor does it really have much connection with cooking at all. The idea stemmed from my own experience eating pickled ginger. My first opportunity to eat sushi was back in San Diego some 30 years ago; it was also my first time tasting the traditional accompaniments: pickled ginger or gari and wasabi. The sushi and wasabi were love at first sight, pickled ginger - not so much. I thought pickled ginger tasted like soap and for the life of me, couldn’t understand why people would want to eat it.
Most people I know would stop there. Pickled ginger is gross and tastes like soap so why should I ever try it again? But I like to come at things a little differently. There are millions of people who eat and love pickled ginger, so what am I missing? I will keep trying pickled ginger every single time I eat sushi until I experience that magical moment of discovery, the moment when the taste of pickled ginger becomes delicious.
After a few years of persistently tasting it every time I ate sushi, I got to experience that magical moment of discovery, and now I know I love pickled ginger! You might ask why would I even put myself through tasting something over and over I don’t like. Because my theory is that the more things you like (food, people, places, music, activities), the happier and fuller your life will be. Hence my book idea: the more you learn to love things the more sense of joy, gratitude and overall happiness you experience. I am lucky enough to find joy in so many places, but I believe part of the reason I do is because I work toward it.
I can’t help but reflect for a minute on the irony of going from not liking pickled ginger to liking it so much that I make my own and then share with you how to do it. I’ve written a couple of blogs over the last few months inspired partly by the fact that I grew my own ginger for the first time this year. I would highly recommend it if you have a sunny spot in your yard. It is really simple to do and my harvest was substantial enough to make it worth my while.
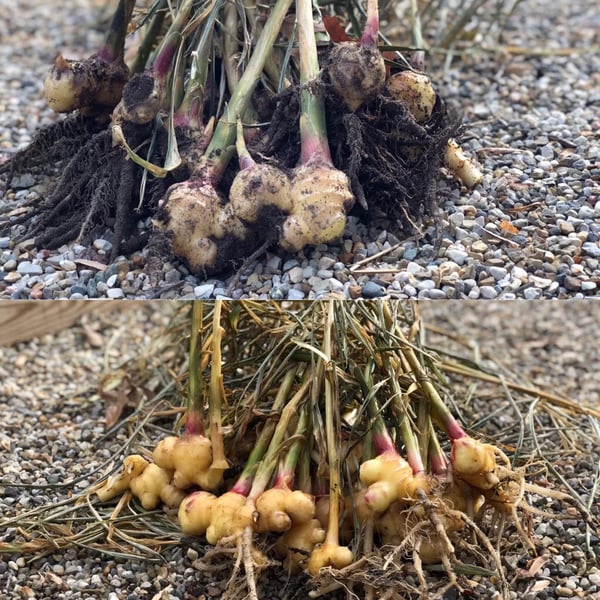
I planted one large piece of ginger, maybe 8 ounces and got about 4 pounds. The ginger is incredibly tender and fresh, something hard to find in the stores, so it's definitely worth growing if you want to crystalize your own or make your own pickled ginger. The fresher and more tender the ginger, the better for these recipes but don’t let that stop you - you can make these recipes with ginger from the grocery store. and it is simple enough to do. This recipe it a great winter activity to do with the kids, too. Let me give you the step by step process.
Pickled Ginger (Gari)
Scroll down for a printable version of this recipe
Yield: 2 to 3 pints
Prep Time: 30 minutes
Cook Time: 5 minutes
1 pound of fresh ginger, peeled and sliced very thin
1 1/2 teaspoons kosher salt
3/4 cup sugar
1 1/2 cup rice wine vinegar
1/4 cup water
1 1/2 teaspoon kosher salt
Peel the Ginger
I’ll offer two videos on how to peel ginger. In the first one, I am peeling ginger you will find at the grocery store.
In the second video, I am peeling the young fresh ginger I grew so you can see the difference.
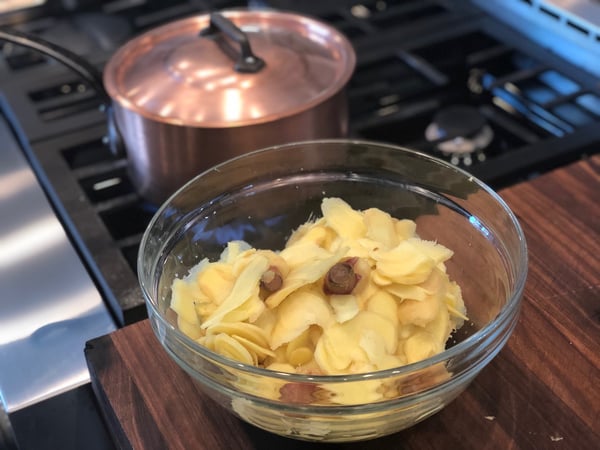
Slice the Ginger
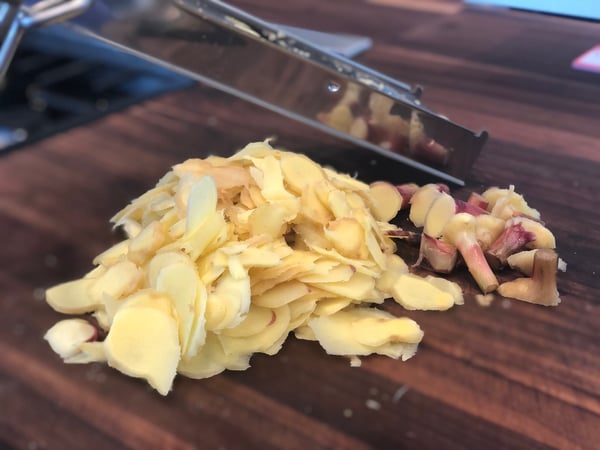
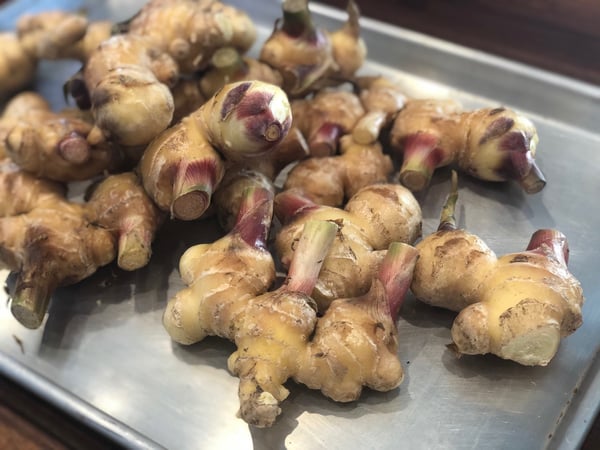
You can slice the ginger with a mandolin or with a vegetable peeler. If you are lucky enough to find young ginger liked I used, you will see the red sprouts attached to the ginger. Save a few of these for each jar of ginger. Simply take these red sprouts and include them with the sliced ginger through each of the following steps. These red sprouts are what give the ginger its classic pink color.
If you do not have these sprouts, you can eliminate the pink color from the ginger completely. You can also add one drop of red food coloring to the pickling brine which you will prepare later.
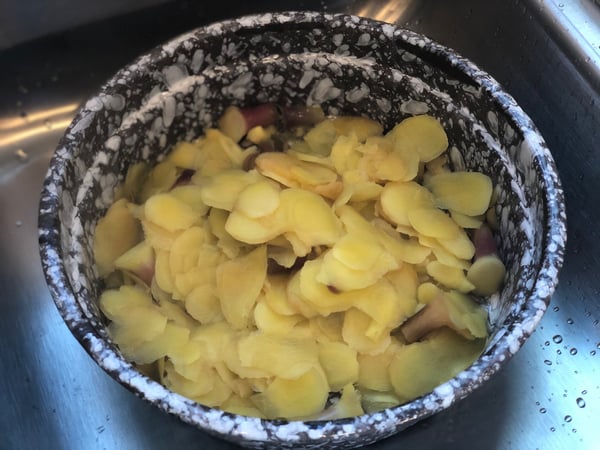
Salt the Ginger Slices
Toss the sliced ginger with 1 1/2 teaspoons of kosher salt and let sit for 5 minutes. Drain ginger in a colander and rinse briefly.
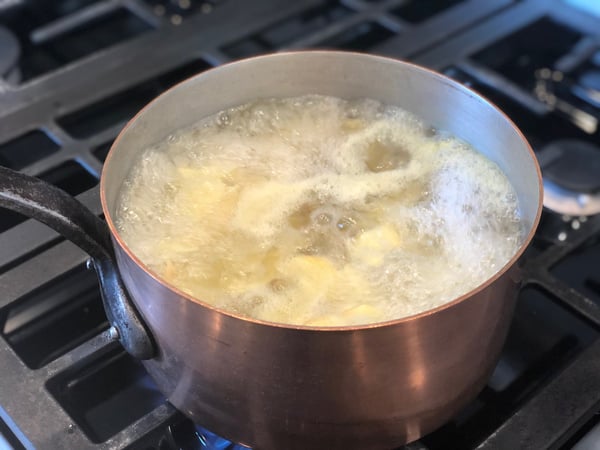
Boil Ginger
In a 3-quart sauce pan bring water to a boil, add drained ginger to boiling water. Place lid on pot and bring to a boil for 1 minute. Drain the ginger and rinse with cool water briefly.
Make Pickling Solution
Bring sugar, rice wine vinegar, water and 1 ½ teaspoons of kosher salt to a boil. Cook just until the sugar and salt dissolve.
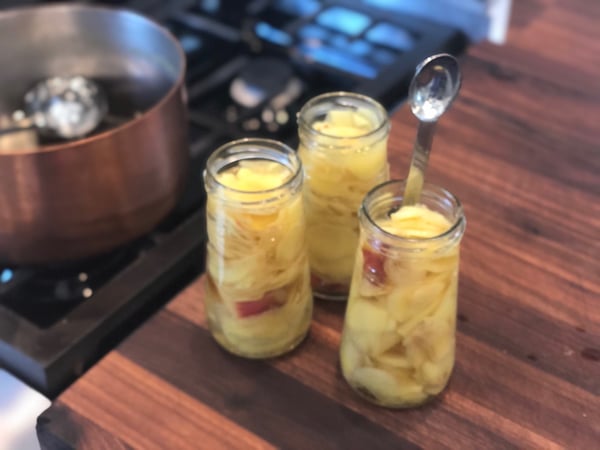
Place Ginger in Sterilized Jars
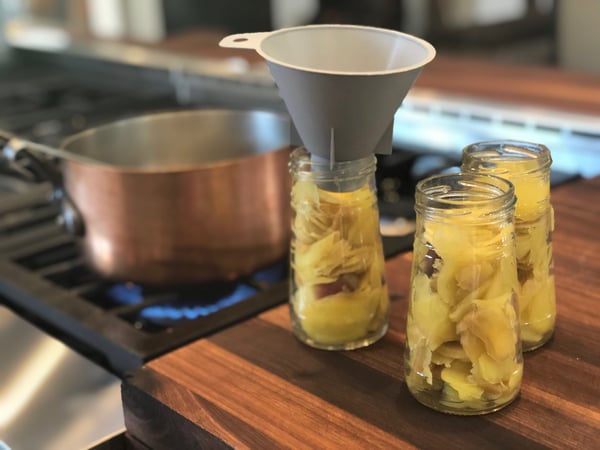
Wash 3-pint jars and sterilize by placing jars and lids in a 200-degree oven for 20 minutes. Remove hot jars from the oven and fill with warm sliced ginger and top with the pickling solution.
Run a spoon handle or knife around the jar to release any air pockets that might be there. Put the lid on the ginger.
Store Pickled Ginger
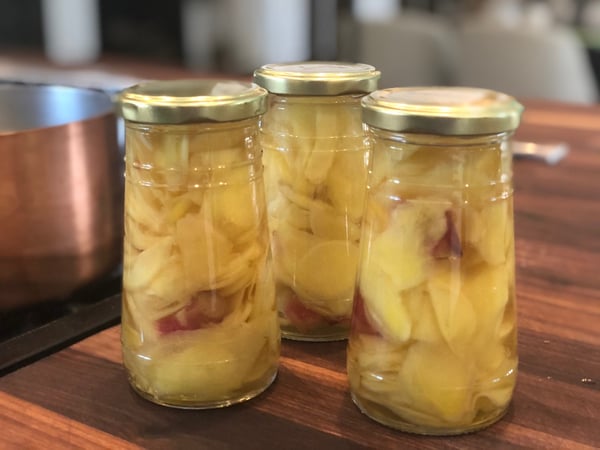
Refrigerate ginger until you are ready to enjoy. The ginger will last up to a year in the refrigerator. If you happened to have the red sprouts to include in your ginger, you should note that the color will take time to release and will vary. This photo is of the ginger I just made so the color hasn’t entirely released yet.
I hope you enjoy this recipe and as always, I would love to hear your feedback and questions in the comment section below. Of course, since we now offer our sushi classes virtually, you can also give me your feedback live! If you have kids who love sushi, you might want to try making your own pickled ginger with them and then taking a virtual sushi class with your kids. I know how expensive it is to get take out sushi for an entire family, so making it at home is not only fun but saves a ton of money!
Join us for our next Virtual Sushi Night on Thursday, December 3 at 6pm CST. You'll learn how to make:
- Maki Rolls
- Inside-out Maki Rolls
- Spicy Tuna


Pickled Ginger
Ingredients
- 1 pound of fresh ginger, peeled and sliced very thin
- 1 1/2 teaspoons kosher salt
- 3/4 cup sugar
- 1 1/2 cup rice wine vinegar
- 1/4 cup water
- 1 1/2 teaspoon kosher salt
Instructions
- Peel the ginger.
- Slice the ginger with a mandolin or with a vegetable peeler.
- Toss the sliced ginger with 1 ½ teaspoons of kosher salt and let sit for 5 minutes. Drain ginger in a colander and rinse briefly.
- In a 3-quart sauce pan bring water to a boil, add drained ginger to boiling water. Place lid on pot and bring to a boil for 1 minute. Drain the ginger and rinse with cool water briefly.
- Bring sugar, rice wine vinegar, water and 1 ½ teaspoons of kosher salt to a boil. Cook just until the sugar and salt dissolve.
- Wash 3-pint jars and sterilize by placing jars and lids in a 200-degree oven for 20 minutes. Remove hot jars from the oven and fill with warm sliced ginger and top with the pickling solution.
- Run a spoon handle or knife around the jar to release any air pockets that might be there. Put the lid on the ginger.
- Refrigerate ginger until you are ready to enjoy. The ginger will last up to a year in the refrigerator.