The time of year for cooking large cuts of meat is upon us. We are not worried about warming up the house too much and as our schedules begin to fill up more having those leftovers comes in handy!
Students often ask me what is the point of tying a roast, especially if it’s a single piece. Normally I will throw a few questions back at them such as: what cut is it, is it misshapen, are there any large veins of fat running through the center, will you be stuffing it, how long do you have to cook it, are you glazing or smearing it in anything?
Some of the many different meat cuts available are quite sturdy and don't need any help. Some are multiple muscles that may stay together at first, but as they cook and become tender, they will start separating. I usually say when in doubt tie your roast because it is not going to hurt anything.
Cuts like a tenderloin wouldn’t need to be tied normally, however they often thin out at the “tail end.” In order to make sure it cooks evenly, fits in your roasting pan, and you don’t need to trim all of that good meat off, I will fold the thin end under itself and tie to secure it. Cuts like shoulder or rump are large and need to cook much longer and slower, so for the most part I will not tie these cuts unless they are oddly shaped. Tying can create a rounder final product for large cuts. As you get into more high-end cuts like Prime rib, we are still under the assumption that they will not need much securing either. Some cuts like Sirloin roast, Chuck Roast, or Bottom Round Roast have odd shapes and tendons or fat running through the center. By tying these cuts, you not only force them to stay in a unified shape to make it cook more evenly throughout, but you also restrain the side muscle from falling apart from the mass as the fat renders and tendons tenderize.
I think that taking a cut of any animal and stuffing it is a great way to add limitless flavor to an otherwise simple meal. When I am planning to stuff a loin, I will often use a “roll cut.” This is a great for round loins, but you will not need to go through all of this for a flatter cut like flank or skirt steak. In either case, you are just trying to take protein and make it as flat and thin as you can while still maintaining the structure of its muscle fibers. For a flank or skirt this is naturally ready to go and aside from laterally slicing it and opening it like a book, there is little to be done. Here I will show you a great way to take a thick loin (in this case, pork) and roll cut it then using what I like to call a “corset tie," to tightly secure the roll together.
How to Roll Cut and Tie a Roast
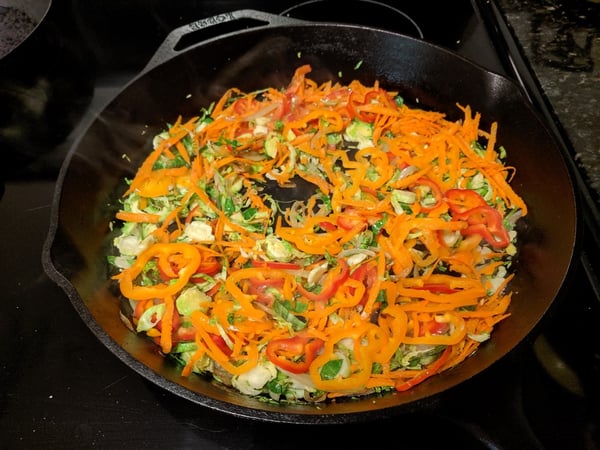
I like to use the stuffing as a refrigerator clean out. I chose to use onion, carrot, peppers, and Brussels Sprouts. I also recommend using a loin that is at least close to the length of your knife the first time to require as little knife movement as possible.
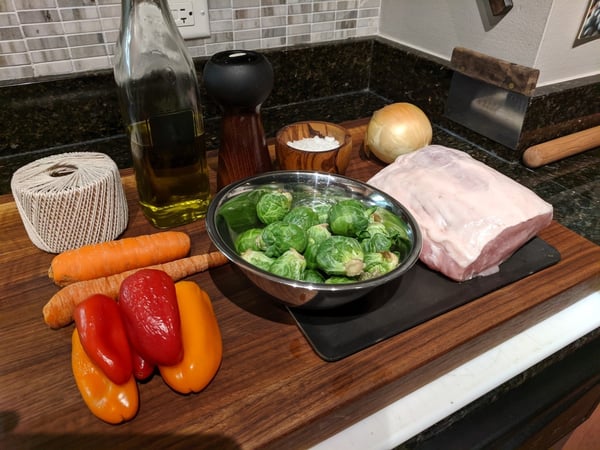
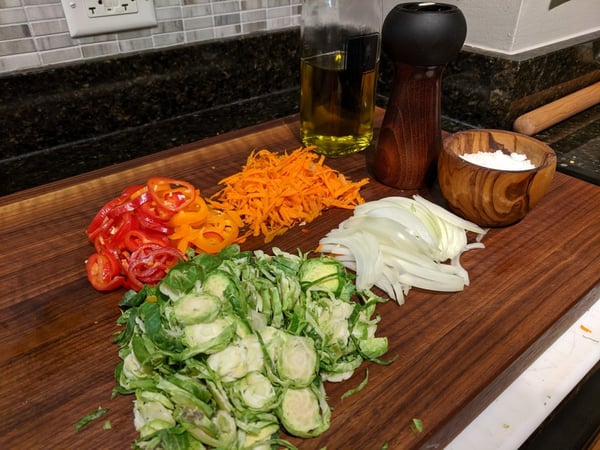
When making a stuffing with veggies you want to be sure to go smaller so that they are more mobile for the rolling process later. I chose to julienne my onion, coin slice my mini peppers, course shred my carrot, and thin shred my Brussels sprouts.
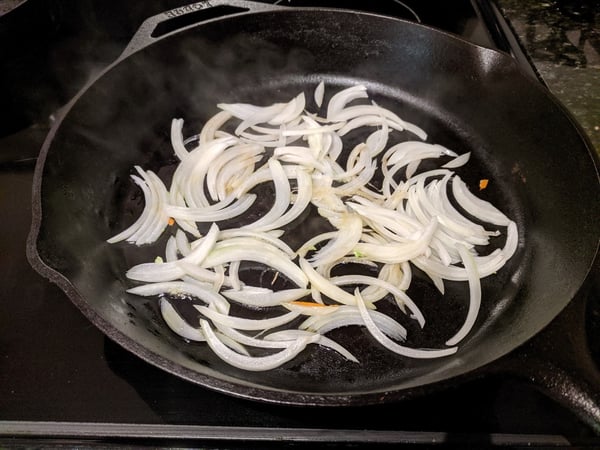
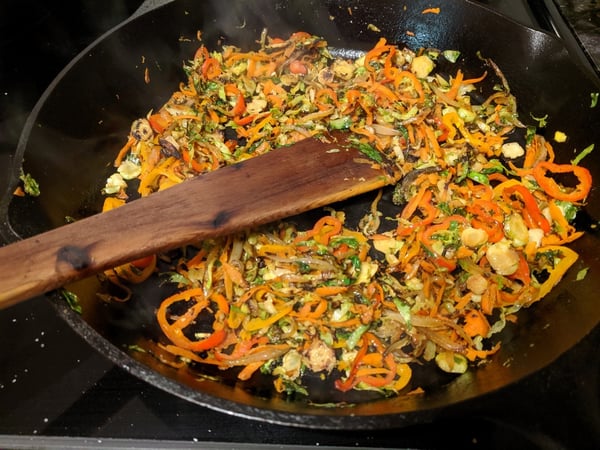
Creating a depth of flavor is important and so is cooking out a lot of the vegetables' natural water. I start by sautéing my onions on high with a tablespoon of oil until they are caramelized, then I add my Brussels sprouts.
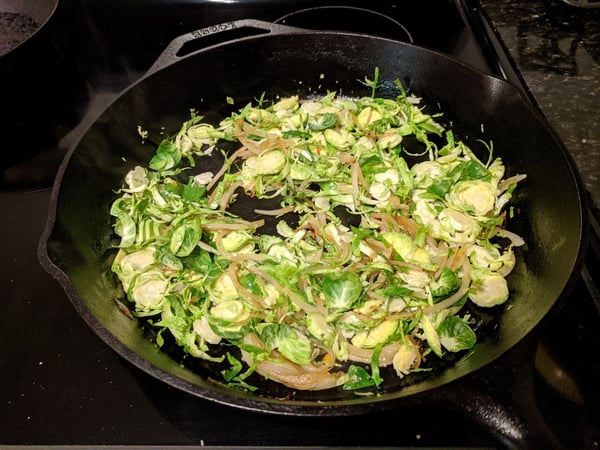
Next, I add the carrots and peppers then lower the temperature and allow them to cook down until everything is tender and sweet. Remember to salt and paper lightly every time you add something to the pan.
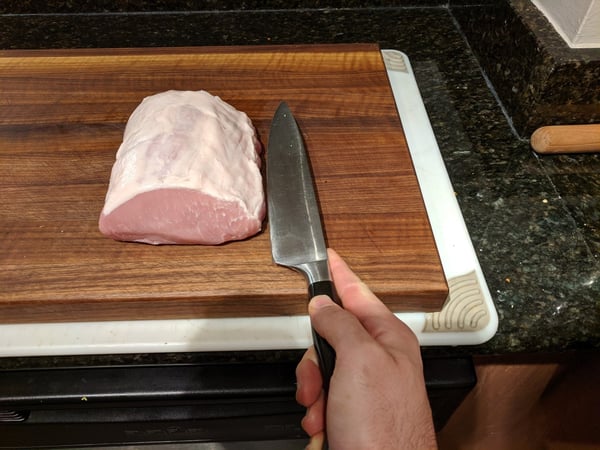
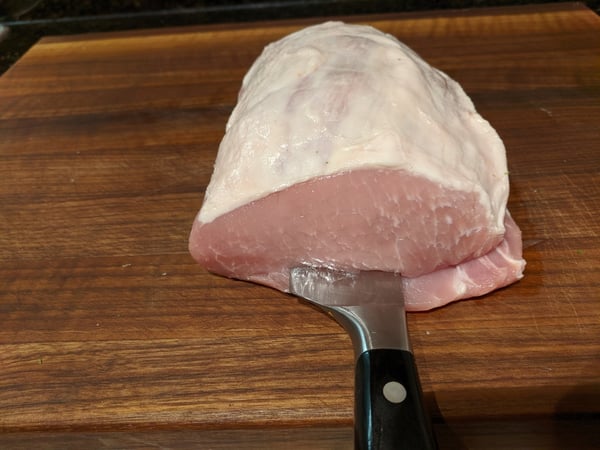
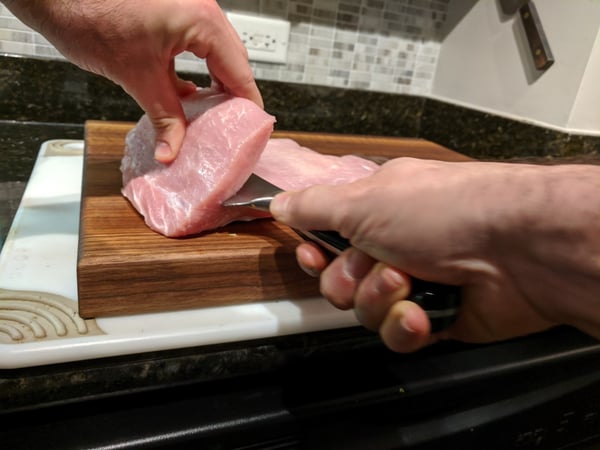
Roll cutting the loin is next, and you will want a sharp knife for this to reduce the amount of force you are using, or you may cut straight through the back side.

Start by holding your knife 1/2-inch off of the cutting board making sure that it is level all the way across. The most important thing to remember it to keep your knife level and don’t let the tip drop down.
Begin moving it forward and back gently pressing it into the side of your loin maintaining the 1/2-inch height and cut until you are 1-inch from the back side. Start lifting the upper piece to keep the pressure from the blade and to give you a better view of your cut.
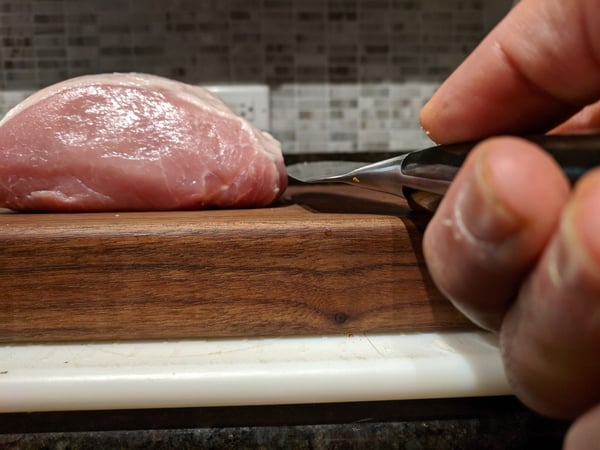
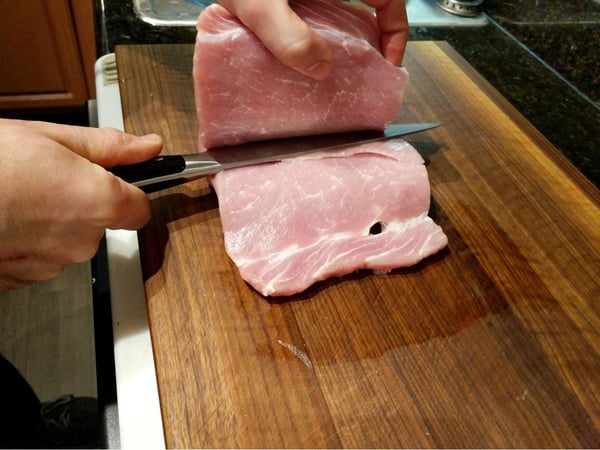
As you continue cutting and reach 1/2 inch from the back side of your meat you can gradually open the loin like a book and continue the cut into the upper lobe.
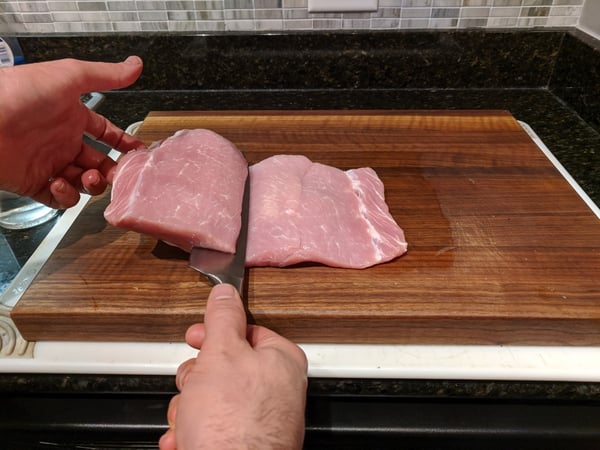
You may repeat this as many times as needed. If your meat is larger it is okay to roll cut thicker than ½-inch.
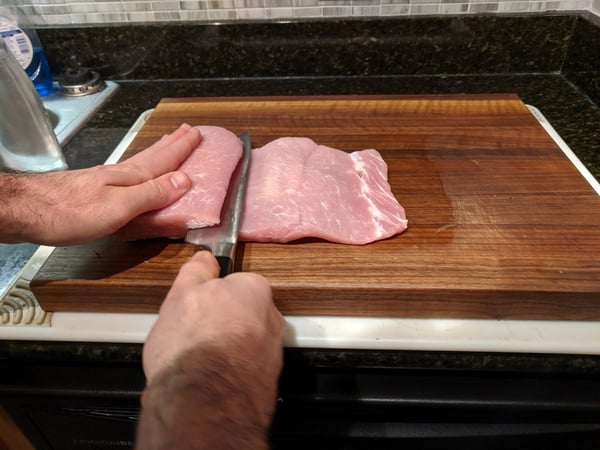
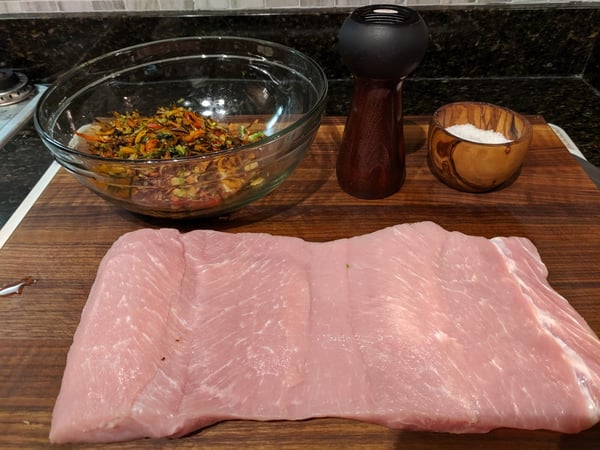
At this point you should be looking at a large rectangle as in the picture above. If not, don’t stress - any imperfections can be covered up with the filling and no one will be the wiser.
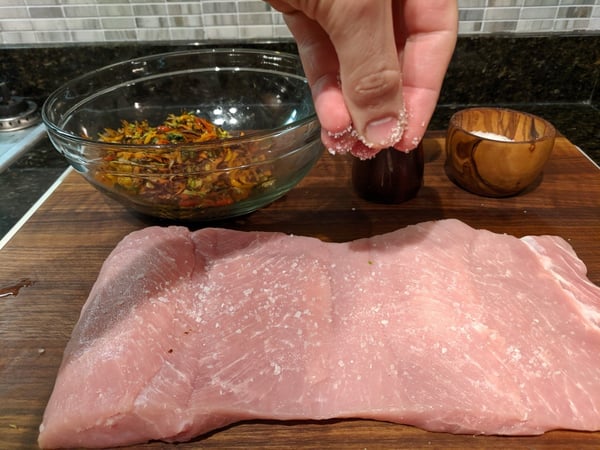
You want to be sure to season the meat with salt and pepper, this is a rare chance to season the inside of a roast which usually we need to make up for on the outside.
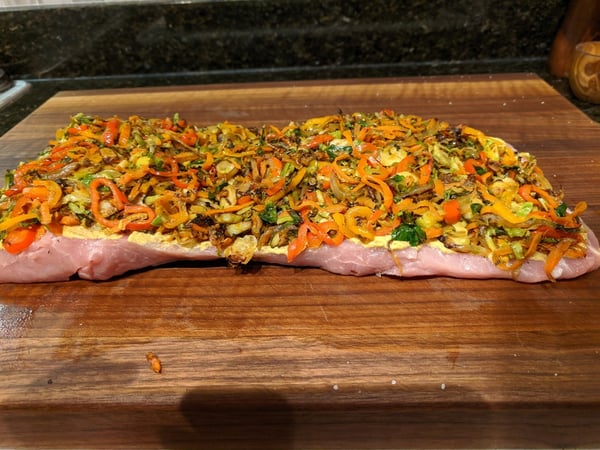
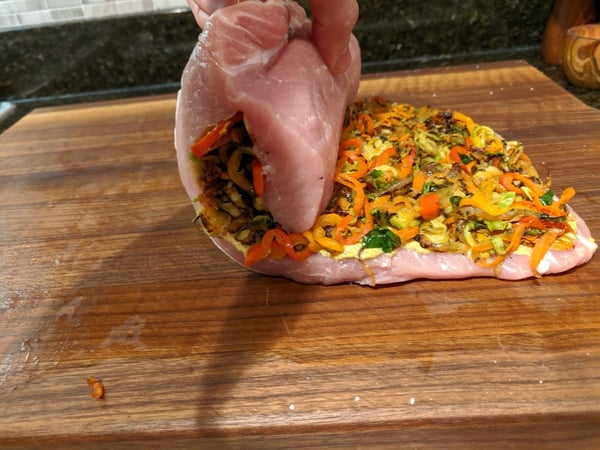
Now disperse your stuffing all the way across evenly, I spread a thin layer of whole grain mustard on mine for a little extra flavor, but that is purely optional and interchangeable with other sauces.
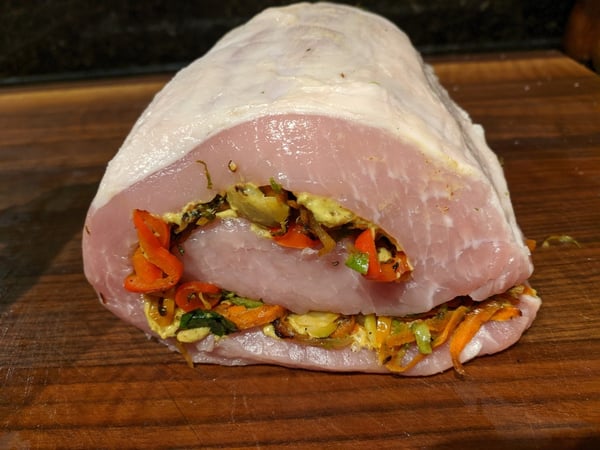
The rolling is as simple as rolling up a sleeping bag. Be sure to keep it tight but not so tight that you squeeze the stuffing out the ends.
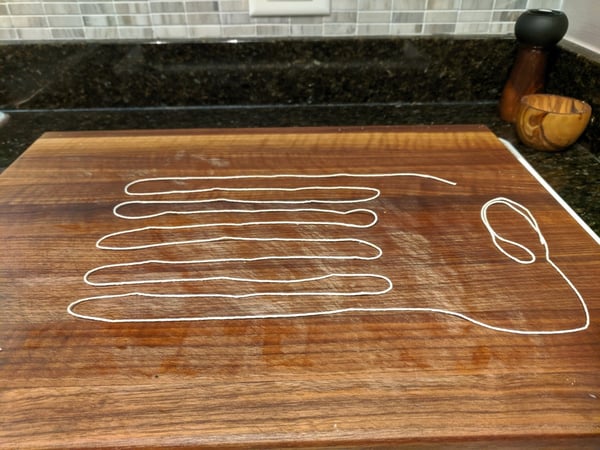
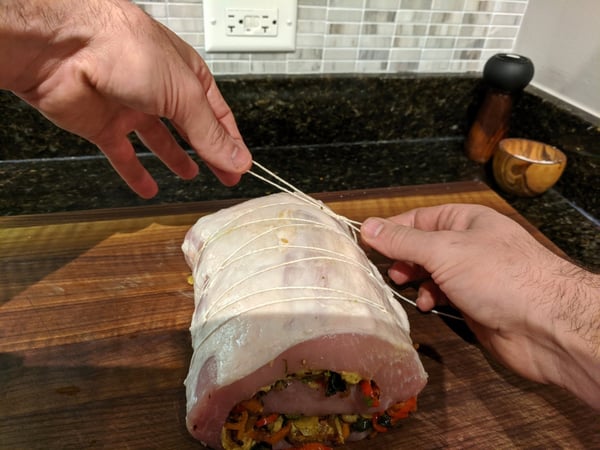
The corset tying technique is a great method that I choose for its versatility and because it is easier for small handed individuals. You start by creating zigzags with 1-inch of space between each zig and zag, and a few inches wider than your roast. Be sure to leave an excess string at the end that is at least twice as long as your roast.
Set your roast in the center of your zigzags and taking the end of your excess string begin going through each point of your zigzags crossing back and forth as shown below. Be sure to go back every few loops and pull it a bit tighter.
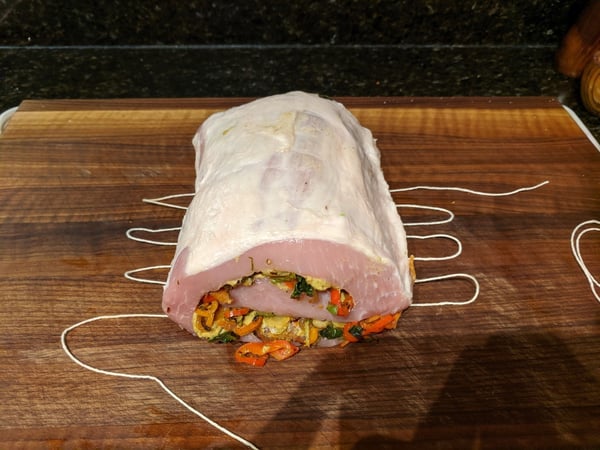
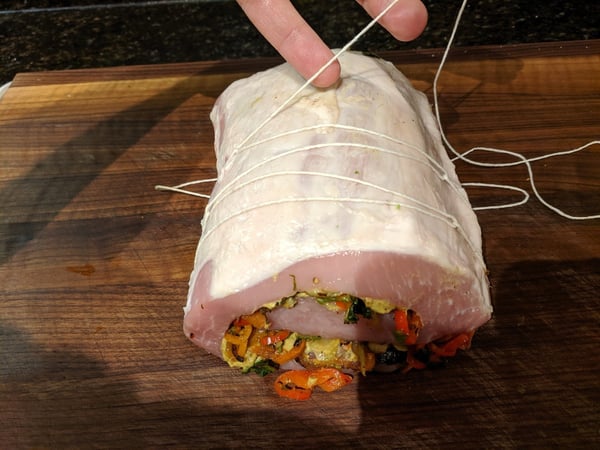
Once you get to the end tie a pretty little bow onto the single remaining string end.
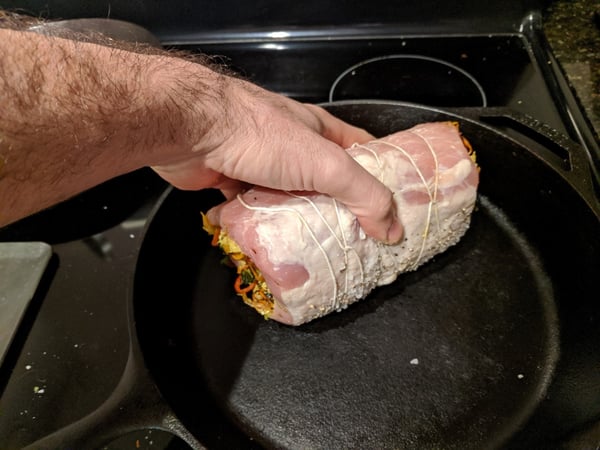
With your roast now stable, heat an oven safe pan on high on the stove top and preheat the oven to 350°F. Season the outside of your roast while it heats.

When your pan is hot, add 2 Tablespoons of oil and begin by searing the smooth fat side first and roll it through the pan slowly until the whole outside of the roast is golden brown.
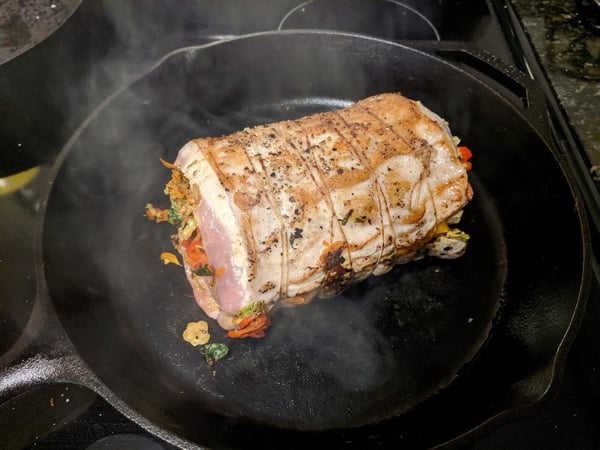
Once you are finishing searing the roast you can set the roast directly in the same pan right fat cap side up and put the whole pan into the oven. Let it finish cooking in the oven until it is the desired temperature for you.
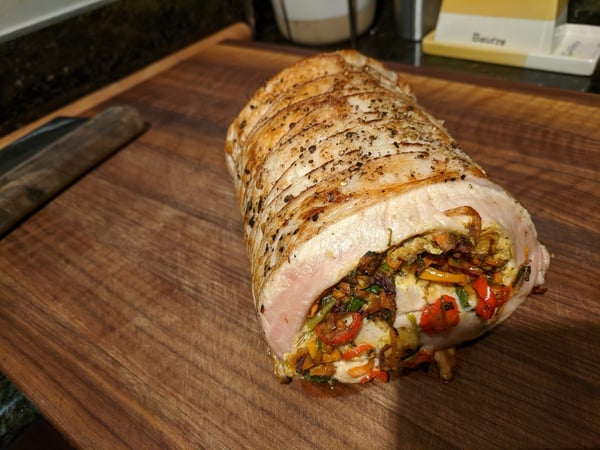
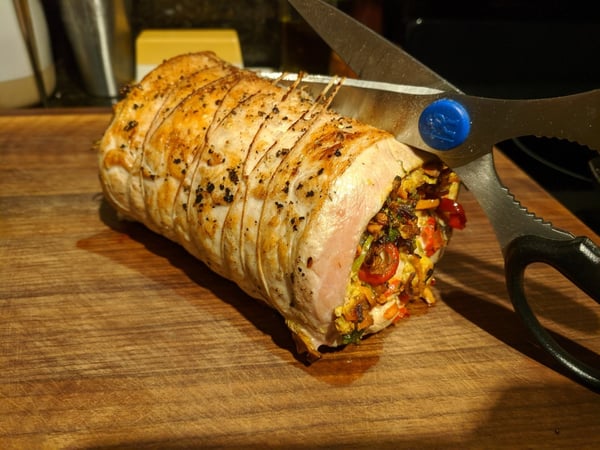
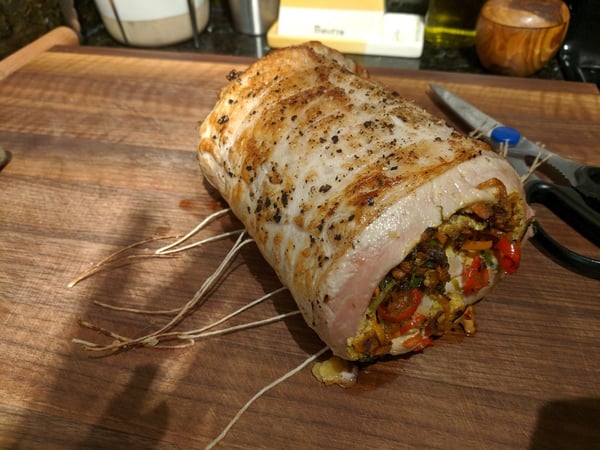
Let the roast rest in a warm space or tented in foil for at least 10 minutes and up to 20 minutes if you have time. I like to slide a good pair of kitchen shears under the string and cut it all and then you can slice up the roast and serve with your choice of sides.
For more inspiring ideas for all of your holiday dinner parties, check out these upcoming hands-on classes at The Chopping Block:
- Autumn Farmhouse Tuesday, November 12 7pm Lincoln Square
- Healthy Harvest Saturday, November 16 12pm Lincoln Square
- Wine and Dine Saturday, November 23 6pm Merchandise Mart
- Fall Dinner Party Saturday, November 30 6pm Merchandise Mart
- TCB Dinner Party Classics Saturday, December 21 6:30pm Lincoln Square