
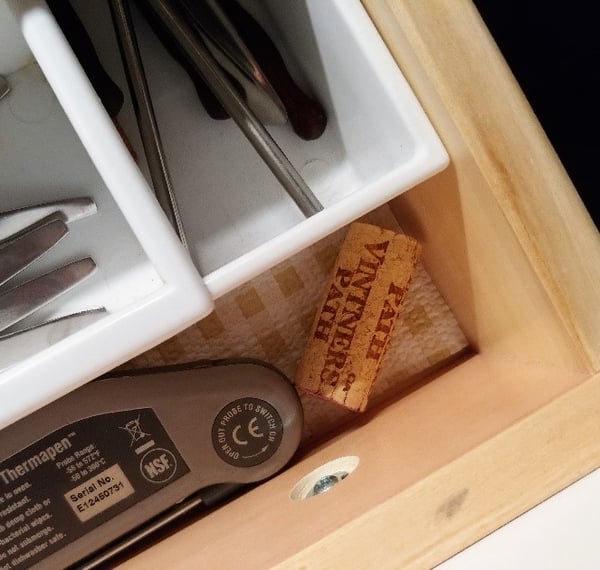
Yesterday I opened a bottle of wine and then mindlessly opened a drawer and tossed the cork in. As I did so, I thought to myself, “Okay, sure, that can go there for now.” I can honestly tell you that this was the first “random” thing that I’ve done in my new kitchen – and when I realized that, oh boy, I did a little happy dance right there on the spot because all of a sudden, I knew this kitchen had become my own!
We live in a high-rise apartment building, and my husband and I had lived in the same apartment for 20 years. A couple of years ago this family-owned building was sold to one of the larger apartment management companies in Chicago, and they decided it was time to renovate. Not in a minor way, mind you, but top to bottom, taking the apartments down to the studs, replacing windows, new electrical wiring in the building, the whole shebang. We had to move one way or the other: either out of the building or to a newly renovated unit, as they were completed. We decided to stay and in March we moved to a new unit – same corner of the building, but ten floors higher. While we were excited to get our “view” back (another building had gone up which had taken that away from us about a year earlier), we were a little wary of this new open floor plan, how our furnishings would look, what we had to pare down on.
One of the biggest impacts was on the kitchen. The open floor plan meant losing the wall I had all my pots and pans hung on, losing cabinet space and shelving. I was used to my tiny, galley kitchen: everything was within arm’s reach. It was tight (I called it “cozy”), but I made it work. It was home.
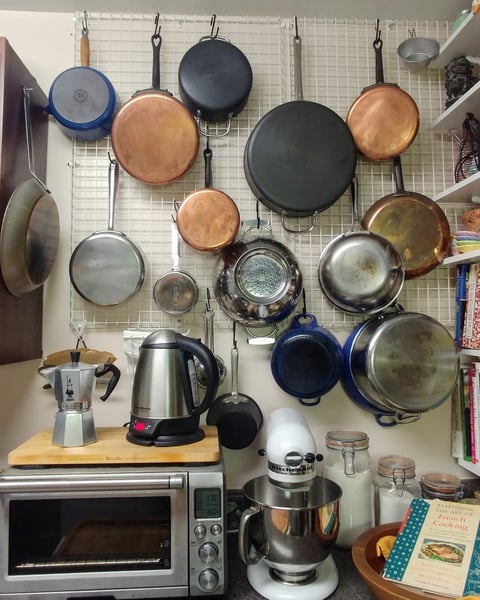
On the up side, it meant more counter space. And I would finally have a countertop to secure the base of my pasta roller onto, without having to first open a drawer and lay a towel across it so flour wouldn’t fall in. But beyond that, my perspective was cloudy and I wasn’t really sure how it would all shake out. Would my kitchen ever feel like home again? I turned this over and over in my head for months, making lists and plans, trying to figure out where things would go, even though I knew I wouldn’t really be able to make too many decisions until we moved in. But since my natural inclination is to organize things, waiting was frustrating. And so my listing and planning and scrapping of ideas would start anew. I tried to contain my anxiety, but I know I drove my husband a little batty. And my friends’ and coworkers’ eyes would begin to glaze over whenever I started a sentence with “I’m not sure about this new kitchen…” Ah, but Pinterest loved me!
At the very least, we knew we would need a ceiling-mounted pot rack for the pots and pans. So, about a month before we moved, we did some measuring and ordered a rack that we thought would be perfect.
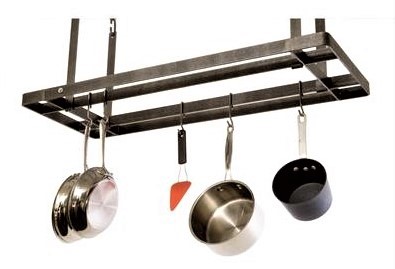
It was sleek and streamlined, very “no frills” much like the new space. And once we moved in, we realized it was also entirely too big! Fortunately this dawned on us at the 28-day mark of the 30-day return period, so we were able to send it back.
At the same time, we were told by management that buried in the ceiling where we wanted to mount a rack was a crazy criss-crossing of electrical conduiting and rebar. We had someone come in and scan the ceiling for us, so we wouldn’t hit anything when the time came to drill holes.
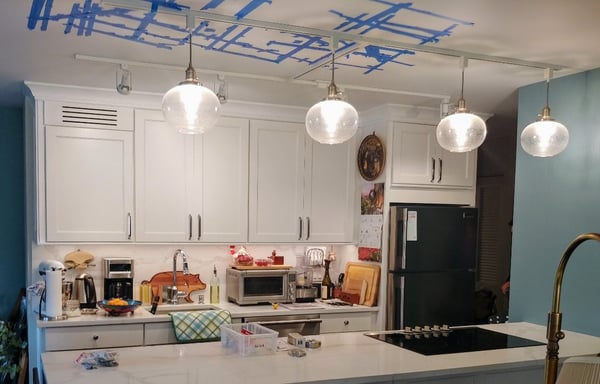
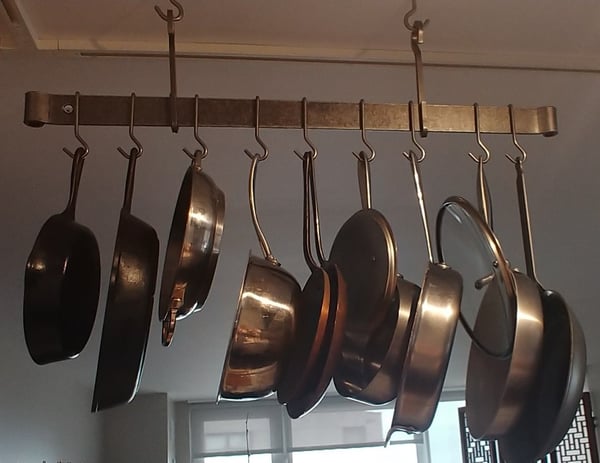
With all that blue tape on the ceiling, we immediately knew that whatever type of pot rack we mounted would have to be limited to two drilled holes. Trying to find appropriate placement for more than that was next to impossible. So we ordered a much simpler style rack, really just a horizontal bar made by Enclume that would accommodate the pots and pans I use most frequently. As to what to do with the rest of the pots and pans, we left that decision for later.
Our plan was to immediately put the pot bar up over the island counter, removing two of the pendant lights over the cooking island. However, within two weeks of living in the new place, we quickly realized that whoever designed the kitchen was not someone who cooks! Really. No cook would decide to put pendant lights over the a cooktop with no ventilation. It’s funny how we would definitely have considered this had it been our own design, but when you move into a pre-planned space you just assume everything has been thought through. It wasn’t. The smoke from cooking and the build-up of grease on the lights after only a couple of weeks was ridiculous. So now we found ourselves learning about and looking for an island range hood. To accommodate both a range hood and the pot bar, we were now talking about removing all of the pendant lights over the island. But with track lighting down the center of the kitchen, task lighting under the cabinets, and 4 spot lights in the range hood, we decided the overall light would be fine by adding in another two or three lights onto the center track once everything was installed. So we held off on installing the pot bar until the hood arrived so we could install everything at once and be sure the spacing was right.
We ended up finding a hood made by Cosmo that was actually designed as self-circulating, pulling grease and smoke up first through stainless baffle filters and then through charcoal filters. We liked that it didn’t have to be “adapted” from a hood designed for a vented kitchen. What a difference it has made!
Ah, but what about all the bakeware, cooking tools, pantry items, serving dishes, tableware, knives? Lots and lots of decisions, is all I can say – and I’m so glad I gave myself the gift of taking my time making them.
Since I don’t bake every day, I decided I did not need my bakeware stored in the kitchen; when I decide to bake, I can pull out what I need. Instead, I store all of my bakeware in the closet of our office/guest room. I’m pleased to report that I’ve already found this arrangement to work remarkably well!
As for dinnerware, serving pieces and glassware? We’ve always had furniture that we can store things inside of: chests, cabinets, buffets, etc. I think people who live in smaller spaces tend to lean in that direction and we are no exception. This move forced me to not only get rid of things I simply do not use, but to also get super-organized with these chests and really think about what I use the most. Those most-used items are the things I keep in the kitchen cabinets. Items I use less frequently, I store in the chests. I have to admit I laughed as I put the our martini glasses in one of the chests – it had been a very long day and I got to thinking that maybe I should start using those more right then and there!
The one thing I would not waver on was that my cooking utensils had to be in the kitchen; if I need something for prep or cooking, I need it right away! I sectioned off one drawer, plus I was able to adapt a deep drawer just below it to create two levels: a removeable upper level holding more commonly used utensils, and the lower level with those that are used less often. So all my utensils are in one area – plus a crock of wooden spoons, whisks, spatulas and such next to the stove.
Pantry items are in a closet just off the kitchen. I’m sure it was intended as a broom closet, but we’ve always used it as a pantry. The closet survived the renovation, and I’m so grateful for that!
Our treasured Japanese Aritsugu knives found a spot of honor on the wall, and for the first time ever, we have the space to have all of them out at once! I love using them and now will hopefully do so more frequently. Below those are our everyday knives, the ones we’re always reaching for. Lesser-used knives are stored on the lower level of that two-level drawer – handy but out of sight.
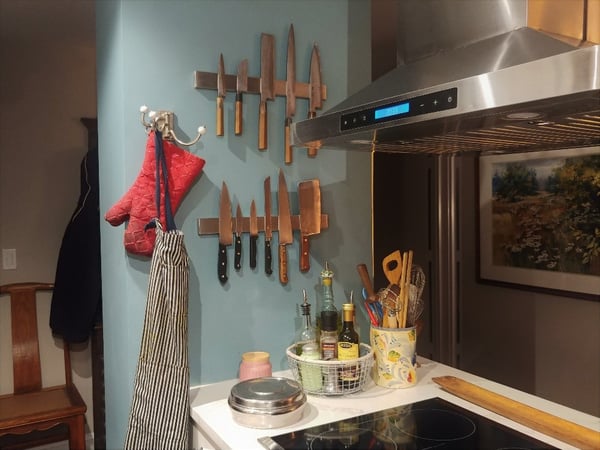
Do you sense a recurring theme here? When necessary, keep what you use often close; the rest can be stored elsewhere. I didn’t even realize this was happening until I was about halfway through the process. It certainly made the second half a lot easier to think through!
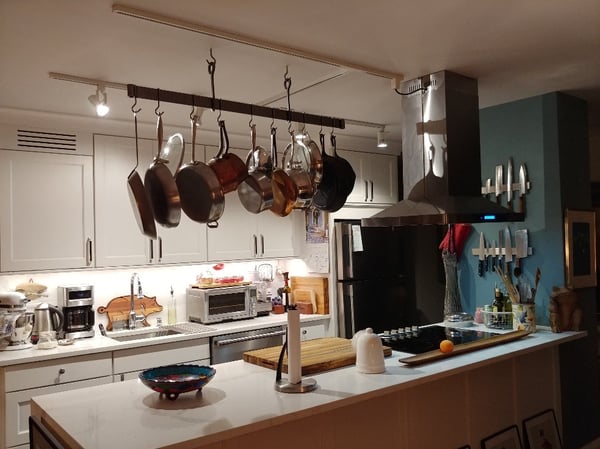
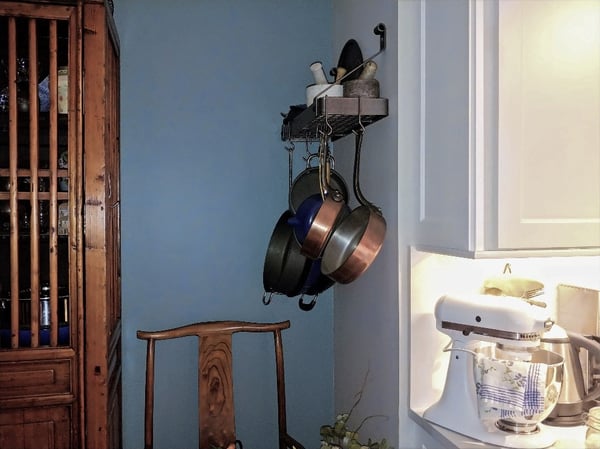
You see, we DID make a decision on those lesser-used pots & pans! (This rack is also by Enclume.)
As stressful as this journey was, I am actually happy with my new kitchen. It will still take some getting used to preparing dinner in such an open space when friends are over – and not worrying about how messy the kitchen looks when we’re ready to sit down and eat. And we still have a few functional/decorative touches yet to arrive: floor mat, counter stools, a rolling butcher block cart. But you know what? Yesterday I opened a bottle of wine and then mindlessly opened a drawer and tossed the cork in – and it felt like home. Maybe now you can better understand my little happy dance!
While we don’t offer kitchen organizing classes at The Chopping Block, you do get to use a fantastic selection of cookware and cooking tools in class! Le Creuset, All Clad, Lodge and Emile Henry cookware and bakeware, just to name a few, are all waiting for you to try. In addition to Rosle stainless steel utensils which can’t be beat, you will also be able to test drive amazing chef’s knives from Shun, Global and Frederick Dick. Come take a class and think about what you want to add to your collection to help make your kitchen your happy place. We’re here to help – it’s what we do!

