

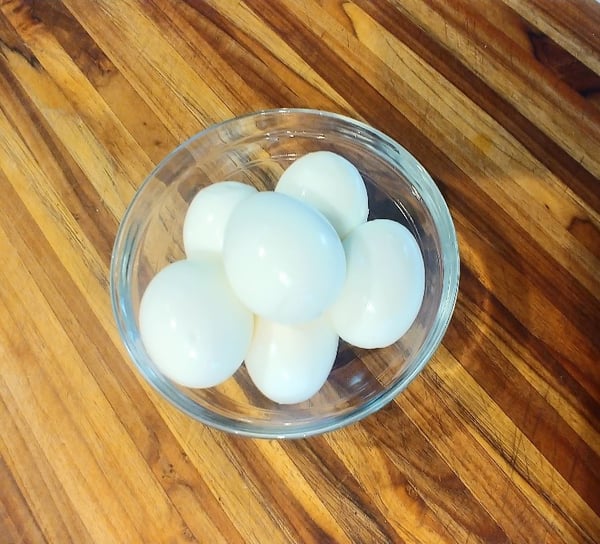
I always feel like the need for peeled hard-boiled eggs seems to grow exponentially with the onset of Summer! My personal favorite ways to use them include sliced hard-boiled eggs in my picnic potato salad, topped on a beautiful Salade Niçoise for those hot summer nights and, of course, glorious deviled eggs. The one thing that each of these have in common – at least the way I like them – is that I want the eggs to be perfectly peeled, no bumps or gouges, just nice, smooth whites on the outside.
If I look back over the years, I can’t even begin to tell you how many “best” ways I have read about to achieve this goal! It seems that everyone has a take, everyone has their foolproof method. Except… not so much, at least not consistently, and at least not for me. Sure, some methods have been better than others. But I have to say, if I need five hard-boiled eggs for a recipe, I always make seven or eight, because I know they will not all turn out as I wish.
 Just before Easter this year, I happened to read about a method for hard-boiled eggs with a perfect peel that I had not yet seen. I wish I could provide you with the article, but I can’t recall where I saw it – and it could very well have just been an Instagram post. Anyway, needless to say, I was drawn in (yet again).
After all, I did need a dozen hard-boiled eggs for coloring; it’s a fun Easter tradition for us. Also, I like sending dinner guests home with an Easter egg in their favorite color – but I always cringe just a little bit when I’m not sure how cleanly they’ll peel once they decide to eat it! So I thought the method I read was very timely, so why not give it a go? All I can say is that of the dozen eggs I made, we had six left after our guests went home… and over the next few mornings, they all peeled beautifully!
One thing that the hard-boiled egg methods I’ve ever used have in common is to immediately submerge the eggs in an ice bath (just ice and water) as soon as they have finished cooking. Presumably this “shocks” the egg, making the white on the inside pull back from the shell. The shocking process should make peeling easier. Well, my experience was sometimes yes, sometimes no. I had also heard that older eggs work better than fresher eggs – but what about when I needed hard-boiled eggs and had just come back from the grocery store with a fresh carton? Finally, I always thought I had to start with room temperature eggs, placing them in cold water so that the eggs would warm up as the water warms up. As it turns out, only one of these three is true, at least with my new-found process.
“Shocking” the egg is indeed important. What never occurred to me – and what made complete sense once I read about it – is that I actually have two opportunities to shock the egg! Not just at the end, going from hot to cold, but also at the beginning going from cold to hot! Yes, that’s right: You place a straight-from-the-fridge-cold egg into just-boiling water! And trust me, there is a way to do it that won’t crack the shell which I’ll describe in a minute. So that first shock sets the stage and the whites retract from the shell as they begin to cook. Then, once the egg is finished cooking, the egg gets the second shock when it’s placed in the ice bath to pull back even further. Well, I’m here to tell you that this double-shock method works! Here are the details – you’ve just got go give it a try.
While you don’t need much in the way of equipment, I still suggest you have all you need within reach: a lidded pan, a bowl for an ice bath and tongs.
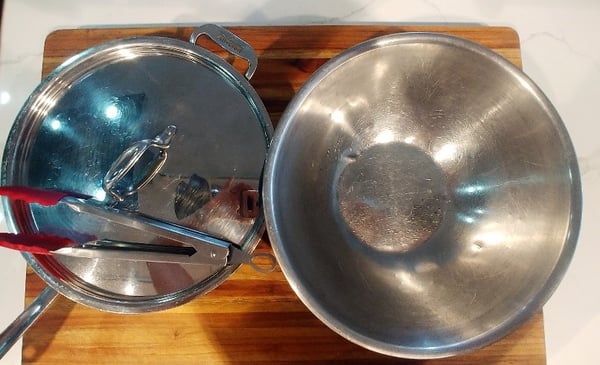 Use a pan with a lid that will allow your eggs to lay on one level. You don’t want any stacking and you do want a little room between eggs; they shouldn’t be hitting one another. Also, double check that the pan lid isn’t going to touch the eggs once they’re in the pan (you may laugh, but I’ve done this).
For demonstration purposes, I’m going to prepare six eggs. They are regular grocery-store brand Grade A Large eggs. I’ll be using a straight-sided skillet. You will want enough water in the pan for it to come about halfway up the side of the egg, approximately one inch. For me, if I stick my index finger in the water, it comes to about my first knuckle. In the photo below, I used an edible ink marker on my finger so you could more easily see the water line.
 Place the pan of water on your stove and turn the heat to medium-high. This is important because if you heat it on high, the water will end up staying too hot for too long once the eggs are placed in the pan and the excess heat may cause your egg to crack. On my electric cooktop (oh, how I wish I had a gas range), I use a heat level of 7, but do keep in mind that everyone’s stove is a bit different.
While the water is coming to a boil, take your eggs out of the refrigerator.
Bring the water to just-boiling. What I mean is just past a simmer (little bubbles) to when larger bubbles start to pop up. This is a “not hot enough” photo, the water is barely simmering with tiny bubbles and none coming to the surface.
 The following video will show you how to tell when the water is the correct temperature and walk you through placing the eggs in your pan. Once your water is the correct temperature, turn your heat to low and immediately place your eggs in the just-boiling water. I suggest using tongs. With the water so shallow, you may be tempted to use your fingers. However, it is a natural instinct to release the egg too quickly as you get close to the hot water. If the egg hits the bottom of the pan too hard, the shell may crack. I have found that using tongs allows me to get the eggs into the water without the risk of dropping them. Do note that the eggs are not completely submerged in the water. Keep your tongs handy as you’ll be using them to remove the eggs when they’re done.
Once your pan is covered, immediately set your timer for your preferred cooking time. I have found that 13-14 minutes works for me. The whites are nice and firm and the yolk is cooked through, but not dry. And I also don’t get that greenish ring around the yolk that can come with overcooking. If you try this method, do a little experiment with just one egg and set it to cook for 13-minutes to see how you like your cooled, finished egg. You’ll then have a rule of thumb to use when you make a full batch!
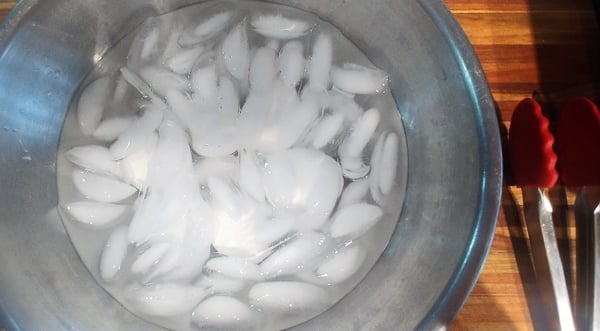
While the eggs are cooking, make an ice bath. This is simply ice and water. Making it now will allow the water to get as cold as possible. Use a bowl to be large enough for a lot of ice, water and room for the eggs to move around and cool. Do use a lot of ice because, don’t forget, you’ll be putting super-hot eggs in and it will start to melt immediately. Add enough water just to cover the ice.
When your timer goes off, turn the heat completely off. Bring your ice bath bowl near the stove and, using tongs, transfer the eggs to the ice bath. The eggs should have room to move around as you use your hand to give them a little swirl. The eggs can remain in the ice bath as long as you want, but let them sit there at least 10 minutes. This will make them cool enough to place into the fridge once you dry them off – or use them immediately!
 Now I’ll show you how easily these shells peel off:
And, as if by magic, they all peeled just as cleanly as the first! If you’d like to see how that happened (with a bit of unexpected blooper-worthy egg folly at the end!), here is a no-sound double-speed version for you:
You can see that, for some reason, Egg #4 wanted to peel mostly in smaller pieces. However, the finished peel was still perfect, so I was fine with that!
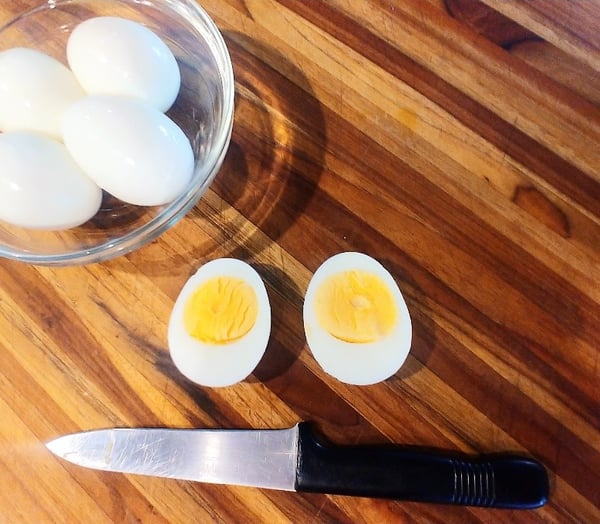 I hope you give this method a try and that it works as well for you as it does for me! I will never make hard-boiled eggs any other way.
If you want to learn another method for cooking eggs, and The Chopping Block's famous Hollandaise sauce hack, join us this Sunday for a virtual class featuring Eggs Benedict and Roasted Potato and Pepper Hash. Cook along with our chef on June 12, 2022 at 11am CST and in just over an hour, you'll have a delicious Sunday brunch to enjoy after class!
