

I love angel food cake and when a client asked me to bake one for her birthday earlier in the summer, I couldn’t have been happier. She wanted all the trimmings – raspberries spilling over from the hole in the center, candied lemon slices, the works! Since I don’t get a lot of angel food cake requests, I pulled out my old favorite recipe & did a practice run, just to be sure I had it down, especially since I wanted to jazz it up with a hint of lemon. After all, it was her favorite kind of cake so it had to be right. Gosh, did my husband and I ever enjoy that practice cake!
However, it was way too much for just the two of us so, of course, I ended up giving some of it away. But it made me wonder if it would be possible to make a smaller version of angel food cake and what my limitations might be. So I thought I would invite you to come along on my testing journey! I’ve included my recipe for angel food cake, but if you just want to know how things turned out in the smaller pans, feel free to jump straight to the end.
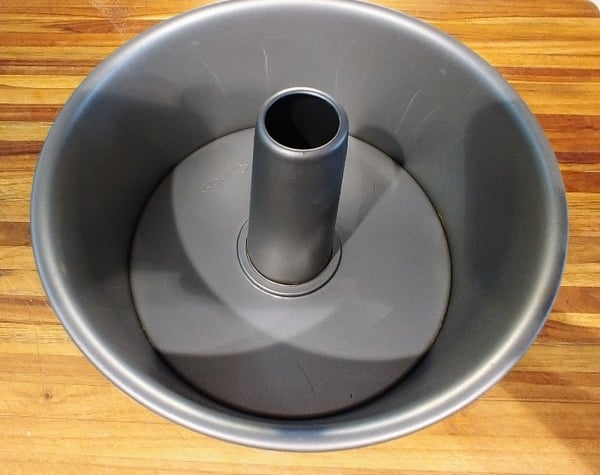
First of all, I knew I really didn’t want to deviate from my recipe, as the birthday girl told me it was the best angel food cake she’d ever had! However, the only way I’d ever prepared an angel food cake was in a traditional two-part tube pan like this one.
 Angel food cake gets its wonderfully light, fluffy texture from whipped egg whites (think about a nice, airy meringue). There is very little flour, compared to other cake styles, and no fat or egg yolks are used. But without these ingredients, structure and baking evenly become a challenge. The hole in the center creates a ring-shaped cake, so you don’t have to worry about the cake collapsing in the center. In addition, it also allows for greater heat flow so the cake will cook evenly and rise properly.
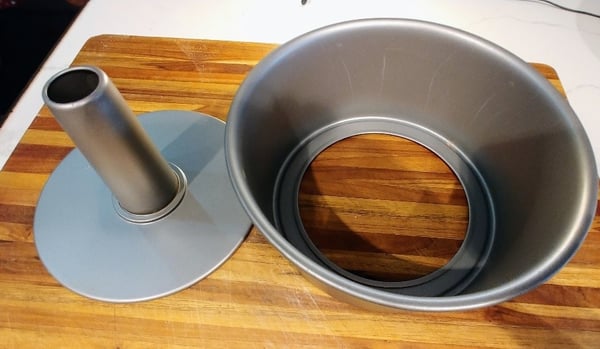
I have read of some who use a Bundt pan with good results, since it also has a hole in the center, although it’s not something I have personally tried. My fear is all those decorative grooves on a Bundt pan may make it difficult to remove the cake. You can see in the photos above that a traditional tube pan has perfectly smooth sides. I always run a cake spatula around the sides to remove the cake. I’m simply unsure how well the cake would pop out of a Bundt pan (but if any of you have done it, please let me know in the comments).
In doing a little pre-testing research, I learned that there is such a thing as a mini tube pan (about 3.5” in diameter). However, trust me when I say I have enough baking equipment for the moment! So I decided to try several pans of various sizes to see how well the angel food cake would bake up. My only requirements were that the pans have smooth sides and be of a smaller size, making “just enough” cake for one or two people to enjoy. I had seen options online for angel food cupcakes but the recipes were different from mine, and I wanted to stick with my tried and true version. So I knew I had to try a cupcake pan, but using my recipe. I also included a mini-cupcake pan that I thought might be good for “angel food bites”. And, lastly, I have a set of small loaf pans (each one is approximately 3”x 6”) that I thought would be good for making a version I could actually slice. Here are the pans I ended up using:
 You can see that I decided to test my regular cupcake pan using paper cupcake liners for half of them, just to see if they would make a difference.
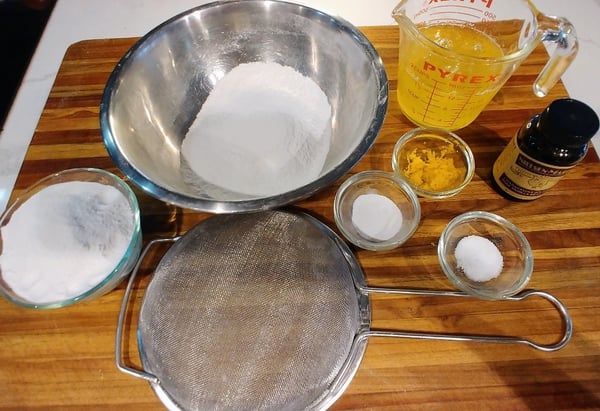 The ingredients for an angel food cake are very simple: superfine sugar, cake flour, egg whites (they whip up best at room temperature), kosher salt, cream of tartar, vanilla and – for this lemon version of angel food cake – lemon zest. The lemon flavor is subtle, more “lemon-scented” than “lemon-y”), but if you prefer it without the lemon, just add an extra smidge of vanilla instead. Not knowing how much batter I was going to need, I made my recipe for a full angel food cake, so the measured ingredients you see in the photo are for the full cake. Below are ingredient amounts for half that, because I had a good amount left over, even after filling all those cake pans!
Angel Food Cake
1 cup sifted superfine sugar (sift, then measure)
1 cup plus 3 Tablespoons sifted cake flour (I like Swans Down – sift, then measure)
3/4 cup egg whites at room temperature (generally from 5-6 large eggs)
3/8 teaspoon kosher salt
3/4 teaspoon cream of tartar
1/2 teaspoon vanilla bean paste OR vanilla extract (if you’re not adding lemon zest, you can increase this to 3/4 teaspoon)
1 teaspoon grated lemon zest
Now, a word about that superfine sugar. You can go out and buy superfine sugar (sometimes known as “caster sugar”), although it can be hard to find and is usually on the expensive side when you do find it. Or, you can make your own if you have a food processor. Just put granulated sugar in the food processor with the metal blade inserted and let it run for about 3 minutes. One tip I have is to put a slightly damp kitchen towel over the top of your food processor as it is running. As the sugar is spinning, “sugar dust” always seems to billow out of the processor and days later you will find a coating of stickiness on your counter and surrounding appliances, which is no fun at all. Also, you’ll want to process more than what the recipe calls for, because you will need to measure what you need after processing it. But if you have some left over, just put it in a container and store it on the shelf next to your regular granulated sugar, and you’ll have some for next time. It’s that simple!
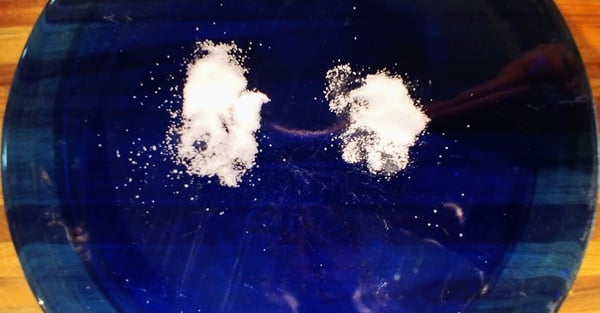 It's a little hard to tell in the photo, but the sugar on the left is regular granulated sugar and on the right is the processed superfine sugar. The superfine sugar is definitely more powdery, with much finer granules than the regular granulated sugar.
As far as I’m concerned, there are only a couple of secrets to making a good angel food cake: sifting the dry ingredients several times, whipping egg whites to nice stiff peaks, and using a gentle folding motion to add the flour. You can use a sifter for sifting the flour and sugar but my hand gets tired with all that squeezing back and forth, so I prefer a simple fine-mesh sieve like the one pictured above with the ingredients. Keeping these tips in mind, here are the instructions to make the cake:
1. Preheat the oven to 350⁰.
2. Combine 1/4 cup of superfine sugar with all the flour. Sift together 4 times (yes, really – but it makes all the difference) and set aside.
3. Making sure your mixing bowl is super-clean and free of any fat, place the egg whites, salt and cream of tartar in the bowl of a stand mixer fitted with the whisk attachment and beat on high until the egg whites are medium firm, about a minute or so. They will not hold stiff peaks at this point, as demonstrated in this video.
As a side note, you can do this using a hand mixer as well. It may take a little longer and your arm may get a bit tired, but it will work!
4. Sprinkle the remaining 3/4 cup superfine sugar over the top of your beaten egg whites as demonstrated here.
5. Using your mixer, whisk again until the egg whites are thick and shiny, another minute or so, and then add the lemon zest and vanilla, as shown below. Note that when I refer to the amount of vanilla I am adding in the video, I am using the amount for the full cake recipe, not the amount I provided in the ingredients list above.
6. Using your mixer, whisk again until very thick and the egg whites hold stiff peaks.
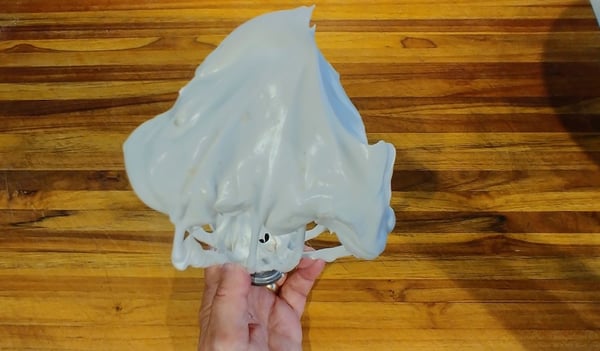
7. Add the flour-sugar mixture in 4 additions, by sprinkling over the top of the egg whites and gently folding in each addition, as demonstrated below.
8. If you were using a full recipe with a regular-sized tube pan, you would simply pour your batter into the ungreased pan (greasing a pan for angel food cake will inhibit proper rising, so leave your pans ungreased). But in my experimental mode here, I spooned the batter into each pan until they were about 2/3 of full. Smooth the tops a bit using an offset spatula or back of a spoon and place them in the oven.
9. The cake is done if it springs back when you lightly press it. It also will be nice and golden brown on top. For a full cake, it takes 35-40 minutes. However, for my smaller pans I ended up baking for the mini-cupcakes for about 8 minutes, the cupcakes went for about 12 minutes, and the small loaves baked for about 25 minutes.
Note: A full angel food cake is left to cool completely upside down, allowing it to stay as light as possible. With these smaller versions, I simply let them cool completely in their pans right-side up on a baking rack (you can see that I got a little over-zealous about removing one of the mini-cupcakes before it was cooled!):

With my baking complete, I was able to finally draw some conclusions. First of all, I learned that it is possible to bake angel food cake in smaller pans without a hole in the center and, for me, that alone was a win! However, I had some thoughts on each bake. First, the mini-cupcakes:
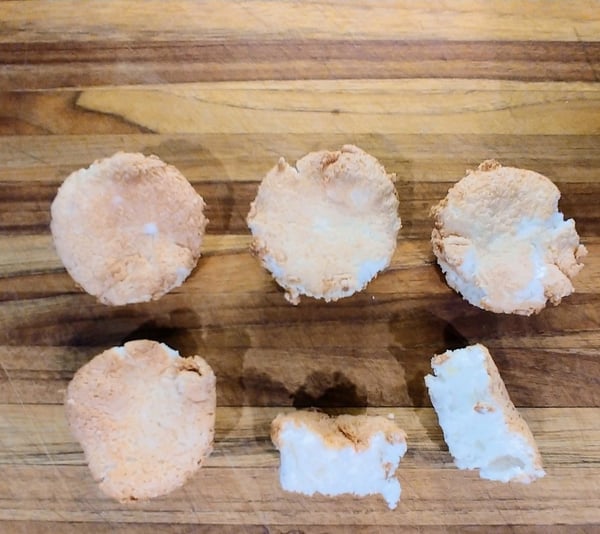
These were super-hard to get out of the pan. After running my spatula around the sides, I still had to do a fair amount of finagling to get them out. So they look a bit broken around the edges. But they tasted great and did not lose that “angel food cake” lightness that I love so much. I think if I were to try these again, I would use paper mini-cupcake liners. I had some and it puzzles me as to why I didn’t think to use them in half the pan, as I did for the regular cupcakes. Speaking of the regular cupcakes…
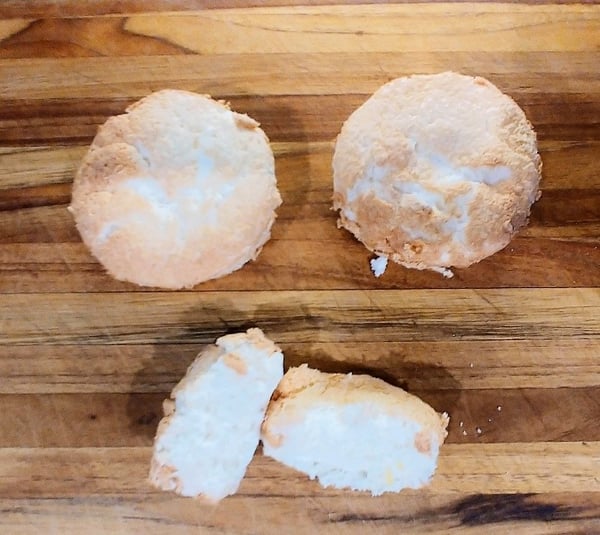
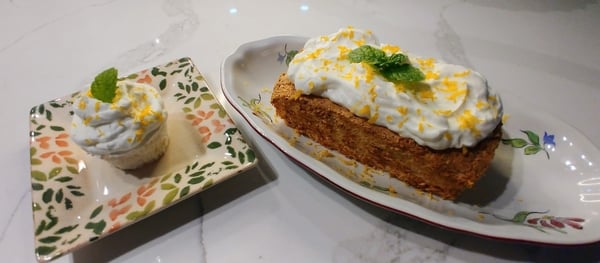
 Even without the cupcake paper liners, these came out of the pan more easily than the mini-cupcakes did, after running my spatula around the sides (no need to do that with those baked in the liners). Again, flavor and texture were just as good as a full cake. But look at those that were baked in the liners. The sides are pure white, no brown edges. How pretty those would be to serve with the liner removed! I loved them, and they made me want to try using liners with the mini-cupcakes.
And finally, the small loaves…
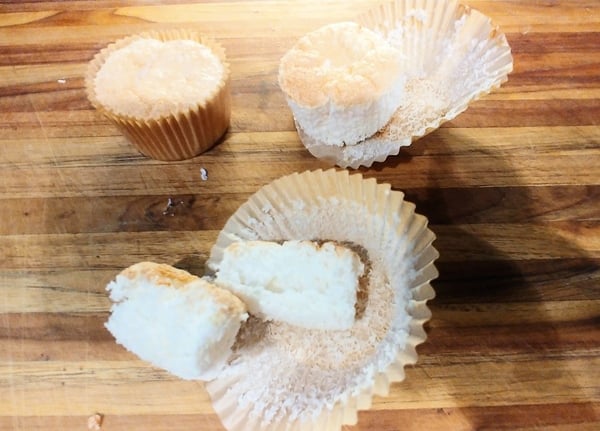
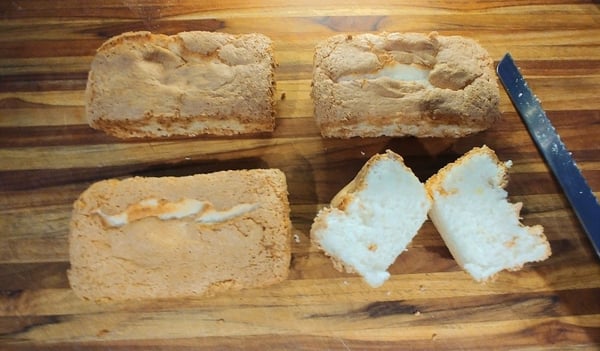 These came out quite easily after running a spatula around the sides of the pan. And they sliced beautifully! Note that I strongly recommend using a serrated knife to cut through angel food cake; it’s a lot easier to “saw” back and forth through the cake than it is to press straight down using a regular knife. And they were the perfect little loaves to share for two people. An added bonus? They froze very well!
I couldn’t resist slathering whipped cream on top of my two “winners” and adding a bit of lemon zest and sprig of mint from our balcony garden – they were equally delightful!
 If you like working with meringue – which is so much of what an angel food cake is made of – think about signing up for our upcoming Hands-on Macaron Workshop on Saturday, September 3 at 10am at our newly renovated Lincoln Square location. You’ll love the new look of the space and it’s an amazing class – you will enjoy every minute!
