

To be perfectly candid, historically, I have not been a fan of spaghetti squash. Setting aside for a moment that it was not enough like real spaghetti to live up to its name, it always turned out too soft and mushy for my taste. And, well, regarding the name, it simply is what it is. In our previous blog post the author said, “It’s not Spaghetti Squash’s fault we gave it this silly name…” and, “…we need to stop trying to make Spaghetti Squash something it’s not.” How completely honest and real, and I couldn’t agree more! So let’s forget the name for now and focus on what I have learned that we can control: the texture and getting rid of that mushiness!
Whenever I tried making spaghetti squash, I followed the usual directions from any number of sources: slice it lengthwise, scoop out the seeds, season it and roast it at high heat until it is knife-tender; that is, until you can easily pierce it with the tip of a paring knife, with the knife coming out just as easily. Well, I have come to disagree with nearly all of that and, as a result, have come to really enjoy the outcome. I’d like to share with you a couple of things I’ve learned. I wish I could take full credit for all of them, just as I wish I could remember all the sources I’ve read. I cannot, but suffice it to say that I appreciate every one of them!
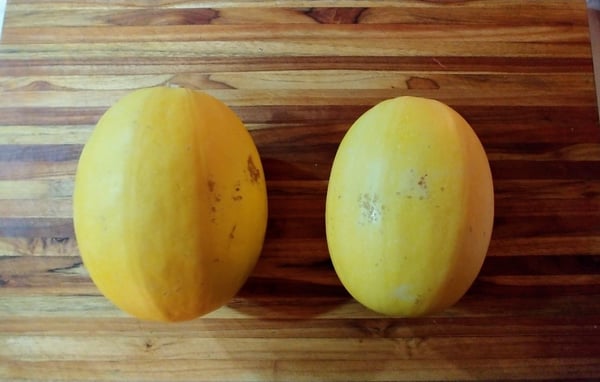
I wanted to demonstrate a bit of comparison for you along the way, so I started with two spaghetti squash, each 2.25-2.5 pounds, which are a bit on the smaller side, as spaghetti squash goes:
 Now… time to cut them in half. Does cutting any hard-skinned squash terrify you? I get that; it’s a daunting task for a lot of people. A little trick I learned to help soften the skin just a bit is to microwave the entire squash for a short time. I love this hack! Pierce the squash near each end with a paring knife – I make four little slits at each end. Then place the room-temperature squash – one at a time – in the microwave on the highest setting, starting at 1 minute. Times will vary, depending on the size of the squash and the strength of your microwave.
In looking into this online, I found most articles said to go for 3-5 minutes, but this will cook the squash way too much, at least in my opinion. I like to start with a shorter period, increasing if I need to. These squash are on the smaller side, so 1 minute was enough. The squash was still hard, but it was warm to the touch, a bit of liquid was bubbling out of the slits, and cutting through it was definitely easier than it would have been before microwaving. You can give it a little test by trying to cut through it – if it needs to go back in, I would only do so for 30-second increments. Note that you are only looking for the skin to become less tough; you are not looking to cook the squash. You should still need to exert pressure to slice through it; it should definitely not be like slicing a zucchini!
Here are my cut squash:
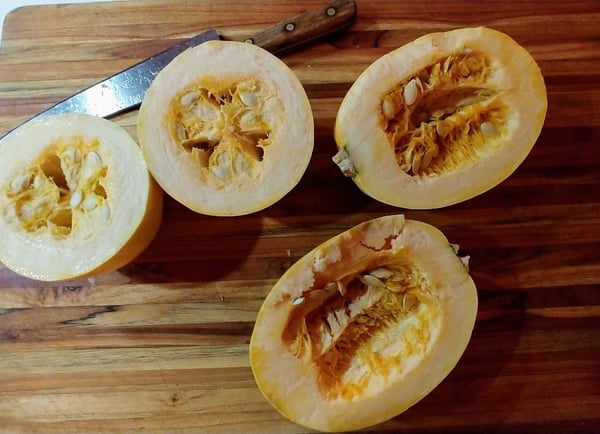 You will notice that I cut one of the squash crosswise (the squash on the left), while I cut the other one lengthwise (the one on the right). Up until recently, I always cut the squash lengthwise, and that is what you will find most spaghetti squash preparations call for. However, I have learned that the way spaghetti squash grows, the strands actually run crosswise. You will notice this in this close-up – I’ve darkened the photo a bit so you can hopefully see the contrast.
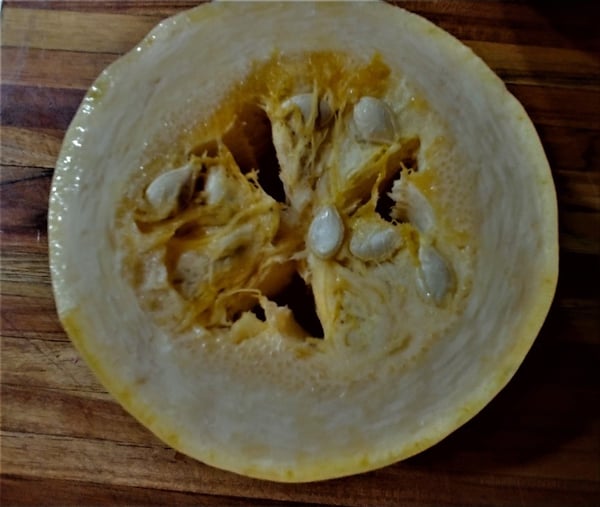 You can see the fibers running around the circumference of the squash. This means that when you scrape them out after the squash is cooked, they will be longer when the squash is cut this way, as opposed to when it is cut lengthwise. Cutting it lengthwise actually cuts the strands in half, which means they cook faster and can more easily end up with a softer texture – exactly the opposite of what I’m shooting for! I will show you the difference between the two slicing options after the squash are roasted.
So now, scrape out the seeds in whatever manner you like (I just use a spoon), and season them with salt and pepper to taste.
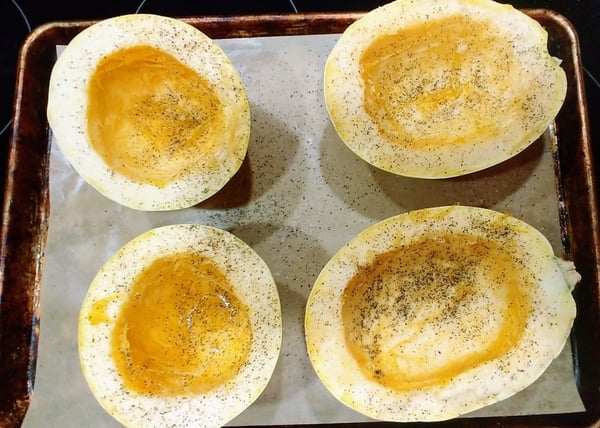 Turn them upside-down on a parchment-lined sheet pan and preheat your oven to 350⁰F. I like just a bit of caramelization on the edges, so I roast them directly on the parchment as opposed to using any water. I find that using any oil on the edges caramelizes them a bit more than I generally prefer, so I do not oil them. That said, feel free to oil the flat sides if you wish!
Let me mention oven temperature for a moment, as this is another deviation from the “standard” that I have found. Most say to roast at a higher heat, generally at 400⁰F. I have found that reducing the heat is another factor that creates a firmer, less mushy result.
Once your oven is preheated to 350⁰F, place the upside-down squash halves in to roast. The exact amount of time will depend on the size of the squash and your own oven. Again, here is another point where I differ, as I have found that a shorter roasting time yields firmer strands. Most spaghetti squash recipes will tell you to roast until the squash is knife-tender which, as I mentioned earlier, is when you can easily pierce the skin with the tip of a paring knife, with the knife coming out just as easily. However, what I look for is barely knife-tender. What I mean by that is that while you can pierce the skin with the tip of a paring knife, you need to give it a little tug to remove it. Keep in mind that the squash will continue to cook a bit once you take it out of the oven, as it will retain heat and steam when left upside-down on the sheet pan.
For larger spaghetti squash, I have found that about 45 minutes is about right – but it’s worth checking in at about the 30-minute mark. These squash were on the smaller side, so I checked at about 20 minutes, and ended up roasting them for about 30 minutes total.
After you remove the spaghetti squash from the oven, let them rest and cool, cut-side down, on the sheet pan for about 10 or 15 minutes. Then turn them over and wait until they are cool enough for you to handle without any sort of towel or potholder. Below is a video that will show you the difference in the strands from the crosswise vs. lengthwise cuts. I need to mention that until writing this post, I did not realize that the video recorded without sound – it is in moments like this that I am glad I often talk with my hands! Below the video I will summarize what I’m saying throughout:
Video summary:
First, make sure the spaghetti squash halves are cool enough for you to handle. Using a towel or potholder will make it cumbersome to remove the strands. Chances are you will be tossing your squash with something hot: herbed olive oil or butter, for example.
Next take a look at the two different cuts. In the lengthwise cut, the spaghetti squash strands will run from one long side to the other. In the crosswise cut, the strands will run around the entire circumference of the squash. Just from here, you can likely see how the crosswise cut will yield longer strands.
Next, using a fork, I have started pulling the strands from the lengthwise cut. I like to start at the skin side and work my way in to the center. I have found that starting in the center tends to tear the strands more. The strands here are about six inches in length.
Next, again using a fork and the same technique of starting at the skin side and working inward, I pull the strands from the crosswise cut. When I take them out, you can see that they are about twice as long as those pulled from the lengthwise cut: about 12 or 13 inches. The longer length means a firmer texture, which is what I’ve been missing out on for so long!
As I continue to pull the strands from the crosswise cut, I talk about how understanding the structure of how produce grows is important to understanding how to best prepare them. For example, I mention a sprig of thyme and how the little leaves grow upward, and how to best pick them off is to run your fingers in the opposite direction of their growth – that is, down the stalk. I also mention that understanding the structure of an onion aids in understanding how to best chop it, as some of you may know if you took our popular Knife Skills class.
Finally, at the end, I mention that if you are looking for a quick meal, you can even use the crosswise half as a little bowl – add a pat of butter or a drizzle of olive oil and you’re good to go!
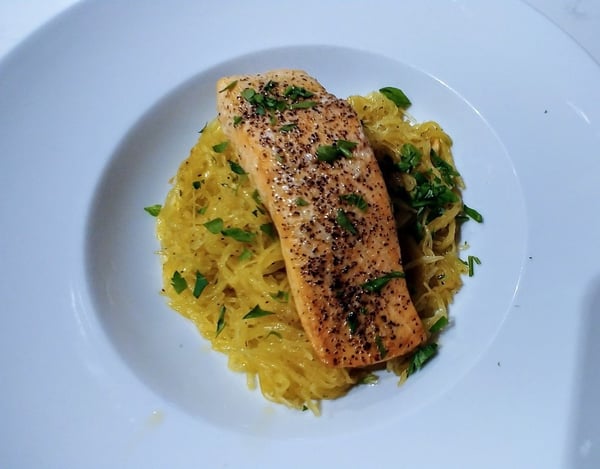
As for what to do with your beautiful strands of spaghetti squash, the options are really endless. One of my favorite ways is to warm some thinly sliced garlic in olive oil along your choice of herbs and/or red pepper flakes and cooking just until the garlic barely begins to turn a slightly brown at the edges. Quickly toss with your spaghetti squash strands, season to taste with salt and pepper, and top with grated Parmigiano-Reggiano – delicious! When I made this last night, I had already thawed some salmon, so I skipped the cheese and topped the squash with the salmon – it was a meal I would never have imagined myself enjoying as little as six months ago. No mushy strands here!
 Maybe you love spaghetti squash exactly as you prepare it now – but I urge you to give this a try to see the difference it makes. Or maybe, like me, it’s never been quite what you like. Again – give this a go, and I think you will appreciate the difference. It certainly makes for a nice, light meal after all of our indulgences over the holiday season!
As we get into January, and you’re ready for actual pasta again, do check out our Virtual Gnocchi al Forno class on January 6, 2023 at 6pm CST – in fact, I’m scheduled to moderate that one, so I hope to see you there. Happy New Year, everyone!
