
The best part of being a home cook is challenging yourself. We try new foods, exciting techniques and reinvent restaurant classics. Some processes take multiple attempts but then there is a magic moment where your knowledge and skill come together to create a dish that meets more than your mere expectations.
I had one of those moments last week with crispy rice. If you have never had crispy rice, it is actually the type of dish that subtly sneaks into every culture. You’ll find crispy rice known as socarrat in a great Spanish paella, nurungji as a Korean scorched rice or maybe you are familiar with a platter of Persian Tahdig. Some cultures simply call it bottom pot.
Once seen as an aftereffect, it is now something designed into dishes. The goal is to get to an end product of golden crispy goodness that produces a textural and flavorful wonderland.
My favorite crispy rice is usually found as an appetizer in an Asian fusion restaurant served with some sort of spicy tuna on top. The only complaint I have when I dine out is that most orders are for only a few pieces and it is usually kind of pricey. (And don’t even get me started on the fact that if you are dining with others you may have to share!)
So, like any good home cook, I needed to learn how to make this for myself.
To be completely honest, this entire expedition was an afterthought when I made homemade sushi and had leftover ingredients. Leftover sushi rice normally isn’t very forgiving but it works beautifully in crispy rice.
With that said….
Crispy Rice
Scroll down for a printable version of this recipe
Makes: 32 pieces
Prep Time: 30 minutes
Cook Time: 6 minutes per batch or about 24 minutes
Inactive Time: 8 hours or overnight
Garnish Time: 15 minutes
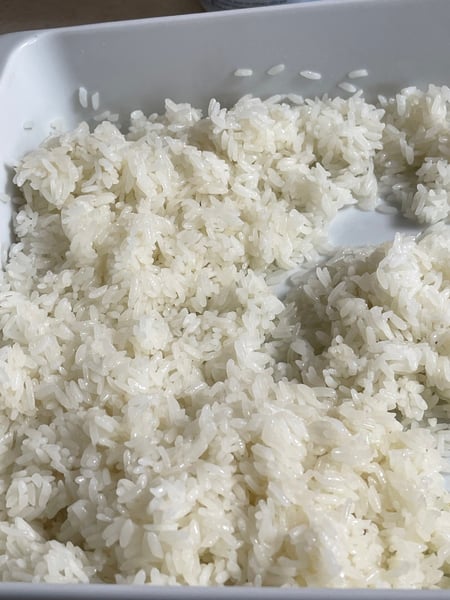
2 cups of leftover cooked sushi rice *This rice can be seasoned already with rice wine vinegar/sugar assuming you are using leftovers. I would only use short grain rice. (Here is a tutorial on making sushi at home.)
Neutral oil of choice (I used grapeseed)
Patience
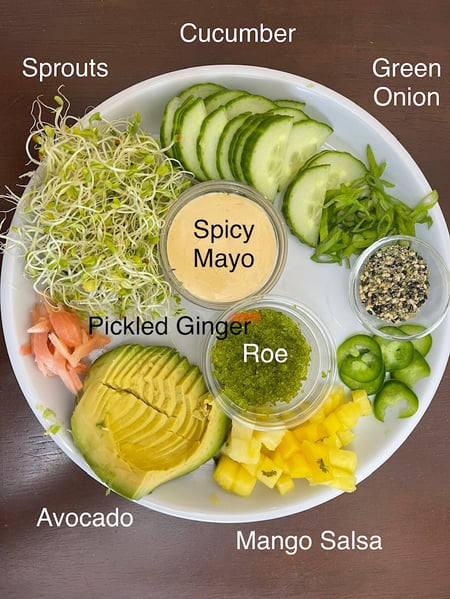
Optional: Typical ingredients used for maki rolls such as spicy tuna, scallions, cucumber, avocado, mango, sesame seeds, jalapeño and roe
 Line an 8 x 8 dish (cake pan) with plastic wrap. Place your sushi rice in and pat it down with hands coated in a little oil. (That will help you keep it from sticking to you.)
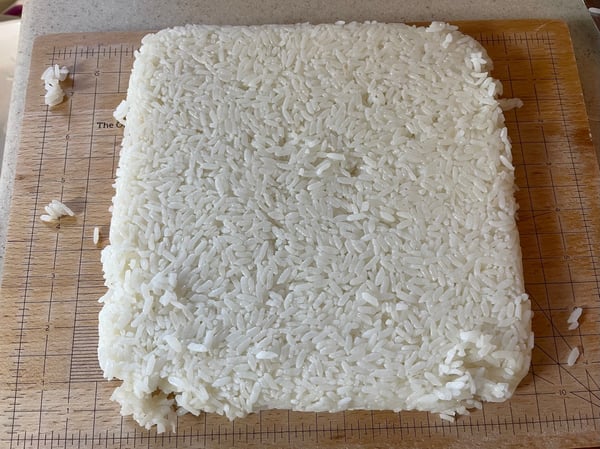
 Do not mash it. You want to press with some force so it is packed in the pan tightly but you do not want to destroy the beautiful little grains of rice.
You want the top layer to be even. (If you have a kitchen level, this is the time to break it out.) The end product will be 8 inches long by 8 inches wide and about 1-2 inches deep. You don’t want it any thicker than 2 inches.
Cover tightly and refrigerate for at least 8 hours or overnight.
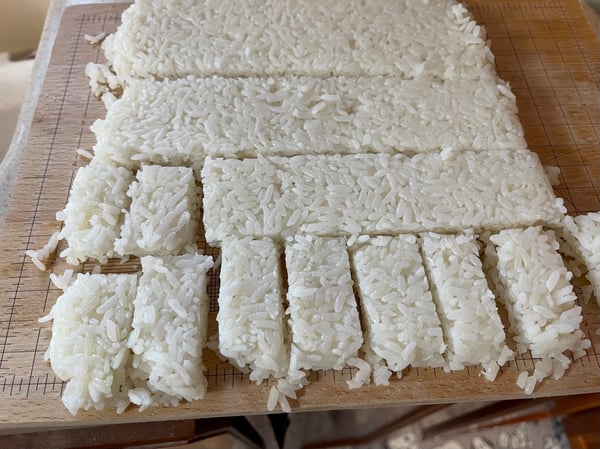
On a large cutting board, gently turn over your 8 x 8 pan and use the plastic wrap to help coax it out in one big piece. Don’t freak out of a stray grain or two pops out of place.
Theoretically, you will end up with 32 2 x 1 inch squares. (You do not have to be exact which is obvious by my photo below.) Some of the pieces lose a grain or two try to resist handling them too much.
 Have a cooling rack ready for your completed crispy rice.
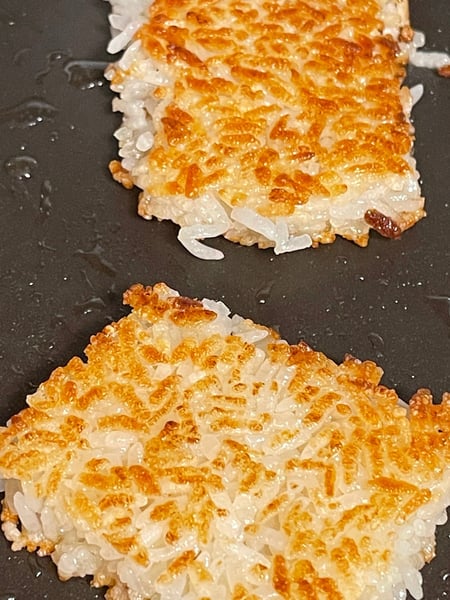
In a nonstick pan, heat oil over medium high heat. You want enough oil to get a shimmer but you do not want to soak your rice cube in oil. We are not deep frying it. We are just browning it.
Once your pan is hot enough, place the pieces of crispy rice in the pan and do not overcrowd the pan. You will have to do a few batches depending on the size of your pan.
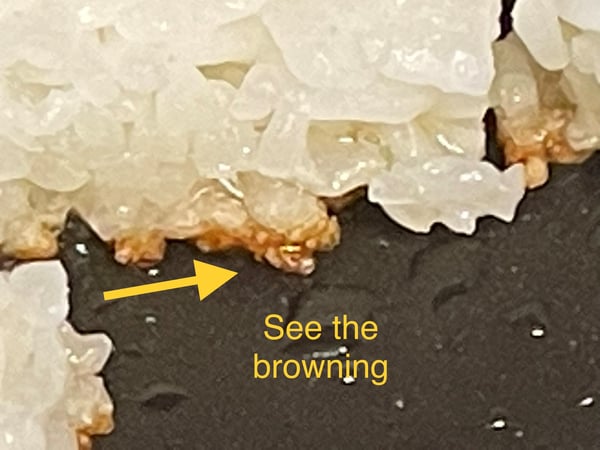
Let it cook about 3-5 minutes until the bottom is crispy and brown. If you look closely, you will be able to see the browning.
 Using either tongs or a fish spatula, gently flip each piece over. I think my first batch was a little light.
 Depending on your tastes and textural preferences, you can brown all four sides or just the top and bottom. After making my first pan of 8, I opted to just do top and bottom.
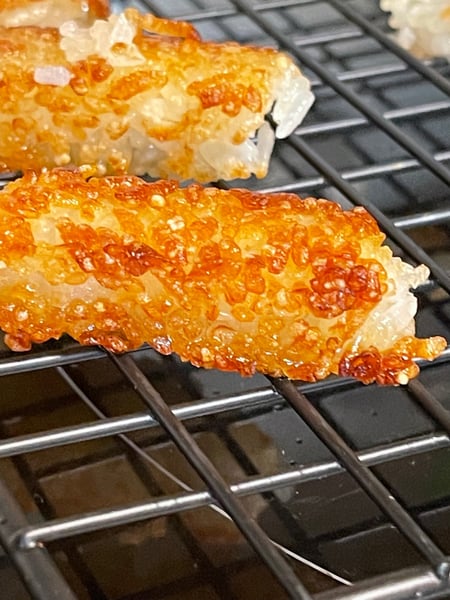 Remove from pan and place on the cooling rack. Repeat with remaining rice. You may need to add more oil to pan.
If your rice cube falls apart, smash it down into a patty and make a crispy rice patty! No harm, no foul and it will still taste great. I also made a couple 4 x 4 squares. They were good, but I did prefer the smaller bites.
 Once all of the rice is cooked and crispy, place them on a serving tray.
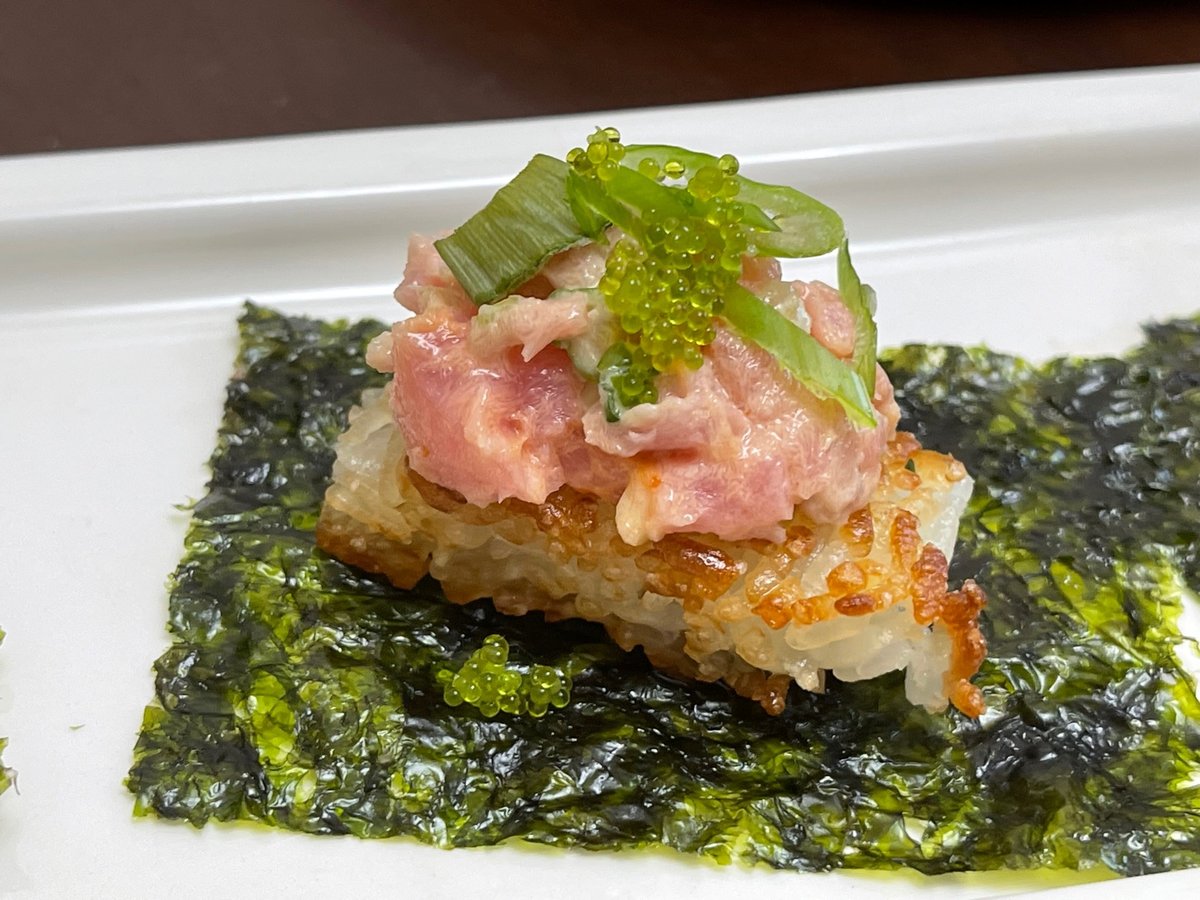
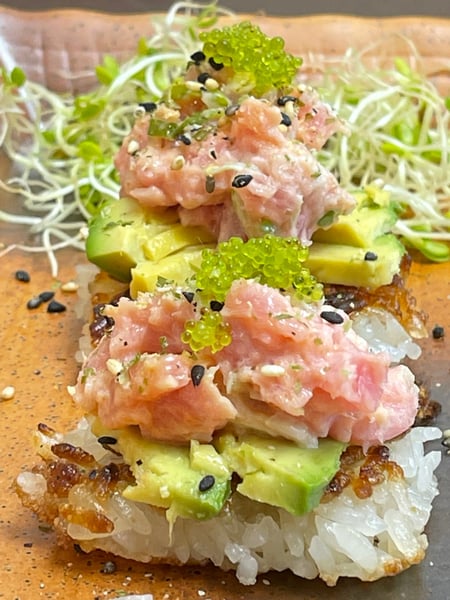
The build is a little tedious but once you make a couple, you will get the handle of it. I don’t recommend putting more than 3-4 ingredients on top.
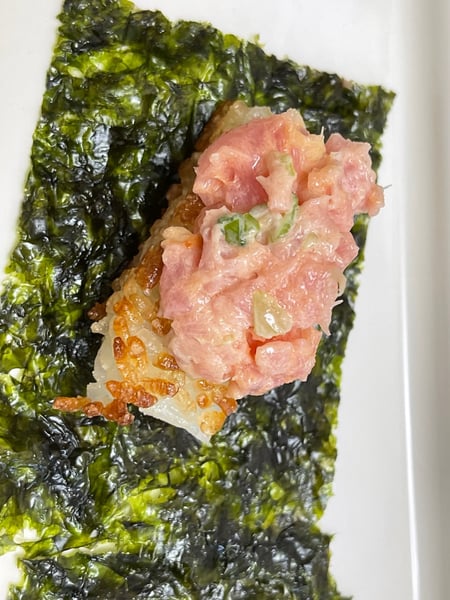
I lined my plates with squares of nori like the snack size pieces that are found in most markets these days and placed the squares of crispy rice on top. Top with about 1 tablespoon of spicy tuna. (You can also top with just veggies if that is your preference.)
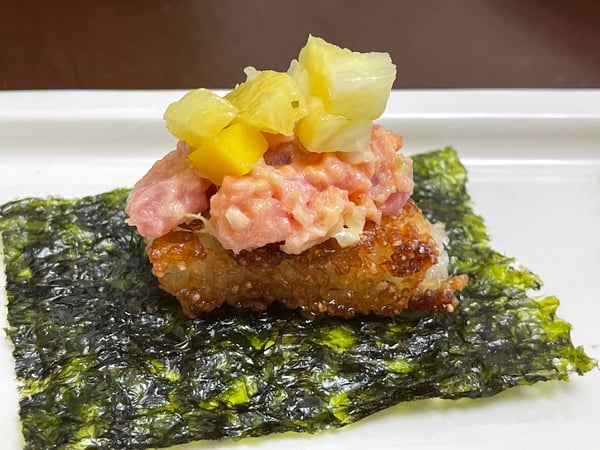
 Top with whatever you like. And my surprising favorite mix was some spicy tuna with mango and pineapple salsa but as you can see there are limitless possibilities.

 I love to make my own sushi but now that I have an outlet for using my leftover components, I think I will like it even more. If you’ve never made sushi rice at home, remember The Chopping Block can help with in-person or virtual classes. We have a virtual Sushi Workshop coming up on Sunday, April 30, 2023 at 11am CST.
And if you make some great crispy rice at home, please share in our private Facebook group (and if you aren’t already a member, join now).


Crispy Rice
Ingredients
- 2 cups of leftover cooked sushi rice
- Neutral oil of choice
- Optional: Typical ingredients used for maki rolls such as spicy tuna, scallions, cucumber, avocado, mango, sesame seeds, jalapeño and roe
Instructions
- Line an 8 x 8 dish with plastic wrap. Place your sushi rice in and pat it down with hands coated in a little oil.
- Cover tightly and refrigerate for at least 8 hours or overnight.
- On a large cutting board, gently turn over the 8 x 8 pan and use the plastic wrap to help coax it out in one big piece.
- Have a cooling rack ready for your completed crispy rice.
- In a nonstick pan, heat oil over medium high heat.
- Once your pan is hot enough, place the pieces of crispy rice in the pan and do not overcrowd the pan. You will have to do a few batches depending on the size of your pan.
- Let it cook about 3-5 minutes until the bottom is crispy and brown.
- Using either tongs or a fish spatula, gently flip each piece over.
- Remove from pan and place on the cooling rack. Repeat with remaining rice. You may need to add more oil to pan.
- Once all of the rice is cooked and crispy, place them on a serving tray.
- Line plates with squares of nori like the snack size pieces that are found in most markets these days and placed the squares of crispy rice on top. Top with about 1 tablespoon of spicy tuna.
- Top with whatever garnish you like.