If you are like me, you’ve never made a sourdough starter nor cared for one. The responsibility of having something else besides my cat to feed did not seem like something I wanted to take on. I’ve been lucky to work in a place with a bakery onsite, but unfortunately, I did not absorb much from it. So when I had some extra time lately, I decided it was time to learn about starters. I’d been craving some homemade sourdough bread!
When you look online it at first seems simple: mix flour and water and give it time. Little did I know all of the different factors involved:
- Which flour do I use?
- What temperature should the water be?
- Why it didn’t rise like it said it would?
The more I researched, the more complex it got. Eventually I ended up with a thriving sourdough starter, but outside the straightforward directions, I also learned a lot.
- Temperature matters
It’s currently winter, and I live in a cold drafty house that doesn’t really go above 65. Not an ideal environment for a starter - they like it above the 68 degree range. If you don’t have a warm house, I would suggest using warmer water when feeding and also being creative on something to keep it warmer. Use a towel or blanket to wrap it, set by a heat register, store in your oven with the light on (I realize this is not great energy use), or use a heating pad.
- It may take longer than expected
My starter took what seemed like forever. It was definitely close to two weeks of twice daily feedings to even look somewhat active. I almost gave up multiple times saying it’s not worth it and questioning why it wasn’t working. It didn’t rise or double like it said it should. I figured at that point I might as well put in the refrigerator and see what happens. It wasn’t until I switched to feeding it once a week and storing in the fridge, did it really start to show the right signs. As time went on, the better it got. So even if your starter doesn’t seem like it worked, it probably has, just give it time.
- Use plastic containers when possible
Flour and water leftovers are like concrete. It’s a big pain to clean, so I started using plastic storage containers and mix in plastic when possible. I then let it dry out which causes it to crumble up and fall off the container.
- Don’t overthink it
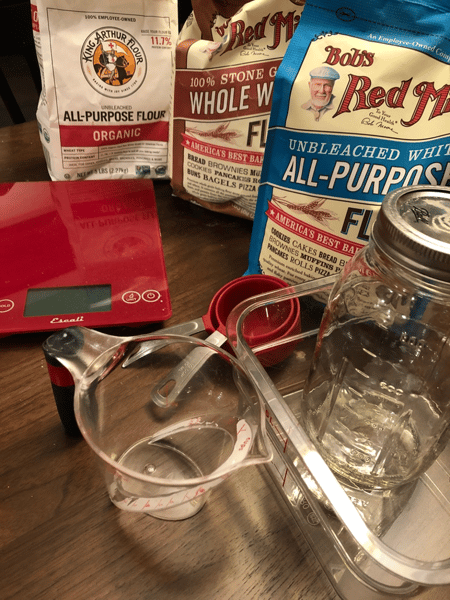
Use what ingredients you have. Don’t go out and buy bottled water or specialty flour. Use non-reactive containers you already have. There are going to be times where you think you’ve killed your starter, but I’ve learned that even if it looks desolate, starters can be resilient.
- Mold happens
I was surprised one morning to open the container and find some fuzzies along the perimeter of the container. Of course you have a panic moment, but since the mold was not a scary color or in the starter itself, I moved my starter into a clean container. I see it as a sign it time to change out the storage to a clean one. As long your starter itself is not moldy, it should be fine to use.
- Set a feeding schedule
Once your starter is going, the best method is to store it in the refrigerator, but you need to remember to feed it about once a week. I’ve found it doesn’t need to be exactly one week, but make sure you don’t forget about it. After feeding I usually leave it out for 4-5 hours to wake it up. Don’t forget to find uses for that discarded starter! There are lots of recipes for discard starter use online.
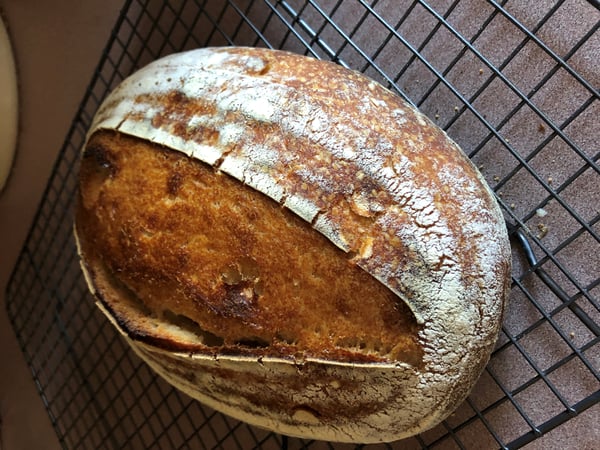
Remember this shouldn’t be an overwhelming process. The initial procedure can be a little time consuming, but in the end, once you start eating fresh sourdough bread (like this recipe for Cranberry Pumpkin Seed Sourdough Bread), pancakes, or pizza dough, you’ll see why it’s worth it.
Interested in learning more about bread baking? Check out our Artisanal Breads Boot Camp. If you are living gluten-free, we do have a Gluten-Free Breads Boot Camp as well.
Here are The Chopping Block's instructions for building a sourdough starter:
Building a Sourdough Starter
Sourdough starter, also called levain or a mother, is a natural, living culture of wild yeasts. When you build a starter from scratch, these yeasts mostly come from the air. This yeast then multiplies and proliferates when you create a comfortable environment for it.
A sourdough starter also contains bacteria that create lactic and acetic acids, which give sourdoughs their characteristic tart flavor. These acids will also develop, to some extent, in any dough that is allowed to proof slowly at a cool temperature, such as in the refrigerator overnight. This aging process is called retarding the dough.
Day 1: Combine 1 cup whole wheat flour with 1/2 cup cool, non-chlorinated water in a nonreactive container. Stir the flour and water together thoroughly making sure there are no dry flour clumps remaining. Cover the container loosely and allow the mixture to sit at room temperature (about 70°F) for 24 hours.
Day 2: Discard half the starter (about 1/2 cup), and add a scant 1 cup unbleached all-purpose flour, and 1/2 cup cool water if your house is warm, or lukewarm water if your house is cool. Note: You may or may not see any activity at all in the first 24 hours, and that's ok!
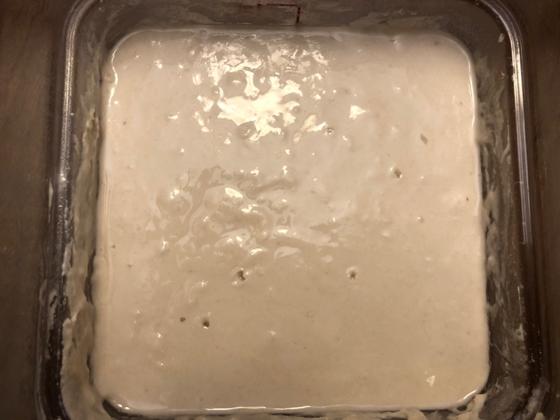
Mix well, cover and allow the mixture to rest at room temperature for 24 hours.
Day 3: By this day you will likely see some bubbling activity in addition to some growth! It's now time to start feeding your starter. You'll want to do this twice a day, as evenly spaced as you can.
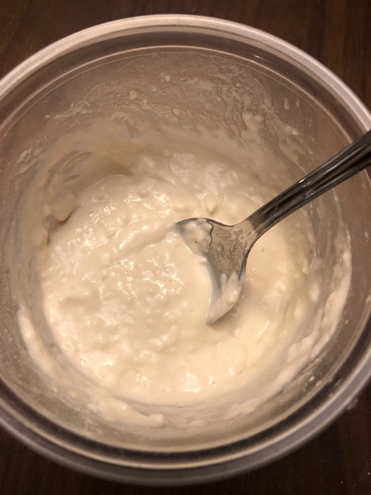
For each feeding, weigh out 4 ounces (a generous 1/2 cup), place it in a bowl and stir well. Discard any remaining starter.
Add a scant 1 cup unbleached all-purpose flour, and 1/2 cup water to the 4 ounces of starter. Mix well, cover and allow the mixture to sit at room temperature for about 12 hours. Repeat.
Day 4: Weigh out 4 ounces (a generous 1/2 cup), place it in a bowl and stir well. Discard any remaining starter. Repeat the remaining steps from day 3.
Day 5: Repeat the steps from day 4.
By the end of day 5, the starter should have at least doubled in volume. You'll see lots of bubbles and the starter should have a tangy aroma. Note: If your starter hasn't risen much and isn't showing lots of bubbles, repeat discarding and feeding every 12 hours for as many additional days as needed, if necessary.
Once the starter is ready, give it one last feeding. Discard all but 4 ounces (a generous 1/2 cup), and feed as usual. Allow the starter to sit at room temperature for 6 to 8 hours; it should be active, with bubbles breaking the surface.
Remove however much starter you need for your recipe (no more than 8 ounces, about 1 cup); and transfer the remaining 4 ounces of starter to a permanent home such as a crock, jar, or anything else you would like to store it in long-term.
Feed this reserved starter with 1 cup flour and 1/2 cup water, and let it rest at room temperature for several hours, to get going, before refrigerating it. Store this starter in the refrigerator, and feed it regularly with a scant 1 cup flour and 1/2 cup water once a week.
Notes:
- During the duration of the everyday feeding schedule, conditions can vary so widely. Instead of using the calendar as a guide use your starter! Once you see your starter double between 1 to 4 hours from a feeding, you know your starter is ready.
- It seems so wasteful to discard so much for the starter, but there's good reason for this. First, unless you discard, you'll end up with the sourdough that ate Chicago! Second, keeping the starter volume the same helps balance the ph. And third, keeping the volume down offers the yeast more food to eat each time you feed it. Here's the good news…you don't have to discard it if you don't want to! Give it to a friend, or use it to bake. There are recipes out there that call for "discard" starter.
- Whole wheat flour is used because the wild yeast that gives sourdough starter its life is more likely to be found in the flora- and fauna-rich environment of a whole-grain flour than in all-purpose flour.
- The colder the environment, the more slowly your starter will grow. If the normal temperature in your home is below 68°F, find a smaller, warmer spot to develop your starter. For instance, try setting the starter on top of your water heater, refrigerator, or another appliance that might generate ambient heat. Your turned-off oven — with the light turned on — is also a good choice.