If I had to choose one method of cooking to use for the rest of my life, I would choose cooking over an open fire without hesitation. A wood or charcoal fire is such an engaging cooking experience, and produces some of the most delicious food you can hope to find. Almost anything is enhanced by a thoughtful application of fire, and some ingredients can only reach their peak when imbued with some of the flavor of the grill.
Now given that gas grills are so much more convenient (and have less of a chance of starting unwanted house fires) we should probably have a pretty good reason for electing to grill over charcoal. The way I see it there are a few pretty great reasons to grill over charcoal as opposed to gas. The first is that charcoal gets hotter. Even standard charcoal briquettes burn hotter than all but the most exotic catalytic gas grills. Higher temps equate to more of that distinct “grilled” flavor, leading to more delicious products. Another advantage to a charcoal grill is that you can use pretty much any of them to make a hardwood fire (more on this later… probably much later in part II) thus lending another smoky dimension to whatever you’re cooking. Additionally charcoal grills tend to be much cheaper than gas fired grills at similar levels of quality. The top of the line luxury charcoal grills are still typically just a fraction of the cost of a top of the line gas fired model. Not to mention cooking over fire is just more fun than turning on a gas burner that just happens to be outside.
There are lots of different styles of charcoal grill out there, but they can all be used in more or less the same way. There is your classic kettle grill, the smoker, though designed for smoking meats low and slow BBQ style, can also be used as a straight forward charcoal or wood burning grill. Then there are the Japanese styles of charcoal grill, the two most common of which are the Konro, and the Kamado. The Kamado is reminiscent of a kettle grill, but with every component raised to its Platonic Ideal. These can be used as grills, smokers, wood fired ovens, and more. The most famous Kamado style grill in this country is probably the Big Green Egg, which we use for our grilling classes here at The Chopping Block. The Konro is a smaller, typically rectangular charcoal grill with a lightweight mesh grate. They are made from an impressively insulating material called diatomaceous earth, and were originally used to make Yakitori. I use a medium-wide size Konro grill at home, so the techniques I discuss will be based around that, but will work with any of the above mentioned styles of charcoal grill (though if you’re using a kettle grill you’ll probably want to test to make sure your grill grate can support the weight of two cinder blocks (spoiler alert: some of these techniques involve two cinder blocks).
A couple things to mention before we get started: first, the most common type of ingredient to cook on a grill is definitely meat, so these techniques are focused on meat, though they will definitely work with anything. Second, though the topics discussed in this post can be used by someone of any skill level, I only touch upon the basics briefly, so a certain level of baseline comfort with a charcoal grill might be helpful. And lastly, as Chicagoans know, open flames can lead to fires. Sometimes very big fires that cause your entire city to burn down giving city planners an opportunity to design one of the most spacious, alley-laden cities in the country, so you want to make sure you are grilling safely. Your grill should be located away from any wooden structures, and should ideally be situated on top of stone or another fireproof material. Most importantly, though is to have a working fire-extinguisher at the ready. This may seem like overkill, but seriously, like… c’mon. Just get a fire extinguisher.
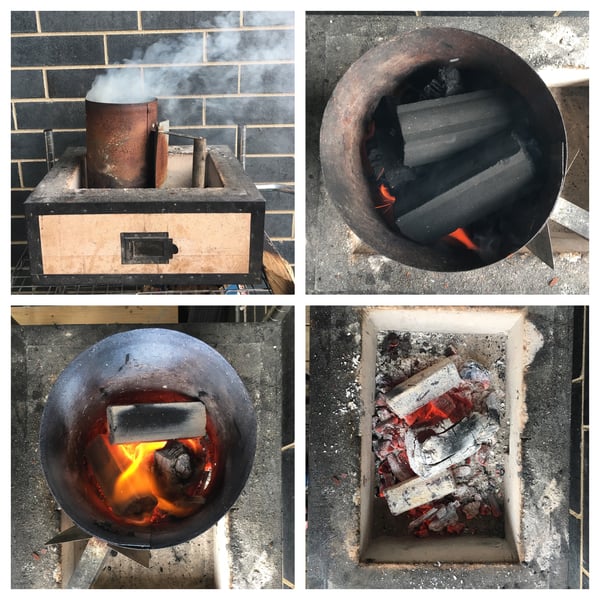
Okay with that rambling preamble out of the way, we can finally get on to some of the practical stuff. First, to get your charcoal started forget your lighter fluid, or pretty much any other accelerant, and get yourself a chimney style starter. These are fast, easy, cheap, and convenient. There's just no point mentioning any other charcoal starting methods. Simply fill the upper chamber with charcoal, the bottom chamber with paper or cardboard, light the bottom chamber, and wait for the charcoal on the top chamber to be covered in a fine layer of white ash (about 20 minutes), then dump out the hot coals into the bottom of your grill, and spread out to make an even bed.
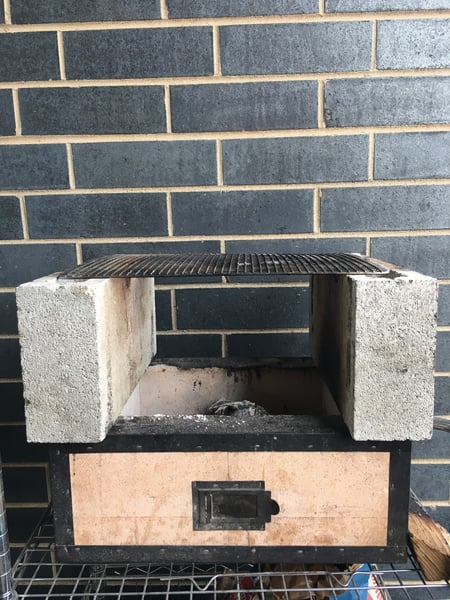
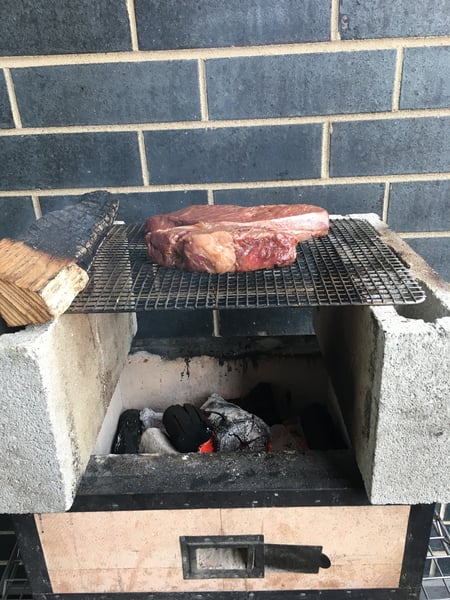
To set up the grill to take advantage of the techniques laid out in this post, you’ll want to position two cinder blocks on either side of the grill leaving enough space between them for the grate to fit (unless your cinder blocks are already resting on the grill grate like they would be for a kettle grill, then you don’t have to worry about it, but you will need a second grill grate or a stainless steel wire rack to put up top).
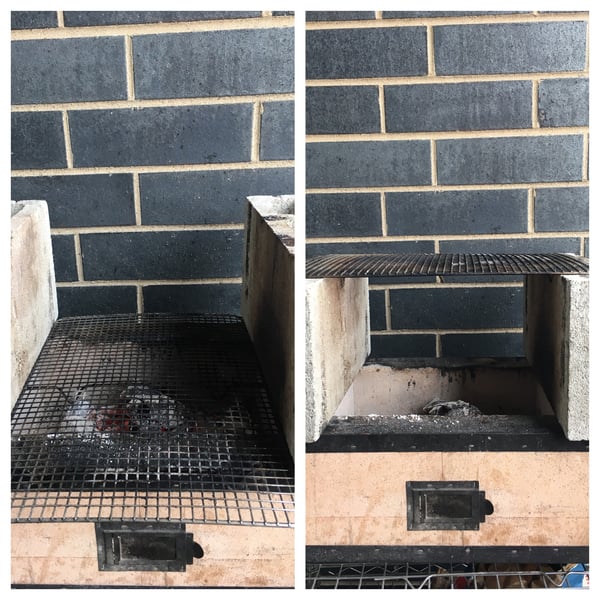
Now we can take our seasoned cut of meat, and place it on our elevated grill grate, and kinda forget about it. The temperature this far above the grill is low enough that we aren’t really cooking the meat quite yet. What we’re doing is more akin to a process called tempering. When we temper we leave our protein out at room temperature for at least half an hour before cooking to help the meat cook evenly and quickly. What we're doing here is kind of a super-temper; we’re bringing the meat as close to its finished done-ness temperature (for the purposes of this post that's medium rare (around 125-130 degrees F) as we can, all the while letting it slowly accumulate a little smokey grill flavor from the charcoal below.
This long and low temperature process is a little like sous-vide cooking in its underlying philosophy, but in my opinion produces a much more delicious result. Flip your meat as often as seems necessary (maybe once every half hour), and add coals as needed to maintain the grill temperature.
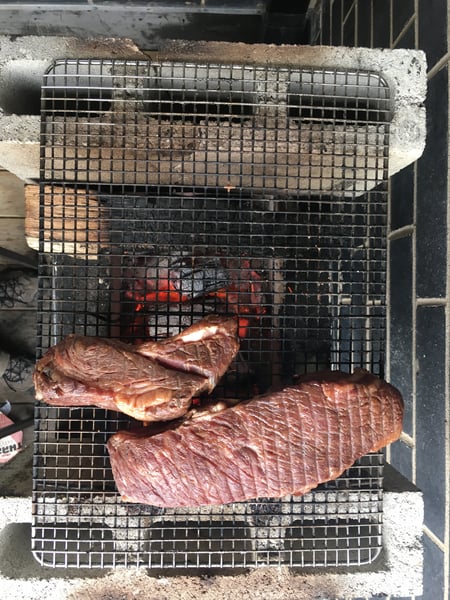
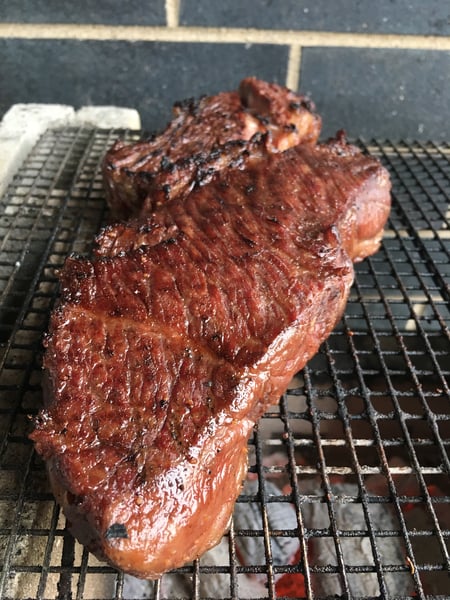
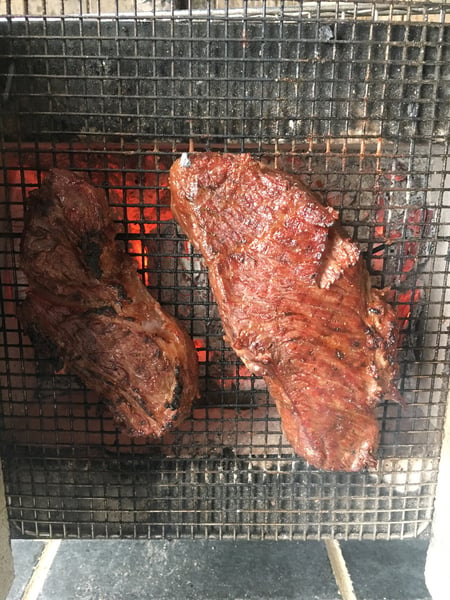
Once the meat is about five to ten degrees below our target temperature (which you will determine using a thermometer, right?) it's time to move the grate to the lower portion of the grill directly above the coals. Make sure you have a nice hot bed of coals for this, or you risk overcooking your meat. We want this hot temperature to get a nice deep sear on both sides before pulling the meat off the grill to rest. We must let it rest for at least ten minutes to make sure all those delicious juices stay in the meat, and don’t come running out onto our cutting board when we slice (more on this whole process in part II).
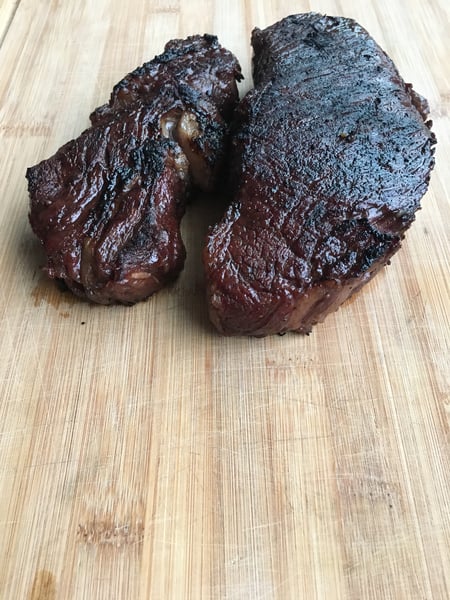
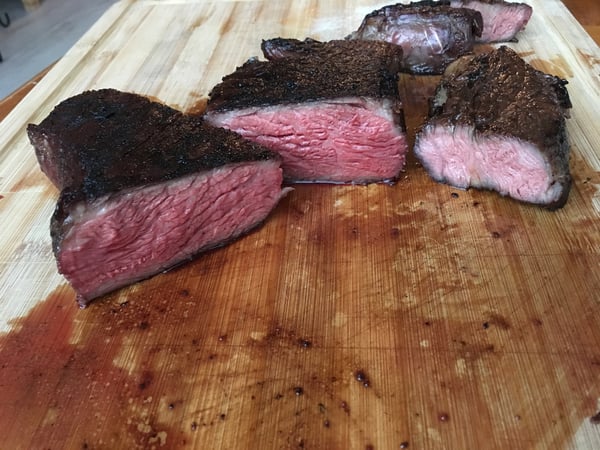
Once our meat is rested we can slice it open to reveal (assuming everything went according to plan) a pretty much perfectly cooked cut of meat. We have even doneness from edge to edge, and a delicious well developed crust with plenty of grill flavor. Truly the best of all worlds when it comes to meat cookery.
Hopefully this at-times-long-winded primer has kept your interest enough to inspire you to try something new this grilling season, and don’t forget to tune in next time for the dramatic conclusion, and some slightly more unusual and advanced techniques to boost the coefficient of deliciousness in your grilled foods even more, in part II. And of course, for more practice on the charcoal grill come visit us at our Lincoln Square location for one of our upcoming season-opening grill classes.