

Has your baking streak ended now the country is beginning to reopen and stay at home orders are being lifted? If you've been like so many of us over the past few months of quarantine, you've been perfecting your sourdough bread, attempting to bake cakes that look like they came from a magazine or indulging in pancake cereal, you may be feeling your baking burst fizzle out. I have one reason to encourage you to stay the course: summer fruit.
Whether you love cherries, berries or rhubarb, now is the time to utilize the season's best fresh fruit in your desserts. Last weekend, our students learned how to make Seasonal Fruit Cobbler in a virtual baking demonstration with Executive Chef Lisa Counts. We discussed the difference between a cobbler, crisp and crumble, as well as a buckle. Students also got a recipe that can be used year-round and adapted to whatever fruit is in season. Lisa even showed how we could change up the recipe to make individual cobbler portions in ramekins.
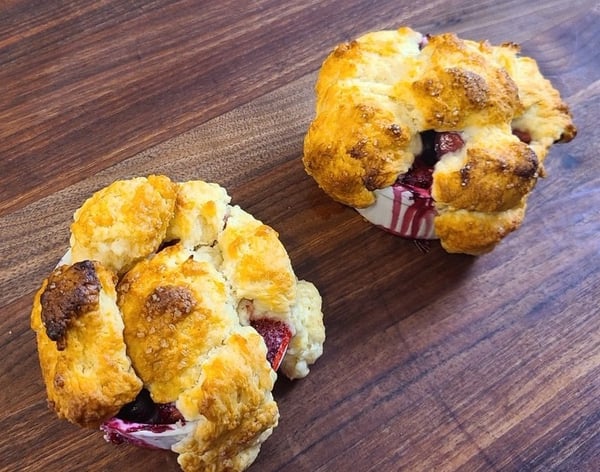
I got inspired after the class to make my own fruit dessert, and when I saw a seasonal pie challenge was on tap this week for The Chopping Block's private Facebook group, I knew I wanted to really test my skills by making a lattice fruit pie, something I hadn't done in years.
You may be thinking lattice pies are only for bakeries to produce because of the amount of work they take, but if you have a solid pie crust recipe (which I'm going to share with you), you can make a lattice pie at home. The pie recipe also follows and just like the cobbler, you can substitute seasonal fresh (or even frozen) fruit. The cherries at my grocery store were perfectly ripe, so I chose those but you could also use blueberries, strawberry/rhubarb or really any other fruit that you like.
I want to focus on the lattice crust technique, because I know that can be intimidating for some people. And while a lattice pie looks like you spent hours carefully weaving delicate strips of pastry like a hair braid, the trick is actually in folding and layering the strips. Don't worry, and don't overthink it! I'll walk you through each step.
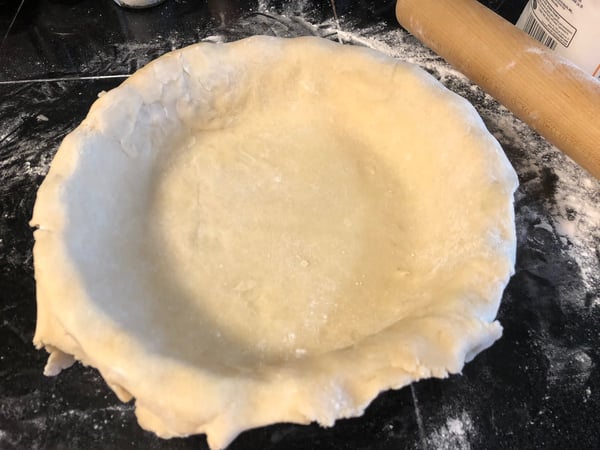
Start by rolling one disc of your dough out for the bottom crust, and place in your pie pan.
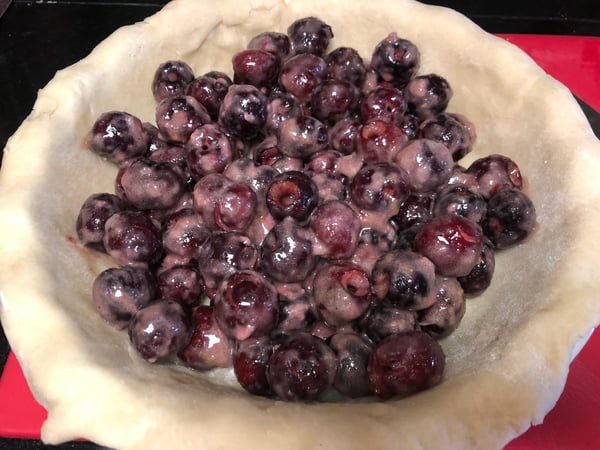
Add the filling.
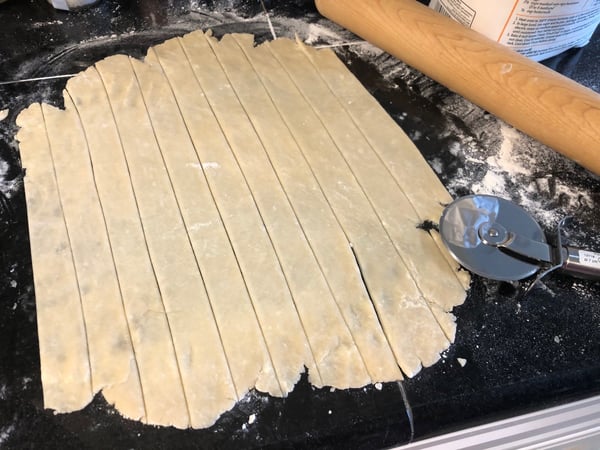
Roll out the second pie crust to a roughly 11-inch diameter (slightly smaller than the bottom crust). Using a pizza cutter or sharp knife, cut the crust into strips that are approximately 3/4-inch wide. Try to be as consistent as possible with the width of the strips, but the length will vary because you are cutting them from a circle.
You will use the longer strips in the middle of the pie and the shorter strips on the edges. Lay half of your total strips horizontally over the pie.
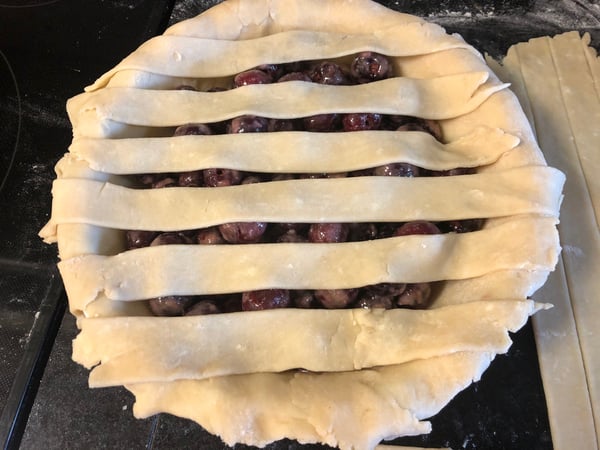
Fold every other strip back at the half pie mark.
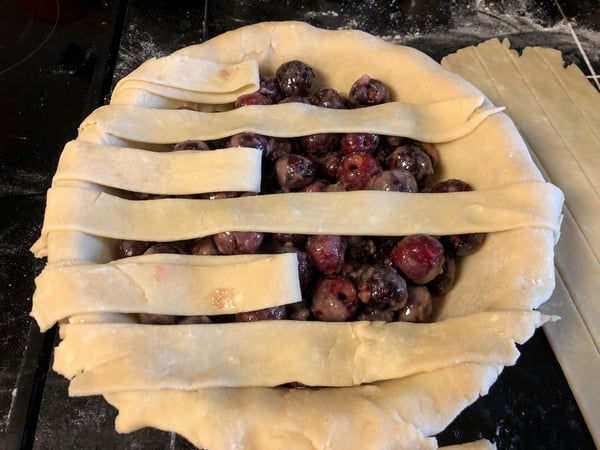
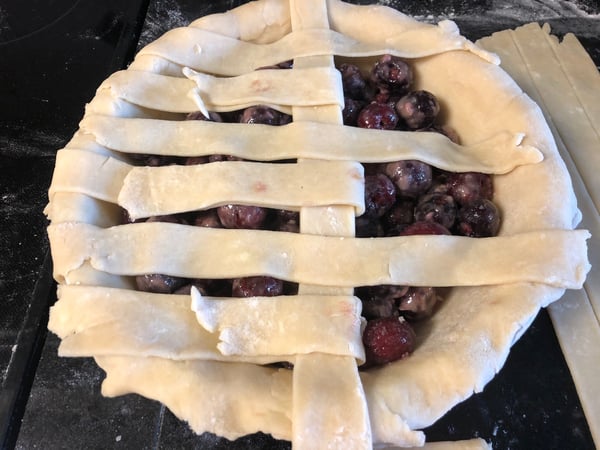
Lay one of the remaining strips of pie crust vertically over the pie at the half pie mark so that it lays across the unfolded horizontal strips.
Now here's where it gets interesting. You are going to reverse your strips. Fold back the strips running under the vertical strip back and then unfold the folded horizontal strips so that they now lay on top of the vertical strip. You've just made the first weave!
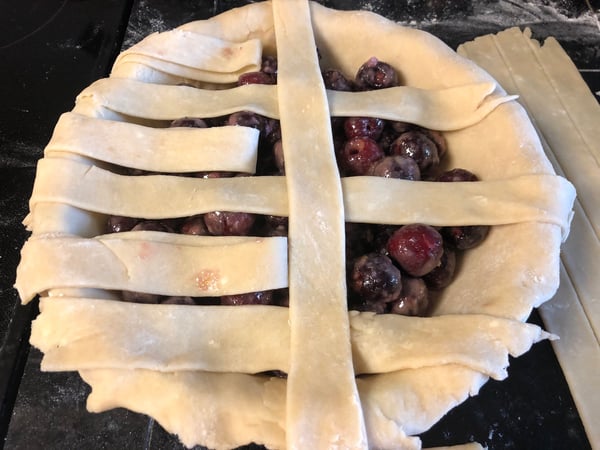
Lay another vertical strip over the pie, placing it as closely as possible to the first vertical strip.
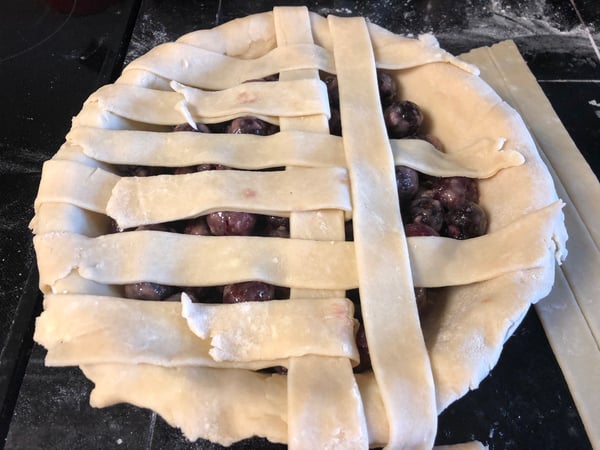
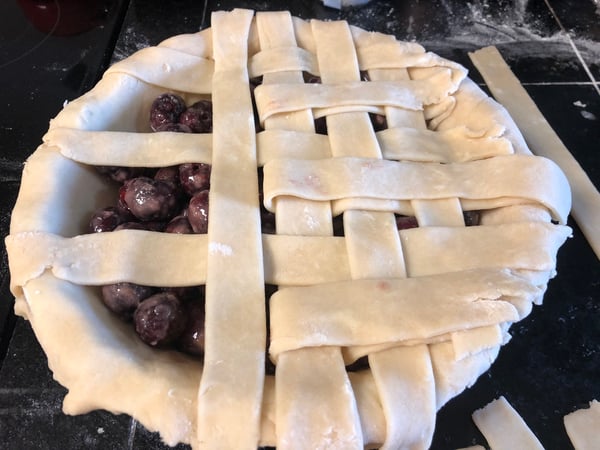
Reverse the folded and unfolded horizontal strips again. Continue reversing the folded and unfolded horizontal strips and adding one new vertical strip each time. Continue until one half of the pie is completely latticed. Don't worry about sealing the strips to the edge just yet.
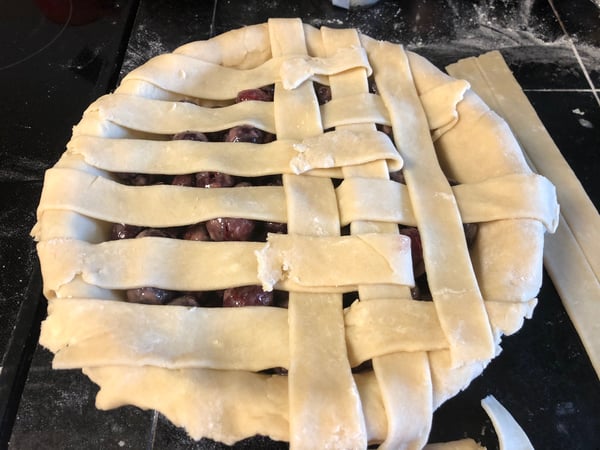
Repeat the same process with the other half of the pie, working from the middle to the end.
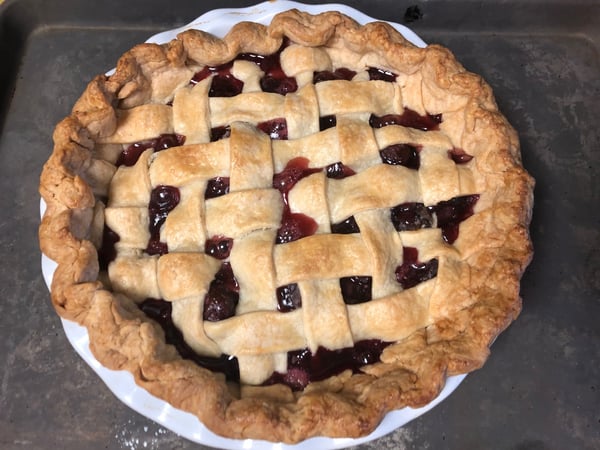
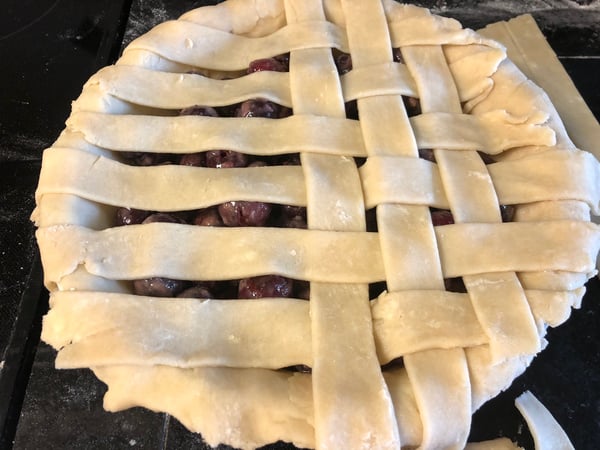
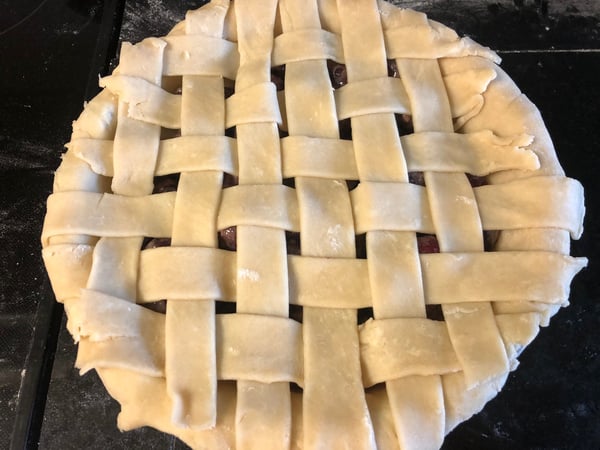
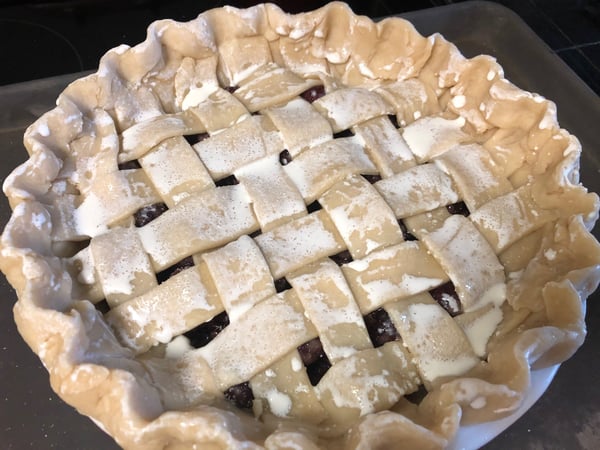
The finished latticed pie crust
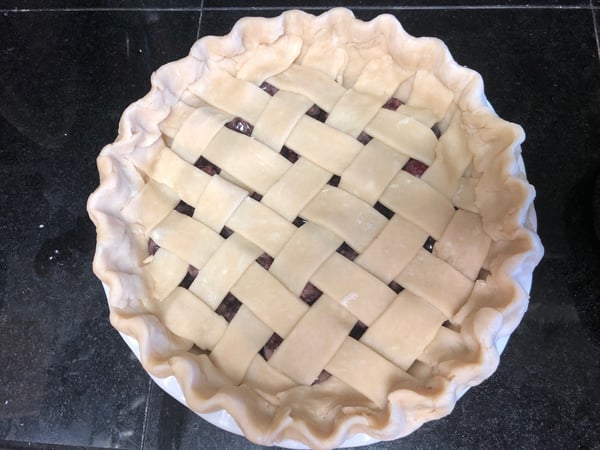
Crimp the edges however you like. Since the lattice is so fancy, I kept it simple with a fluted crimp which is very easy to do. Gather the pie crust around the edges and distribute pieces so that it is relatively even around the pie. Remember, pie dough is very forgiving! Then hold the crust with two fingers of one hand and use the finger of your other hand to push in while maintaining the structure of the crust with your other hand.
I stick my pie in the freezer for about 20 minutes at this point because chances are your dough has gotten pretty soft from all of that touching. This helps the pie crust maintain its structure while baking so it doesn't shrink too much.
One other tip I want to give you if you decide to work with cherries is to use a deep bowl to pit them so your kitchen doesn't look like someone was murdered in it. I never wear an apron when I cook, except when I pit cherries. My rule is always one cherry in the bowl, one pit out. That way, you never run the risk of missing a pit. A cherry pitter obviously makes this task a lot easier.
Cherry Cardamom Lattice Pie
Scroll down for a printable version of this recipe
Yield: One 8-inch pie
Active time: 45 minutes
Start to finish: 2 hours
1 recipe of pie dough (2 discs)
3 1/2 cups fresh or frozen pitted cherries (you can use blueberries or other fruit too)
2 tablespoons all-purpose flour
1/2 cup granulated sugar
1/4 cup cornstarch
3/4 teaspoon ground cardamom
Pinch fine sea salt
1/4 teaspoon lemon zest
2 teaspoons lemon juice
2 tablespoons cold unsalted butter, cut into small pieces
Heavy whipping cream as needed for garnish and serving
Granulated sugar as needed for garnish
Vanilla ice cream as needed for serving
1. Preheat oven to 350º.
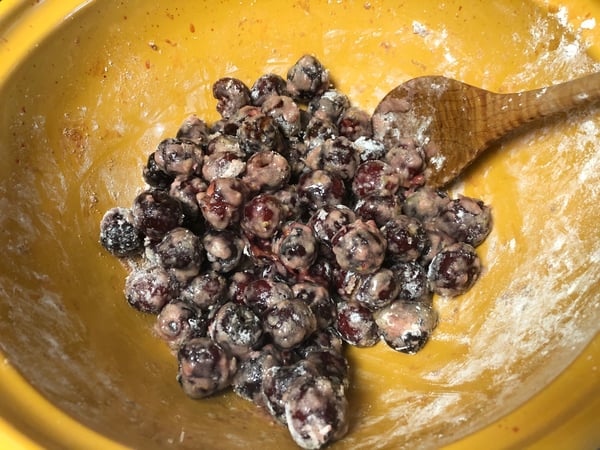
2. Toss the cherries with the flour to coat. Add the sugar, cornstarch, cardamom, salt, zest and juice, and mix well. Allow to sit while rolling out the dough.
3. Lightly dust a clean surface with flour and roll out one disk to about 1/8-inch thick. As you’re rolling, lift and turn the dough occasionally to ensure it does not stick. Gently roll the dough onto the rolling pin, lift, and place into the 8-inch cast iron skillet. Gently push the dough to fit the 8-inch skillet. Trim the edges so you have about 1-inch of dough on the edges all the way around.
4. Add the filling to the pie. Sprinkle pieces of butter on top of the filling.
5. Roll another disk into an 1/8-inch-thick circle. Cut the dough into 1/2-inch wide strips. Weave the strips in a crisscross pattern over the top of the fruit, leaving a 1/4-inch space between each strip. Trim any overhanging strips so they are even with the bottom crust edge, and then roll the bottom crust over the top and crimp to create a decorative border.
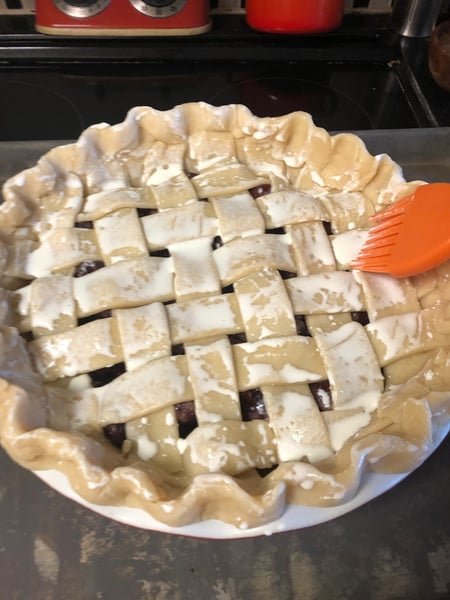
6. Brush the top of the pie with heavy cream and sprinkle generously with sugar.
7. Place the pie on a parchment-lined sheet tray, and bake for about one hour or until the filling is bubbly in the center.
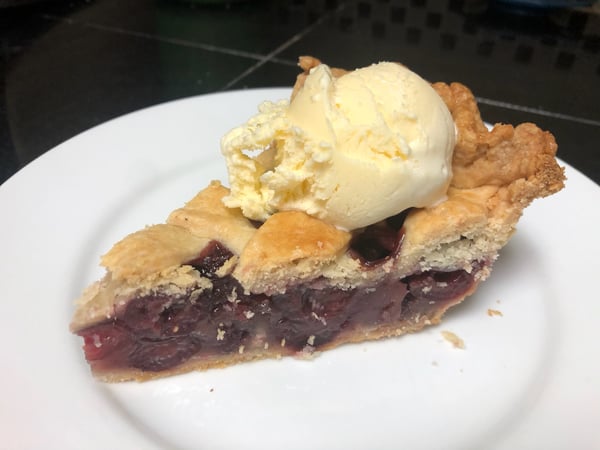
8. Allow pie to cool before cutting and serving with whipped cream or vanilla ice cream.
Put your pie making skills to the test this week to meet our private Facebook group challenge to make a seasonal pie. It's where we share our successes in the kitchen to inspire other home cooks!

If you could use some help with your baking skills, we are offering virtual baking classes every Saturday morning. Join us for these upcoming classes and check out everything virtual we're offering on our class calendar:
- Strawberry Shortcakes Saturday, June 13 at 11am CST
- Lemon-Ricotta Cheesecake Saturday, June 20 at 11am CST


Cherry Cardamom Pie
Ingredients:
- 1 recipe of pie dough (2 discs)
- 3 1/2 cups fresh or frozen cherries (you can use blueberries or other fruit too)
- 2 tablespoons all-purpose flour
- 1/2 cup granulated sugar
- 1/4 cup cornstarch
- 3/4 teaspoon ground cardamom
- Pinch fine sea salt
- 1/4 teaspoon lemon zest
- 2 teaspoons lemon juice
- 2 tablespoons cold unsalted butter, cut into small pieces
- Heavy whipping cream as needed for garnish
- Granulated sugar as needed for garnish
Instructions:
- Preheat oven to 350º.
- Toss the cherries with the flour to coat. Add the sugar, cornstarch, cardamom, salt, zest and juice, and mix well. Allow to sit while rolling out the dough.
- Lightly dust a clean surface with flour and roll out one disk to about 1/8-inch thick. As you’re rolling, lift and turn the dough occasionally to ensure it does not stick. Gently roll the dough onto the rolling pin, lift, and place into the 8-inch cast iron skillet. Gently push the dough to fit the 8-inch skillet. Trim the edges so you have about 1-inch of dough on the edges all the way around.
- Add the filling to the pie. Sprinkle pieces of butter on top of the filling.
- Roll another disk into an 1/8-inch-thick circle. Cut the dough into 1/2-inch wide strips. Weave the strips in a crisscross pattern over the top of the fruit, leaving a 1/4-inch space between each strip. Trim any overhanging strips so they are even with the bottom crust edge, and then roll the bottom crust over the top and crimp to create a decorative border.
- Brush the top of the pie with heavy cream and sprinkle generously with sugar.
- Place the pie on a parchment-lined sheet tray, and bake for about one hour or until the filling is bubbly in the center.
- Allow pie to cool before cutting and serving.