

My passion for pie started at a very young age. My grandmother Ruby was a pie aficionado - her chocolate pie was hands down the best I ever tasted, somehow intense with chocolate, yet light as a feather. Her sour cherry, peach and apple pies were made with her own preserved fruit and equally delicious. She clearly paid a lot of attention to her fillings, but her lard-laden pie crust was always equally top notch, flaky, rich and crisp.
Grandma Ruby not only made a great pie; she also made a spectacle of displaying her pies. She was a quiet and modest women but had a real flair for the dramatic when it came to her desserts. She never made just one pie because that would be boring. During the holidays when I would walk into the door of my grandparents' house, the first thing I would see would be her smorgasbord of pies. The kitchen table would be filled with pies, usually seven or eight at Thanksgiving and at least five at Christmas. The only reason she made less at Christmas was so that she could make room for all the Christmas cookies, peanut brittle, bars and cakes she made.
 It was a labor of love for her, and I think she and I shared a passion for cooking for that same reason because of the joy it brings to those we love and care about. I imagine it brought her immense joy seeing all her grandkids light up at the spectacle of her holiday dessert table. This memory will stay with me forever.
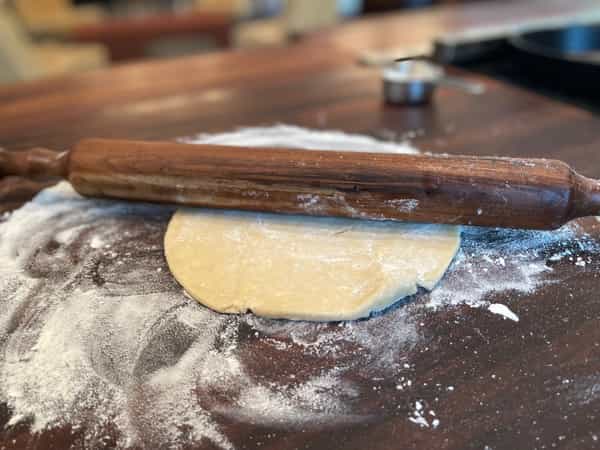
Over the years, I have written a lot about how to make a pie: our famous apple pie, apple cider pie, zucchini pie, peanut butter pie and strawberry pie are some that come to mind. We have blogs and videos on how to roll a pie crust and make a pie crust, but I have never broken down the anatomy of the actual pie dough.
- What does the flour do?
- What are the roles of the sugar, the butter, the fat, the salt and the water?
- If you change the level of ingredients in any way, how will that affect the pie crust?
 I am not a food scientist or pastry chef, but I do understand these critical ingredients' role in baking, not just in pie crust but in most of the holiday goodies you may be about to bake this season. Understanding why your cookie is as flat as a pancake instead of the thick and chewy cookie you hoped it would be also stems in part from understanding these basic ingredients: flour, sugar, butter, shortening, salt and sugar. There are certainly more ingredients critical to baking than what is in my pie crust recipe. Baking soda, baking powder, eggs and acid are used in almost all cookies and cakes and sometimes in pie dough, but in an effort to keep this blog concise and not to overwhelm you, I will stick to outlining the pie crust ingredients we use in our well-tested pie crust recipe.
The Chopping Block's Pie Crust
Scroll down for a printable version of this recipe
Yield: One 2-crust pie or two 1-crust pies
Prep time: 10 minutes
Inactive time: 2 hours to 24 hours
2 cups all-purpose flour
1 to 2 tablespoons granulated sugar
Pinch of fine sea salt
1 1/2 sticks unsalted butter, chilled
1/4 cup shortening, chilled
1/3 cup cold water
-
Place flour, sugar and salt in the bowl of a food processor fitted with a metal blade.
-
Cut the butter and shortening into small pieces and add to processor. Be sure to keep them as cold as possible.
-
Pulse the mixture until crumbly and the fat is in small pieces throughout the flour.
-
Working quickly, start the processor and add cold water until the mixture just forms a ball.
-
Turn out dough onto a work surface and shape into an oval.
-
Cut the dough in half and press the cut side down to form two disks. Wrap each disk in plastic wrap and refrigerate for at least 2 hours or up to 3 days before rolling out.

All-Purpose White Flour
 Let’s first understand what all-purpose white flour is. White flour is wheat that has had the outer bran and germ removed. Once the outer bran and germ is removed from the wheat it is then ground and sometimes bleached. It is very easy to find unbleached all-purpose white flour these days if you want to avoid the bleaching process.
To be clear, all-purpose white flour is wheat flour, it just has the outer bran and germ removed. When then outer bran and germ are not removed, it is whole wheat flour.
To me, the most important thing to know about wheat flour, whether all-purpose white flour, bread flour, semolina, pastry flour or whole wheat flour is that its main contribution to baking is structure. It creates structure because of gluten. It contains gluten because of its protein content.
Yes, you read that correctly, wheat flour has protein. If you were a professional bread baker you would be having discussions with your fellow bakers on the protein content or strength of the flour you are baking with. Have you ever wondered why sliced white bread and a French baguette are so different when they have almost exactly the same ingredients? There a few reasons, but it is primarily because of the level of protein in the flour.
All-purpose white flour has a moderate level of protein, bread flour has a high level or protein, and pastry flour has a low level of protein. All-purpose is designed specifically for things like pie dough, cookies, quick breads, pancakes and waffles - baked items that are tender but not overly delicate. Bread flour is for breads requiring a firmer, denser texture and pastry flour for fine delicate cakes, (follow your cake recipe, many use all-purpose flour too). The outlier, whole wheat flour is generally used to add some flavor and texture to other flour but not used entirely on its own. This is because when the germ and bran are left on the wheat bran interferes with gluten development.
Gluten is what creates structure in your baked goods, but you need wheat flour to make gluten. Other flours have gluten but much lower levels. Gluten is created when we add liquid (usually water) to flour and mix it. When you are making bread, you need a lot of gluten development so we add water to the flour and mix it a whole lot; we call that kneading. I always compare gluten development to muscle development since they are both protein at their core and the more you work out the gluten or muscle, the stronger it will be. Bread requires a lot of strength to rise and hold its airy light but somewhat chewy center. Wheat flour provides the most lift to your bread, more than any other flour or combination of flours.
In a pie crust, we still need some gluten development so that the pie dough holds it shape but we also want it to be flaky and tender. Besides selecting the correct flour, all-purpose white flour, we do not knead our dough. In pie dough we employ a few other tricks and ingredients to develop just enough gluten to hold the dough together but also to make it tender and flaky.
 Butter
 We use two fats in our pie crust, butter and shortening. I will get deeper into shortening in the next section but these two fats share one characteristic in making a great pie crust - they interfere with gluten development. Remember gluten develops like a muscle and when you slather gluten strands with butter it makes it hard for the slippery gluten strands to get too strong. The fat allows some gluten to develop but not too much.
When we make pie dough, we also cut the cold fat into the dough, we do not put it in a blender or mixer. We cut the cold fat in by placing it in a food processor, using a pastry blender or by hand. All of these techniques create a slightly different result but what they ultimately do is to break up the gluten strands rather than lengthening them by kneading like we do when making bread.
But why combine butter and shortening? Let’s start with a little more about butter. Butter is clearly the hands down winner over shortening in the flavor contest. So why not use all butter? You certainly can use all butter, or all margarine or all lard or any combination you like but butter, margarine and lard all share one characteristic: they all have a relatively low melting point, around 84-86 degrees.
I like to offer this visual example of how the melting point of fat affects baked goods. If you make a chocolate chip cookie with all butter, margarine or lard, the dough will melt quickly in the oven leaving you with a relatively flat cookie. That doesn’t mean it's a bad cookie, it is just not going to be a thick and chewy cookie if that's what you want. When the dough hits the oven, the fat melts quickly because of its low melting point.
When you use only butter, lard or margarine in a pie dough you will have a very flavorful dough. You will also have a very tender dough; these fats will do an excellent job at interfering with gluten development but you will not have an incredibly flaky dough.
 Shortening
Shortening, on the other hand, has a very high melting point compared to butter, margarine or lard: 117 degrees. When we cut fat into our pie dough, we hope to leave little pieces of fat dispersed throughout the dough. I call these little pieces of fat, potential flakes. Shortening gives you better flakes because it melts so slowly that the dough surrounding the piece of shortening has more time to cook before the fat melts. This leaves you with bigger pockets or flakes in your pie dough. Butter gives you flavor and tenderness, shortening gives you flakes.
You can play around with different fats and quantities of each in this recipe. You may not always be concerned with flakiness. You might choose lard over butter for a chicken pot pie or a chorizo empanada. Perhaps all butter is what you want for a Tart Tartine. Stay close to the overall ratio of fat but have some fun shifting the type of fat to develop your own crust. If experimenting with different fats, look up their melting point online and compare it to what I have outlined above, it will help you understand what result you will achieve. For example, olive oil is already melted, you can make an olive oil crust that will be tender but likely not very flaky, perhaps the olive oil flavor is the priority for your tomato basil crostata.
Sugar
 I think sugar is likely the most misunderstood ingredient in pie dough. Yes, it sweetens the dough, but what else does it do? Sugar is also a tenderizer, primarily because it interferes with gluten development. There is a classic French pastry dough called Pate Sucre. There is a lot of sugar in Pate Sucre so the dough isn’t rolled (you couldn’t roll it if you wanted too), but rather is pressed into the pie dish by hand. Therefor sugar can be decreased in this recipe but not increased without the understanding that the dough can become more difficult to roll. Since I hear so many people have difficulty rolling their pie dough, I think keeping to our recipe is the safest bet.
Can I decrease the sugar in this recipe? Maybe you are making a quiche and feel like you want to avoid the dough being too sweet. Yes, you can leave out the sugar but I recommend keeping at least one tablespoon of sugar in the recipe. Primarily because sugar helps to give your pie dough that beautiful golden color. I have experimented with leaving sugar out entirely and find the result somewhat pale. If you are making an empanada and know you are going to brush an egg wash on the pastry, leaving out the sugar becomes a non-issue I still like a little sweetness in my dough but that is just my taste.
Water
Most people way more knowledgeable that myself on baking swear you should add as little water as possible to your pie dough. This is because it is easier to over develop the gluten with extra water in the dough. This is why I really like using a food processor to make pie dough. It very quickly and efficiently cuts in the fat and evenly disburses the water. When I make pie dough by hand, I find it uses more water and doesn’t distribute it as well.
Water helps to develop some necessary gluten but it also adds moisture and steam. I have had a lot of handmade pie doughs that are rather chalky and dry… this is due in part to either not enough water in the recipe or unevenly distributed water. These same doughs are generally more crumbly than flaky, you need water to get a pop of steam in your dough and assist in developing those little pockets of fat in expanding into a flake.
Salt
 Lastly, a simple sprinkle of salt brings everything together. Salt brings out the flavor of the butter, salt and flour.
 If you want to learn more about the science behind baking, join us for an upcoming baking class before the end of the year. We have them for adults, as well as the whole family:
- Hands-On Holiday Treats Workshop Saturday, December 9 10am
- Hands-On Holiday Treats Workshop Saturday, December 16 10am
- Hands-On Festive Family Baking Saturday, December 23 10am


The Chopping Block's Pie Crust
Ingredients
- 2 cups all-purpose flour
- 1 to 2 tablespoons granulated sugar
- Pinch of fine sea salt
- 1 1/2 sticks unsalted butter, chilled
- 1/4 cup shortening, chilled
- 1/3 cup cold water
Instructions
- Place flour, sugar and salt in the bowl of a food processor fitted with a metal blade.
- Cut the butter and shortening into small pieces and add to processor. Be sure to keep them as cold as possible.
- Pulse the mixture until crumbly and the fat is in small pieces throughout the flour.
- Working quickly, start the processor and add cold water until the mixture just forms a ball.
- Turn out dough onto a work surface and shape into an oval.
- Cut the dough in half and press the cut side down to form two disks. Wrap each disk in plastic wrap and refrigerate for at least 2 hours or up to 3 days before rolling out.